November Garden To-Do List for USDA Zones 3-8

November Garden Tasks


The outdoor air is now officially crisp and has the smell of autumn.  The mornings require jackets and scarves, and the evenings are perfect for snuggling under a blanket next to a campfire.  It’s time to finish cleaning up from the growing season and get ready for winter rest and winter planning.  This November Garden To-Do List is geared toward those in cooler climate areas (USDA Zones 3-8), but if you are looking for a list for this month for USDA Growing Zones 9-11, CLICK HERE.

For those of you enjoying “true fall”… here is your November property to-do list.  Be sure to share it with friends on social media and let’s get out into the garden together!

In the Garden

  • Things to Plant by Seed:  Garlic and spring bulbs.  For a list of what you can do all winter for spring bulbs…click here.  
  • Harvest:  The last of the winter veggies… kale, cabbage, fall turnips, Swiss chard, and greens.
  • Mulch:  It’s time to cover those gardens for the winter.  NEVER leave soil exposed to the winter elements in the garden, food forest, or flower beds.  Add wood chips around fruit trees and berry bushes (wood chips create a fungal dominated soil, which trees prefer).  Keep the chips away from the stems and trucks though.   Add another layer of straw around garden veggies (and spent garden beds), because straw creates a bacterially dominated soil, which is preferred by annual veggies.  These will decompose slowly over the winter and make things nice and rich for you in the springtime. 
November Garden Calendar
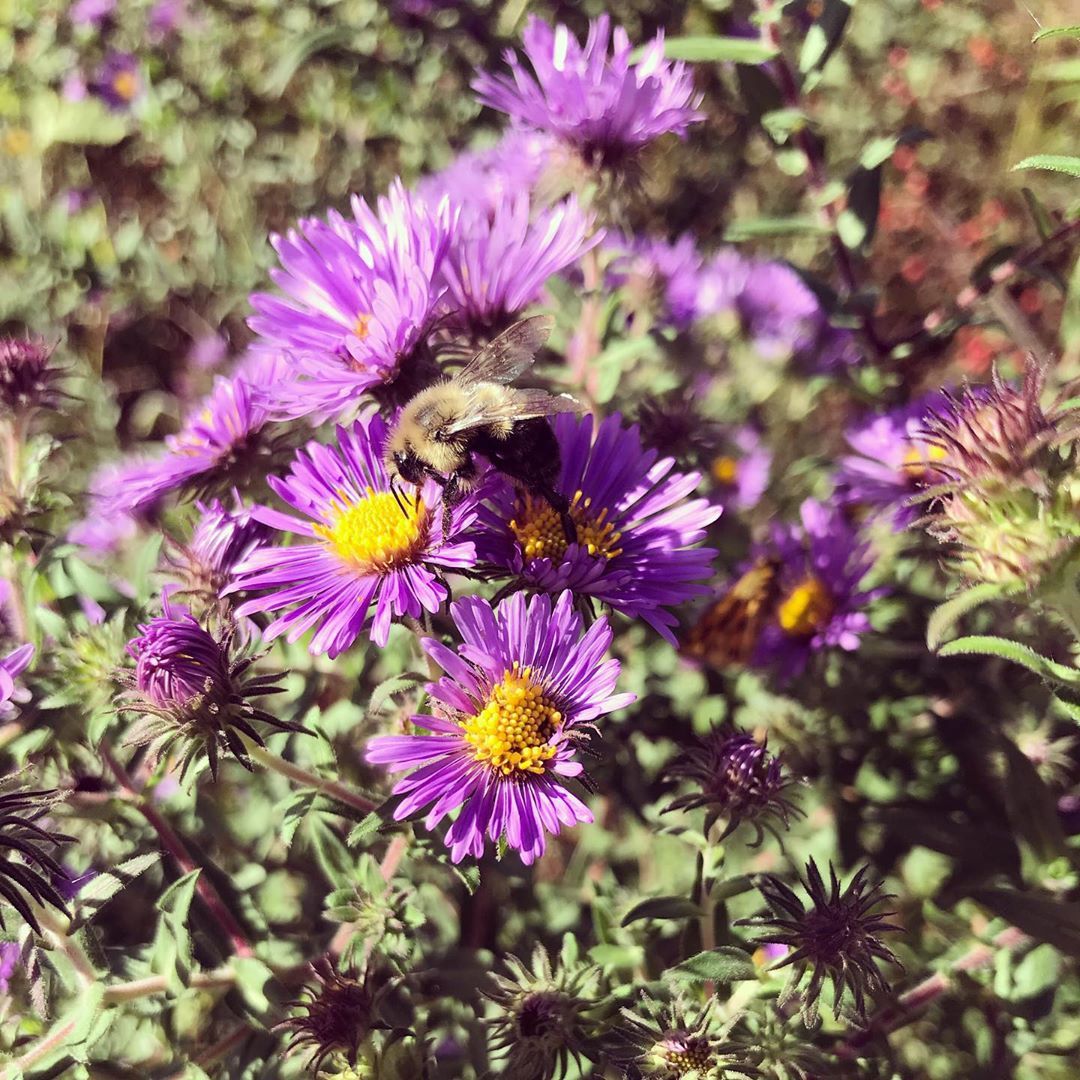
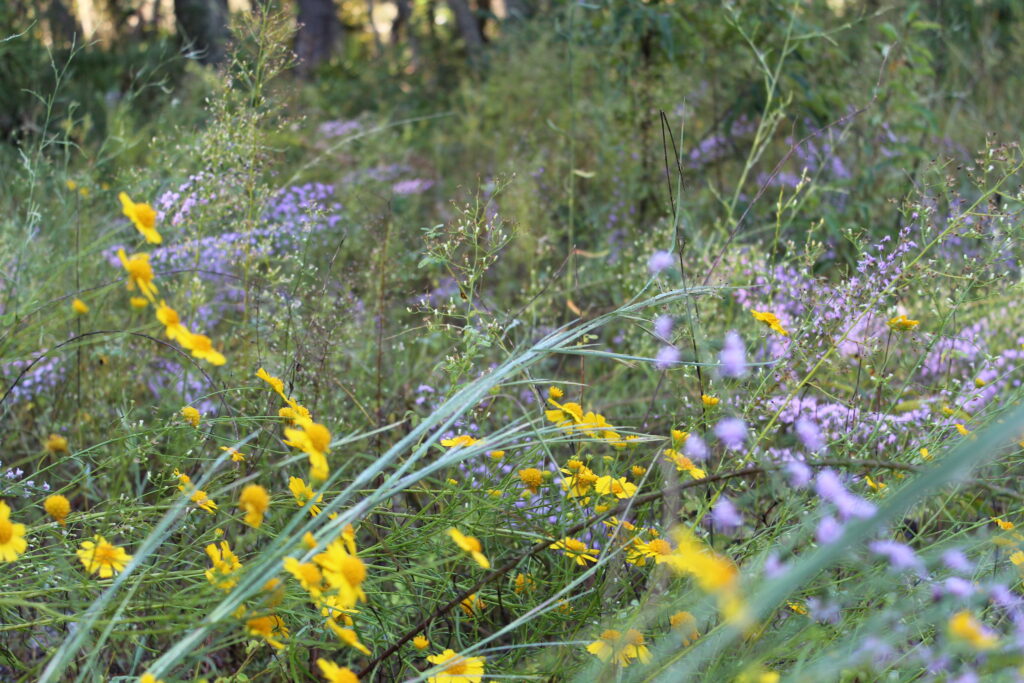
Elliot’s Aster

Enjoy the last blooms of the native asters before they go into dormancy. Save seed to spread other places too!

In the Greenhouse

  • Start taking cuttings: If you are planting in the ground, it’s time to start greens like radishes, turnips, and beets. If you are planting in raised beds or tray in the green house, you can do much of the same and even microgreens!
  • Clean and sterilize equipment and unused pots
  • Store pots in a shed or garage with cardboard between them to prevent winter cracking
  • Set mouse traps to control critters in sheds and greenhouses
  • Stop fertilizing all houseplants until spring

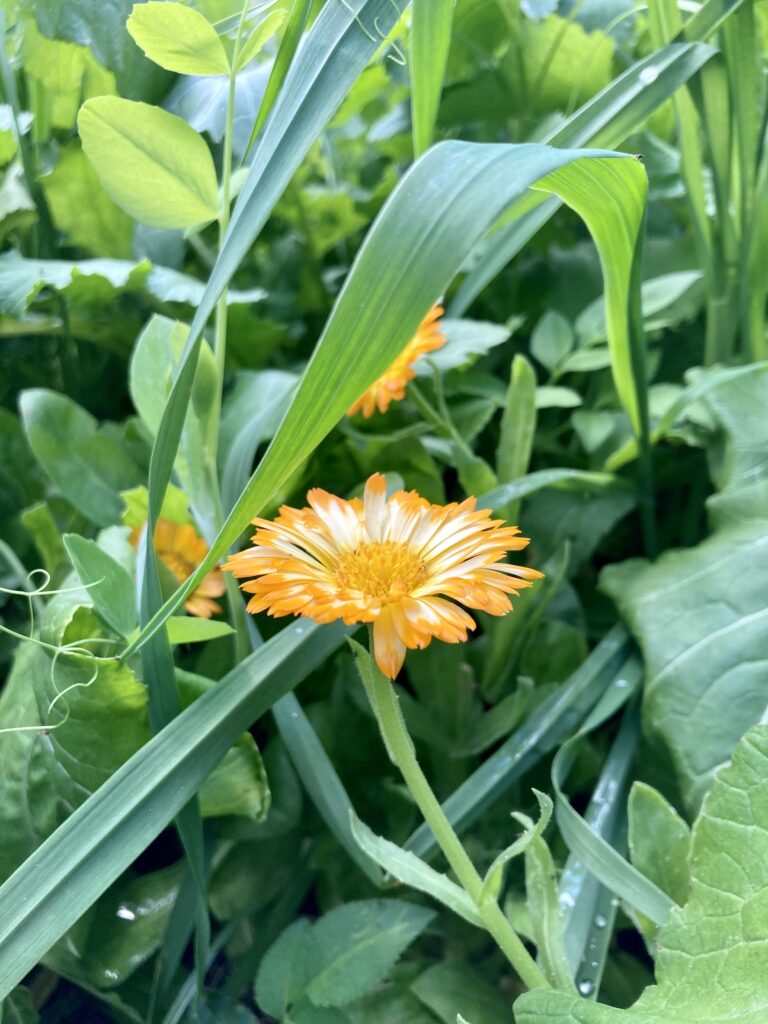
Cold season flowers and cover crops can be grown in the greenhouse or poly-tunnel all winter long! This calendula pic was from December in Kansas.

In the Food Forest

  • Harvest ripe fruit: Persimmon, last of the paw paw, acorns, nuts, and other final forest gifts.
  • Plant cold hardy fruit trees: Peach, plum, pear, nectarine, blueberry, elderberry, goji berry, lingonberry, aronia berry, hazelnut, pecan, persimmon, and appleUse our FREE GUIDE on “How to Plant a Fruit Tree or Berry Bush” as a quick tutorial.
  • Probiotic time! This is an excellent time to refresh the probiotic in your soil, spray fruit trees, berry bushes, and help activate compost piles before winter. We recommend using BioAg, by SCDProbiotics.
  • Mulch: Apply mulch / wood-chips around the base of fruit trees. Keep the wood chips away from the base of the tree, because if they touch the trunk it can cause rot or bacterial issues. Wood chips will encourage mycorrhizal activity and strengthen the root system.
  • Chop & Drop: Time to harvest the last of the legume trees (honeysuckle, Japanese pagoda, Siberian pea, Russian Olive, etc.) and drop them at the base of your fruit trees.
  • 1 and apply organic neem spray as needed. This time of year with cool air and moisture, fungal issues can pop-up overnight, so a nice fall application can help prevent this damage over the winter months.
  • Pastures: Sow wildflower seeds to improve pasture health.
  • TIP: When your neighbors rake their leaves and do their fall yard clean-up, ask for the bags of leaf litter (usually out at the road) to add to your compost pile. That’s free organic matter to help build your soil! Their trash is your treasure.

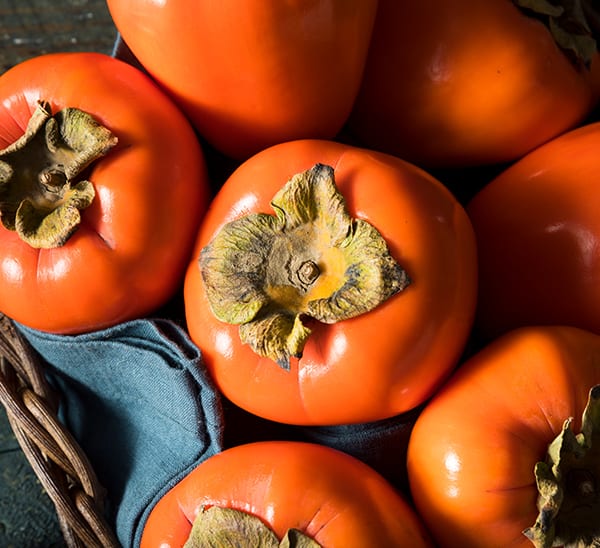
Persimmon are best when fully ripe or after falling from the tree.

In the Shed

  • Use SeaFoam in each power tool to help clean things out a bit before fall storage.  After heavy fall use, give power tools a quick check (oil, air filters, and clean off exteriors). 
  • Check mouse traps and keep animal feed in sealed containers.
  • Give cutting tools a good cleaning (using rubbing alcohol) and oil afterwards to prevent rust while they are stored for the winter.
  • Check for holes in the walls or along the floor to prevent mice from entering over the winter. Fill or patch accordingly.
  • Bleach all storage containers to sterilize them for the winter.
  • Plug in ultrasonic mouse deterrents to prevent nesting during winter months.

Animals, Poultry, and Livestock

  • Chickens:  Feed extra protein, omega-3 fatty acids, and B-vitamins this month. Birds are finishing with their fall molting season, so they need the extra boost to help replenish their feathers and energy reserves. You can help them out by feeding them live minnows, meal worms, canned tuna, etc. Do NOT heat your coops over the winter. Instead, follow this guide on “How to Help Chickens Stay Warm in the Winter.
  • Quail:  Mix apple cider vinegar and honey with their water once a week. Pick fresh flowers and grass seed heads to put inside their coop and nesting area. This is a great time to provide supplemental protein using meal worms and small crickets.
  • Add wood ash to the dustbath to help prevent and treat lice and mites.
  • Add BioLiveStock (probiotics) to all animal waterers this month to help their microbiome and gut health as they enter the winter months.
  • Feed spent pumpkins and fall gourds to the chickens and goats. They might need to be cut open first, but this highly nutritious snack is perfect for the barnyard friends!
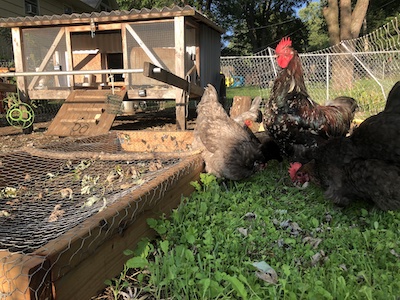
Chickens eating a ground cover of wheatgrass, radish, and clover.

Around the House

  • Open up the windows on warmer days to help air out the house and let in fresh air
  • Check batteries in smoke alarms and carbon monoxide detectors
  • Have chimney cleaned and inspected before starting for the first time in the winter
  • Spray tire shine and protectant on vehicle and trailer tires to prevent winter damage
  • Slow down or stop fertilization from November – February (especially nitrogen) on all house plants. Instead, use kelp to help stimulate uptake of remaining minerals and stimulate root growth.
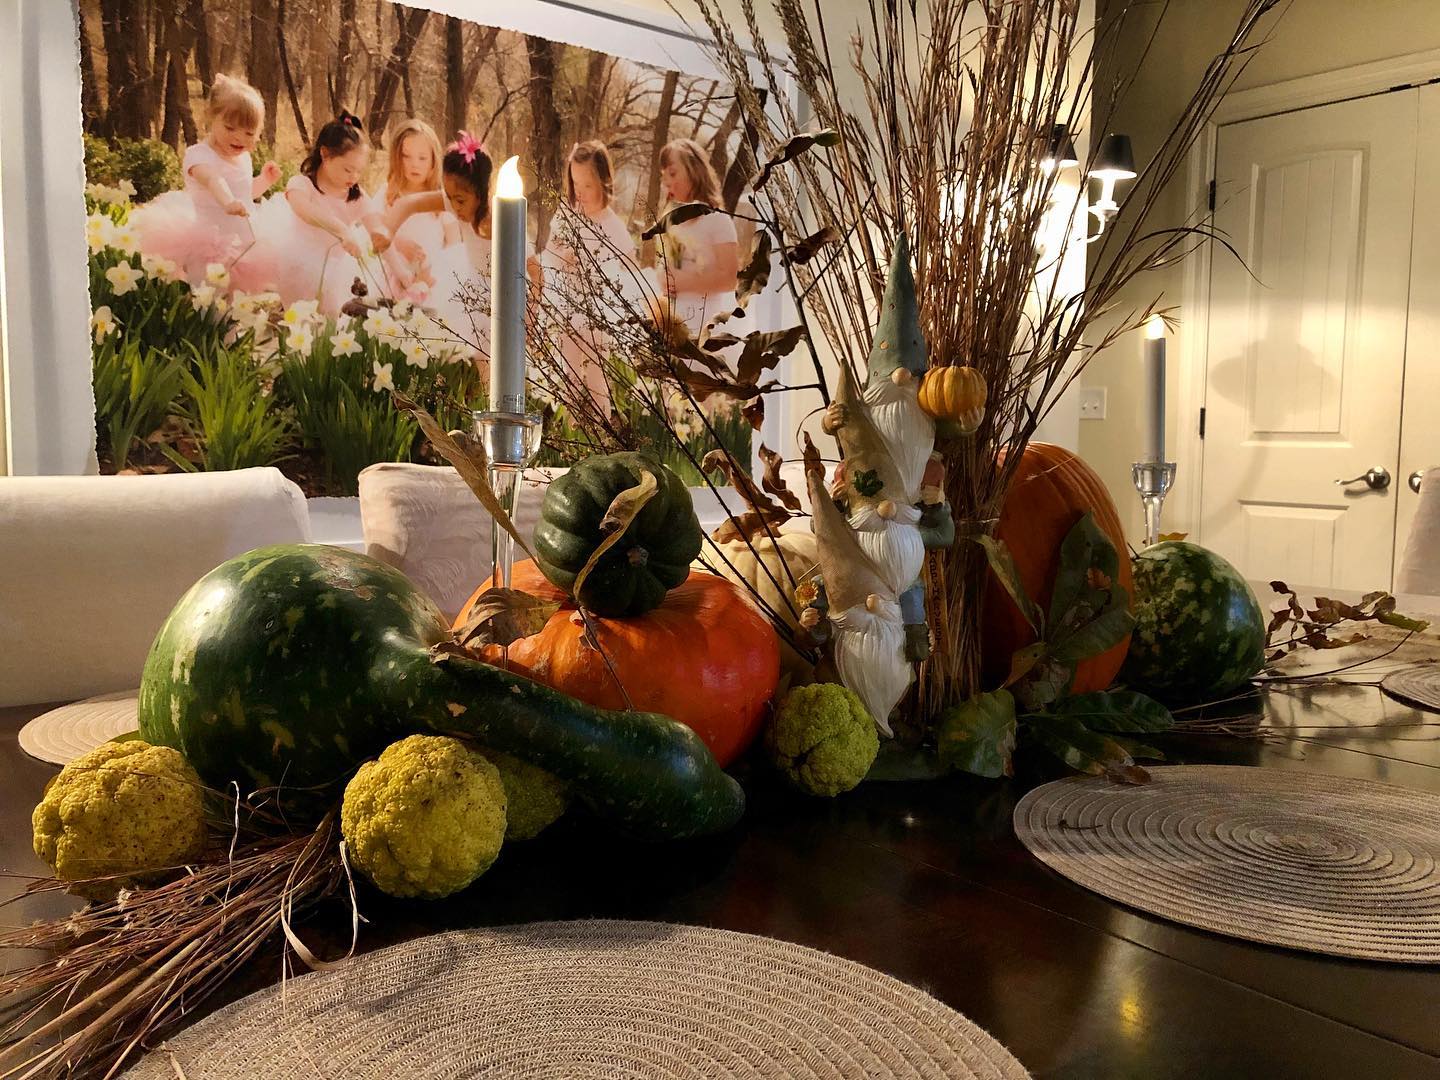
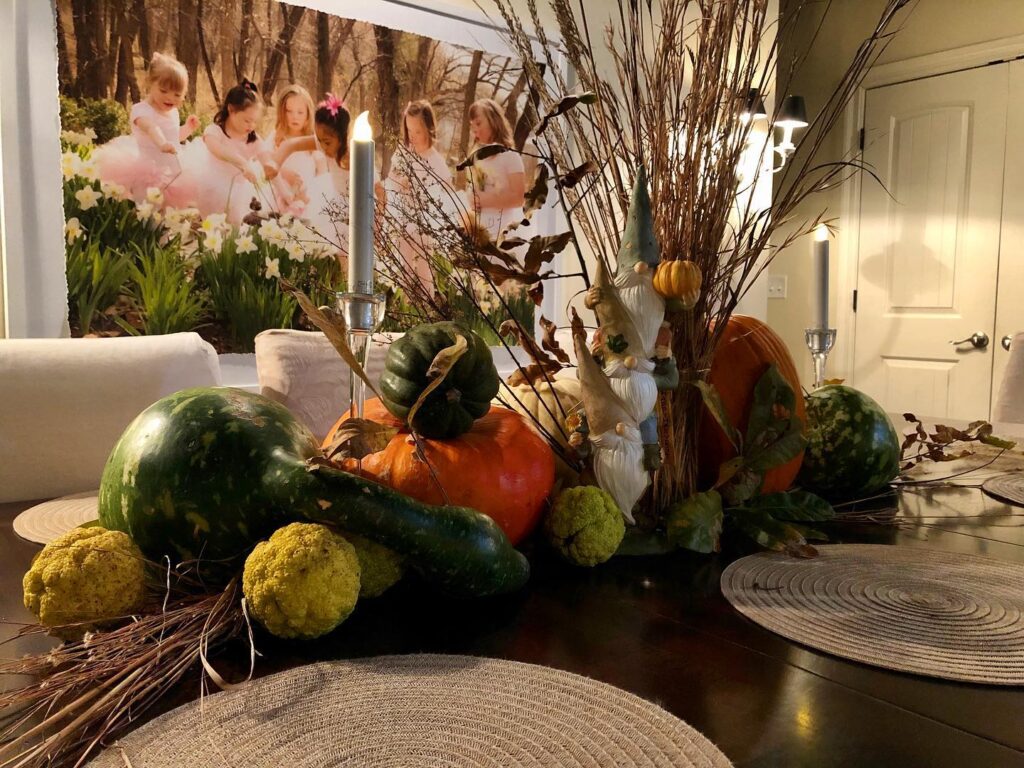
Bring gourds, pumpkins, and squash indoors are “store” on your table as an edible decoration until you are ready to eat them. Collect dried grasses and branches while out on nature walks, but always ask for permission if you don’t own the land yourself.

In the Perennial Flower Beds

  • Dead-heading: Only cut back perennials with “soft stems” that will rot over the winter. Leave as many seed heads and spent flowers as you can for winter homes for insects and food sources for wild birds. Wait until early spring to cut them back.
  • Add extra wood chips to areas that are in full sun in order to protect soil health and microbial activity
  • Before a rainy day, add probiotics to your soil for the winter months. This is a great way to help balance out nematodes in the soil, build soil structure, and improve overall soil health. You can purchase organic products like BioAG (that’s what we have used for over a decade), which will store on the shelf for years and has a fantastic probiotic blend.

Fall is a great time to plant native wild flower seed mixes!

If this list was helpful to you, consider sharing it on social media or sending to friends who may benefit from it as well.

Looking for On-Going Permaculture Mentorship?

permaculture mentorship

As a subscriber to our Patreon, you will have access to our ever-growing library of permaculture videos, classes, and PDF resources.  This is a perfect opportunity to learn and grow at your own pace, while also having access to a knowledgable community of permaculture homesteaders. 

Patreon subscribers are also able to interact daily / weekly with Kris and his team, to receive mentorship and immediate consultation tidbits.   This membership is like having a permanent virtual homestead or farm consultant on speed-dial.   Consider joining us on Patreon or evening giving a subscription as a gift!  CLICK HERE TO GIFT A SUBSCRIPTION.    

Pro-tips:   To avoid App store fees, you can initially subscribe on the desktop version to save some extra money!  There are also FREE 7-day trial options available for some membership tiers. 

September Gardening To-Do List for Zones 9-11

The last days of summer have arrived…

Summer is coming to a close and we are also nearing the end of the rainy season in many southern states.  Though temps are still high, we are now officially in annual vegetable gardening season.  As most of the US is finishing their veg gardens, we are just getting started in the warmer climates!   So, if you want to plant those tomatoes, pepper, eggplants, and squash – the season is now upon us!  Needless to say, there are plenty of things to keep us southerns folks busy in the garden and around the homestead.

Please note, this specific list is catered to those living in USDA Zones 9-11, so if you are looking for Zones 3-8 – click here.  

Without further adieu, here is your September Gardening To-Do List!

September Gardening To-Do List

In the Garden

  • Things to plant by seed:  beats, brussels, collards, eggplant, kale, lettuce, peppers, Swiss chard, tomatoes, and one last round of tropical spinaches.  Plus, you can start planting beans a little at a time this month!  We also recommend continuing to plant a few squash, pumpkins, carrots, and cucumber seeds each week.   We suggest staggering your planting this month, so all your cucumbers aren’t ripe at once.  Typically, this is our strategy with most varieties of annual veggies.
  • Onions:  Start planting bunching onions
  • Pumpkins:  Keep plantings through the second week of the month.
  • Tropical greens:   Harvest and enjoy your tropical spinaches (longevity, Okinawa, Surinam, Brazilian, etc.) all month long!  Start looking for flowers to dry so you can save seed for next year.  
  • Brassicas:   Wait until the last week of the month for most cabbage, cauliflower, broccoli, etc.  
  • Fertilize:  This is a great month to apply compost to the garden and food forest!  Composted manure is our favorite for the garden and mushroom compost in the food forest.  Other great amendments for this month include:  azomite (minerals), fish emulsion, blood meal, kelp, folic acid, and epsom salts (which is actually magnesium).  
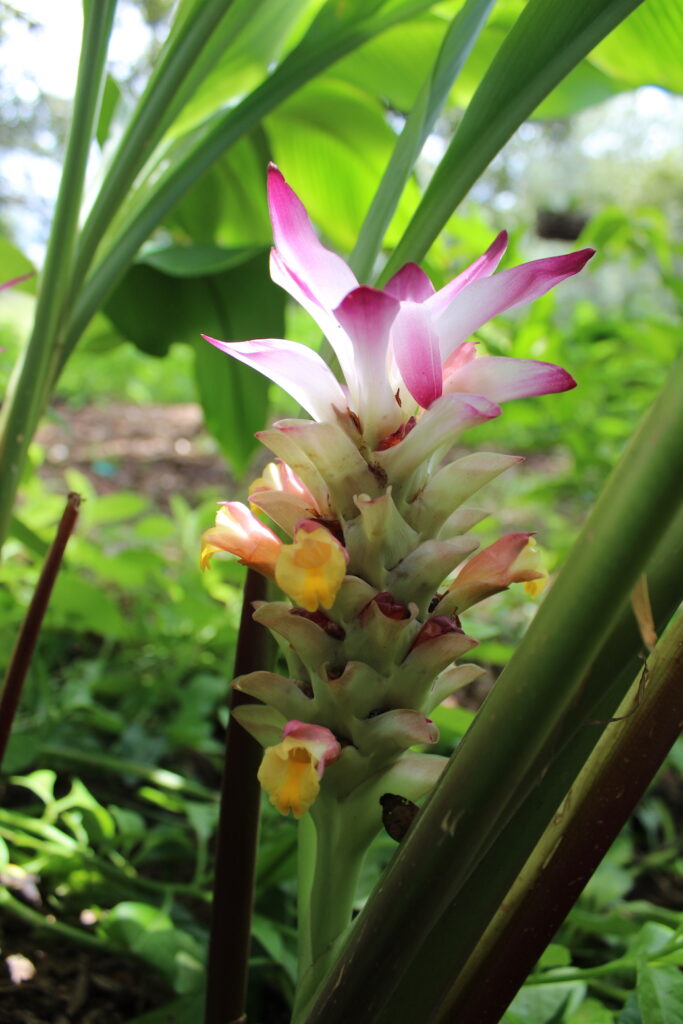
Spicy Turmeric Flower

Turmeric and Ginger are all in flower this month! These are fun little surprises that often hide at the base of the plants. Be sure to pay attention!

In the Greenhouse

  • Time to start planning to remove shade cloth (end of the month). Check to see if any greenhouse windows or plastic needs to be ordered before winter months.
  • Keep air flowing! September is still pretty wet in many parts of the south, so be sure to encourage proper airflow to prevent mold and mildew.
  • Check mouse traps regularly, because animals will start looking for their fall homes soon.
  • Start fall propagations of fruit trees and berry bushes from cuttings. It’s a great time to propagate mulberries, elderberry, sweet almond shrub, African blue basil, start avocado and mango seeds, etc.
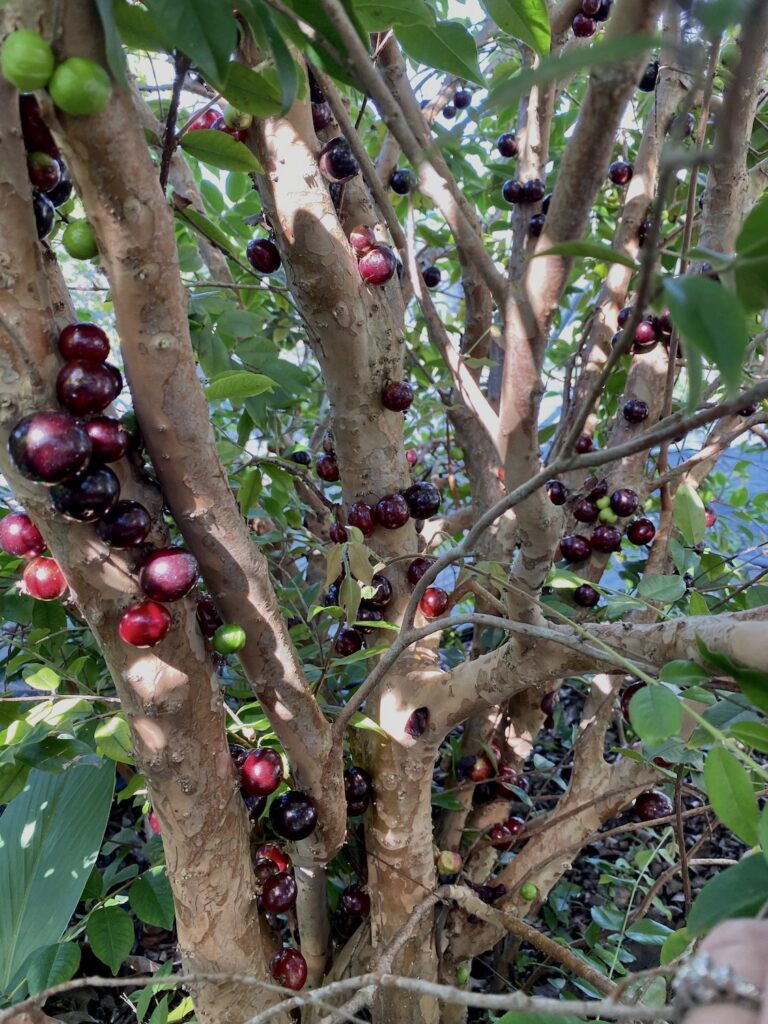
jaboticaba fruit

Jaboticaba are producing a nice fall harvest in many areas this month! It’s also a great time to save those seeds and start planting new plants that can be overwintered in a greenhouse or indoors.

In the Food Forest

  • Harvest: enjoy the last of the mangoes and start preparing for sugar apple, atemoya, and chermoya! Avocado season has also officially begun! Look for guava, more tropical cherries, and java plums later this month. Strawberry trees, acerola, and goji are in high production right now – so get out there and enjoy!
  • Fertilization: Use mushroom compost as much as possible. 1-2″ deep at the base of the trees (away from the trunk) and then cover with wood chip mulch. Always make sure your compost is “cool” before applying. If it’s hot to the touch when you receive it… let it sit for a few weeks to cool off before applying to your fruit trees. Always water thoroughly immediately after applying compost.
  • Avos and Mangoes: The first week of September is the last opportune time to plant new avocado, strawberry trees and mangoes if you are in Central Florida. Otherwise, they may not have time to root in properly before winter months. Anything uber tropical planted after this month are a risk. But most tother things (plum, peaches, etc.) are still fine to plant.
  • Berries: This is an ideal time to plant tropical berries and cherries like strawberry guava, Barbados cherry, pitangatuba, Cherry of the Rio, etc.
  • Stone fruit: It’s best to WAIT to plant peach, pear, plum, nectarine trees until fall or winter dormancy. Technically you can plant them now, but it’s not really ideal.
  • Plant late summer ground cover, like buckwheat, to create biomass coming into fall.
florida pasture maintenance for september

In the Shed

  • Keep tools oiled. This time of year is often hot and humid… the perfect recipe for rusty tools.
  • Check mouse traps and keep animal feed in sealed containers. Give the feed shed a nice cleaning to prevent critters from finding their “fall homes” in areas you don’t want them.
  • Look for estate sales for garden tools. Many of the new (plastic) ones are junk! The best tools are the old wooden handled tools that are available at estate sales. Instead of buying new, consider up-cycling.

In the Chicken Coop

  • Chickens:  Spring chickens have finally started laying eggs! They should be given plenty of fresh greens and can now have supplemental calcium. For calcium supplements, you can use crushed oyster shells or aragonite.
  • Quail:  It’s time to start helping the quail get ready for winter months. Extra protein, bug treats, dried grass heads, etc. are always a boost to their health. TIP: Dry flower petals and grasses to add to their nesting areas to help simulate their native habitats in the prairie.
  • Plant fall foraging areas using a native wildlife seed mix. Plant a mix specifically for chickens. We like the Happy Hen Mix from Hancock Seed Co.
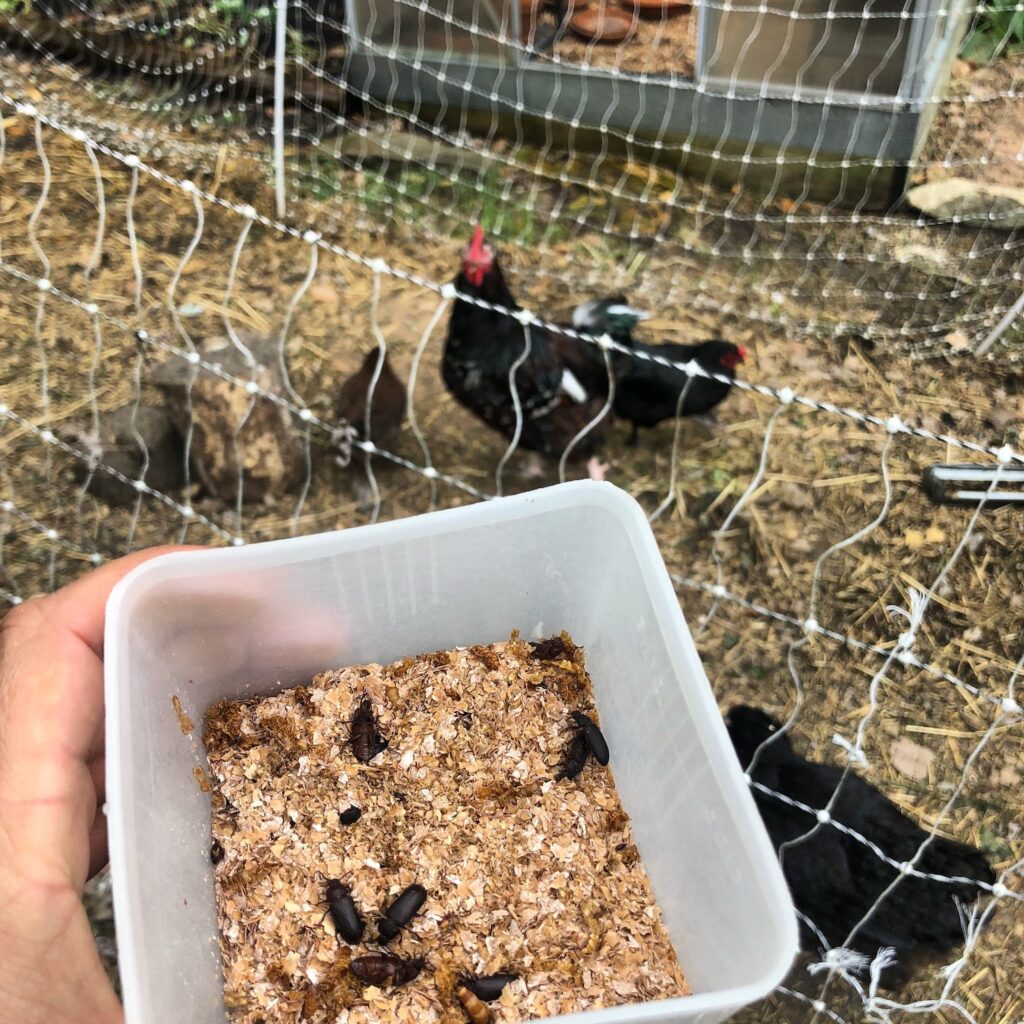
chickens and mealworms

Offer mealworms, beetles, and other insects as a healthy protein treat to help boost the health of your flock as they go into the fall season. This helps prepare their bodies for fall molting (that is right around the corner).

Around the House

  • Run dehumifiers to keep the indoor humidity between 45-60%. This is the ideal range for health and to prevent mold, fungus, and bacterial growth.
  • Replace your HVAC filters
  • Clean outdoor windows and doors (I use Basic H for this)
  • Apply UV protectant to your recreational vehicles (boats, car interiors, RV’s, decals, etc. Put moisture collecting crystals (like DampRid) in the cupboards of RV’s to prevent mold in storage.
  • Spray tire shine and protectant on vehicle and trailer tires to prevent sun damage
  • Fertilize house plants at regular strength until the end of the month, then taper off in late October. Do not fertilize house plants in the winter months… allow them to go “dormant” as well.
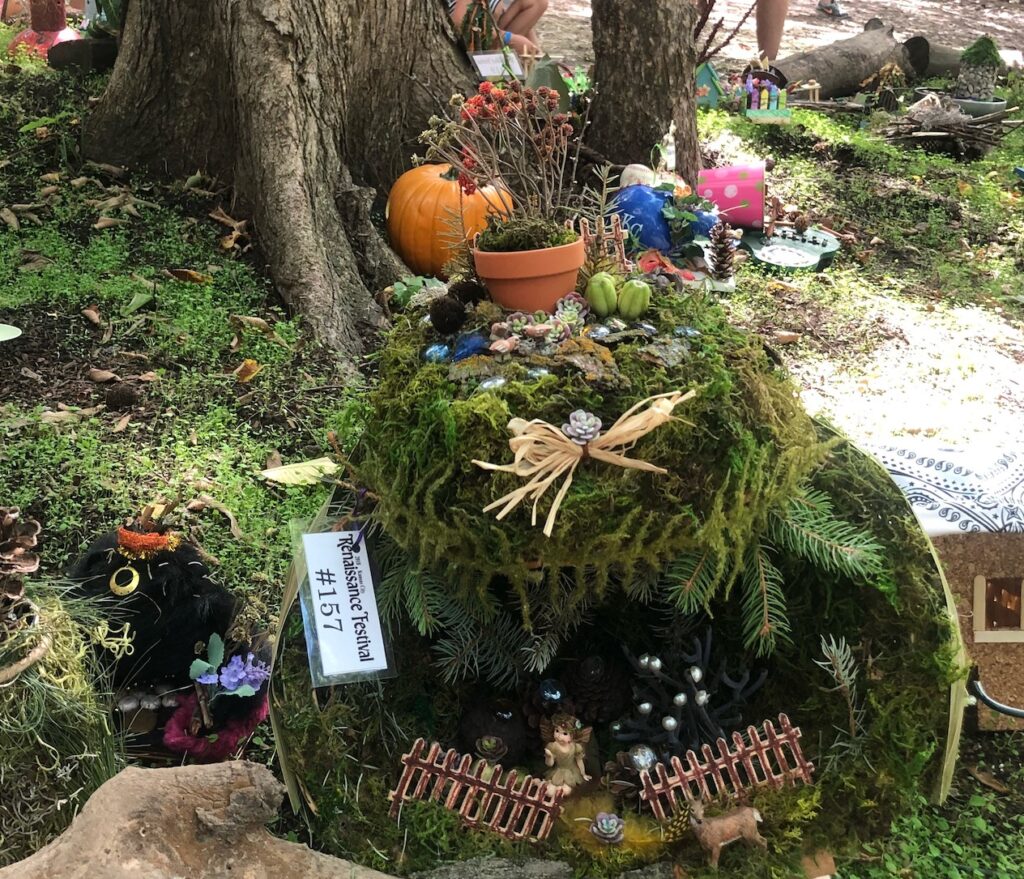
garden ideas

Make gnome or fairy houses with kids as a late summer / early fall project.

Also, start scoping out some local apple orchards, pumpkin patches, and corner mazes.

In the Perennial Flower Beds

  • Dead-heading: Cut back spent flowers in order to get a final bloom. Spent flower heads can be fed to chickens or composted.
  • Fertilize: Use compost to fertilize annual flower beds at the beginning of the month. Then toward the end of the month, use a fish emulsion / sea kelp foliar spray (like that from GS Plant Food) on flowers, fruit trees, and berries.
  • Plant annual flowers for fall color: sunflowers, zinnia, cosmos, celosia, broom corn, etc.
  • Plant fall flowers like chrysanthemums for autumn color. They can actually be grown in the ground as well and will come back every year in most regions. It’s also a great time to plant wild flower seeds en-mass. Companies like American Meadows and Hancock Seeds have some great wildflower mix selections.
  • Bring cut flowers indoors and share with neighbors, especially those who are shut-ins or elderly
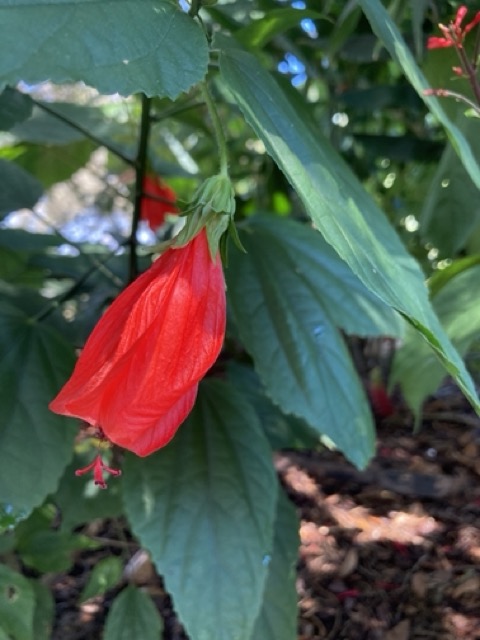
turks cap hibiscus flower
Edible flowers from Turk’s Cap Hibiscus

Enjoy the final days of summer and we’ll see you in the Garden!

Thanks for sharing this article with those who may find it helpful (like people within your gardening groups).

August Gardening To-Do List for Zones 3-8

August gardening to do list

What to do on your Property in August – Cold Temperate Climates

It’s the peak of the summer heat and this is the time of year that our gardens are feeling it the most.  However, there are still plenty of things to be doing on your property this month. 

By this time of the summer, we are harvesting tomatoes, peppers, and all sorts of treats from the garden.  The food forest is beginning to pop and many folks are checking plums, pears, and apples every day.   Chickens and ducks are beginning to ebb and flow a bit on their laying cycles, so it’s important to keep up with an adequate supply of protein and fresh greens.   

So wherever your are gardening this month, be sure to stay organized, hydrated, and take time to rest.  Make sure your gardening experience remains a time of respite and rejuvenation – take time for YOU!

Remember, this list is tailored for cold temperate climate growing zones, but if you are looking for warm temperate or sub-tropical growing zone lists CLICK HERE.

In the Garden

  • Things to plant by seed:  beets, carrots, radishes, and turnips.
  • Fall greens:  In order to stagger your harvest times later in the fall, consider planting smaller amounts of fall greens (salad mixes, kale, etc.) every other week this month.  The same can be done with beets and radishes.
  • Brassicas:   Plant broccoli, cabbage, and cauliflower by seed or transplants for fall harvesting.  Keep them well-watered (1″ per week) as they get established and mulch with straw around the base to cover the soil and prevent water evaporation.
  • Harvest:  tomatoes, eggplants, peppers, and other night shades.  Prop up plants as needed to provide support.  
  • Mulch:  Keep bare soil covered completely to prevent water evaporation and protect microorganisms.  Add a little more compost and wood chips around fruit trees and berry bushes.  Add another layer of straw around garden veggies.  
  • Compost application:  Add fresh organic compost to strawberry patch (thin them while you apply compost).  You can also add compost to bramble canes (blackberries and raspberries) to improve next years harvest.

It’s time to start making tinctures and drying herbs.

In the Greenhouse

  • We are finished with the “greenhouse” season, but if you have a shade cloth, you can actually open up all the windows now and put the shade cloth over the top. This will allow you to start micro-greens and other later season veggie starts. If using a shade cloth, use the opened greenhouse for your indoor tropical plants to give them a season outdoors. Just be sure to pay attention to your watering!
  • Clean and sterilize the plastic pots used this winter / spring
  • Set mouse traps to control critters
  • Hang fly trap to control aphids, flies, and other pests

In the Food Forest

  • Harvest: berries that are ripe: goji, elderberry, blackberry, raspberry, etc.
  • Mulch: Apply mulch / wood-chips around the base of fruit trees. Keep the wood chips away from the base of the tree, because if they touch the trunk it can cause rot or bacterial issues. Wood chips will encourage mycorrhizal activity and strengthen the root system.
  • Herbs around fruit trees:  Start harvesting herbs to dry and make tinctures, harvest fruit as they are ripe and remove those that fall to the ground. Fallen fruit calls in the pests… So feed to chickens or add to the compost pile.
  • Harvest elderberries:  If you are making elderberry tinctures, teas, or wine – now is your time to harvest. Whatever you do not harvest, the birds will take care of for you. It is also a great time to harvest elderberry canes for cuttings and propagation.
  • Watch for fungal issues on leaves and apply organic neem spray as needed.
  • Plant late summer ground covers in any “bare spots” around the forest. Consider things like daikon radish or crimson clover. Water the first 10-12 days until established.
  • Wait to plant new fruit trees and berry bushes until next month, when the heat dials down a few notches.

Reminder: Elderberry must be cooked before eating.

In the Shed

  • After heavy spring and summer use, give power tools a quick check (oil, air filters, and clean off exteriors).
  • Check mouse traps and keep animal feed in sealed containers.
  • Give cutting tools a good cleaning (using rubbing alcohol) and oil afterwards to prevent rust.

In the Chicken Coop

  • Chickens:  Some of the early spring chickens will start laying soon. Once the first egg has appeared, switch chickens over to a layer feed and/or provide supplemental calcium.
  • Harvest comfrey and feed to chickens, horses, goats, and cattle.
  • Quail:  Mix apple cider vinegar and honey with their water once a week. Pick fresh flowers and grass seed heads to put inside their coop and nesting area. This is a great time to provide supplemental protein using meal worms and small crickets.
  • Deworm: Use 1 tablespoon of Basic H in a 5 gallon waterer (1tsp per gal) for chickens (NOTE: Use the original formula of Basic H, which comes in a 5 gallon bucket OR 30 gallon drum). Add 1.5 cups to a 100gal waterer basin for cattle and horses. Available in bulk (much cheeper for farm use) This should be their only water source for two days.
  • Coop clean out: On a sunny day with a breeze, clean out the coop in the morning. Use Basic H organic cleaner and spray everything out. Leave the coop open all day to dry it out with good airflow. Clean out all waterers and feeders using a bleach solution.
  • Add wood ash to the dustbath to help prevent and treat lice and mites.
  • CLICK HERE for extra tips on keeping chickens cool during hot summer months.
Chickens eating a ground cover of wheatgrass, radish, and clover.

Around the House

  • Keep South and West facing shades closed during the day time in order to block out the hot sun.
  • Open up the windows on cooler nights to help air out the house and let in fresh air.
  • Replace your HVAC filters
  • Check batteries in smoke alarms and carbon monoxide detectors
  • Wash windows (inside and out). Use a product like “Invisible Glass” to avoid streaks.
  • Clean outdoor windows and doors (I use Basic H for this)
  • Apply UV protectant to your recreational vehicles (boats, car interiors, RV’s, decals, etc.
  • Spray tire shine and protectant on vehicle and trailer tires to prevent sun damage
  • Give houseplants a good fertilization and shower to clean off leaves
Add kid-friendly elements, hobbit holes, and fairies to the perennial flower bed.

In the Perennial Flower Beds

  • Dead-heading: Cut back spent flowers in order to get a second bloom. Spent flower heads can be fed to chickens or composted.
  • Plant seeds of larkspur, holly hocks, and poppies for next year
  • Add extra wood chips to areas that are in full sun in order to protect soil health and microbial activity
  • Bring cut flowers indoors and share with neighbors, especially those who are shut-ins or elderly
  • Find / create garden activities that involve kids.
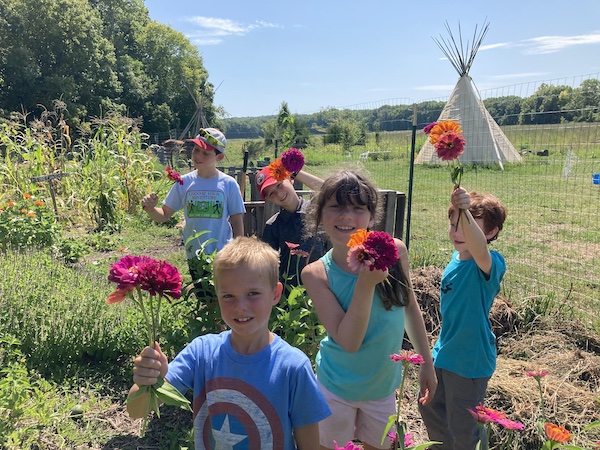
Kids picking flowers at the Blue River Forest Experience in Overland Park, KS. This organization hosts after school nature activities and summer camps.

We hope this list was helpful for you! Enjoy some much needed time outdoors and we’ll see you in the garden.

PLEASE SHARE THIS ARTICLE WITH THOSE WHO WOULD FIND IT HELPFUL!

July Gardening To-Do List for USDA Zones 9-11

The summer fun is in full swing and we are likely all enjoying the opportunity for daily harvesting. There is such joy and satisfaction in being able to walk into your backyard and grab a snack on the go. The flavor of a sun-ripened sweet tomato right off the vine and a fresh piece of fruit from one of the trees. This is the taste of summer! For me, I remember being in the garden with my mom when I was a child, and she would always hand my brother and I some fresh green beans. There is something about fresh beans (still warm from the sunshine) that will always remind me of my childhood. I was fortunate as a child to have a parents who enjoyed the outdoors. My brother and I grew up climbing trees, foraging in the woods, hunting and fishing, and building forts near the berry patches. As the years have gone by, I have found myself looking back on those years as critical times of the establishment of wonder and imagination in my life. There is something about the garden and food forest that invites us inward and beckons us to be a part of it. To not just eat – but see, hear, experience and dream a little. The garden, for me anyway, is a place that I feel safe in, provided for, and celebrated.

This month, as you go about your July Gardening To-Do List, take time to imagine and appreciate. Take space for yourself and create a safe space to invite others. The food forest can be both a flower for one and a garden for all.

NOTE: This list is geared toward USDA Growing Zones 9-11. If you are looking for the July Gardening List for Zones 3-8, click here.

July Gardening To-Do List
Yellow Star Cherry (Aka Pitangatuba) tastes like a citrus pineapple and is very soft and juicy! They often fruit in the first year from planting, so it’s a great source of instant gratification for a tropical food forest.

July Garden Calendar for USDA Zones 9-11

In the Garden & Greenhouse

  • Building soil the vegetable garden: For the most part in zones 9-11, our annual vegetable season has come or is coming to an end. It’s the time when we shift from annual production toward production in the food forest. Som for annual beds, this is a great time for a cover crop (like Sunn Hemp, Cow Peas, etc.) or to cover it with straw and let it compost in place.
  • To plant: Cassava cuttings, sweet potatoes, okra, chaya, tropical spinaches (like Longevity, Okinawa, Brazilian, Suriname, or Jewels of Opar).
  • To harvest: Tomatoes, peppers, eggplants, okra…and as many tropical greens as you can! It’s also a great time of year to pick sweet potato leaves and saute them for supper. Add some salt, pepper, garlic, and cheese and tuck in!
  • Compost: Turn pile 1-2x per week.
    • NOTE: For most people an outdoor compost pile doesn’t really generate a lot. However, using a worm bin (like the ones from Uncle Jim’s Worm Farm), can provide worm tea which creates way more bang for your buck. For most families, composting worms are going to give you a better result.
  • Open the Greenhouse: This time of year the green house often needs to be open 24/7 so it does’t become an oven. You can also cover it with a shade cloth to help stop the heat. Generally speaking, most plants are outside at this point and enjoying the summer rains and sunshine. This makes it a great time of year for you to clean it out and get ready for fall. by mid-August, you’ll be ready to use it as a shade house to start seeds for the fall gardening season.
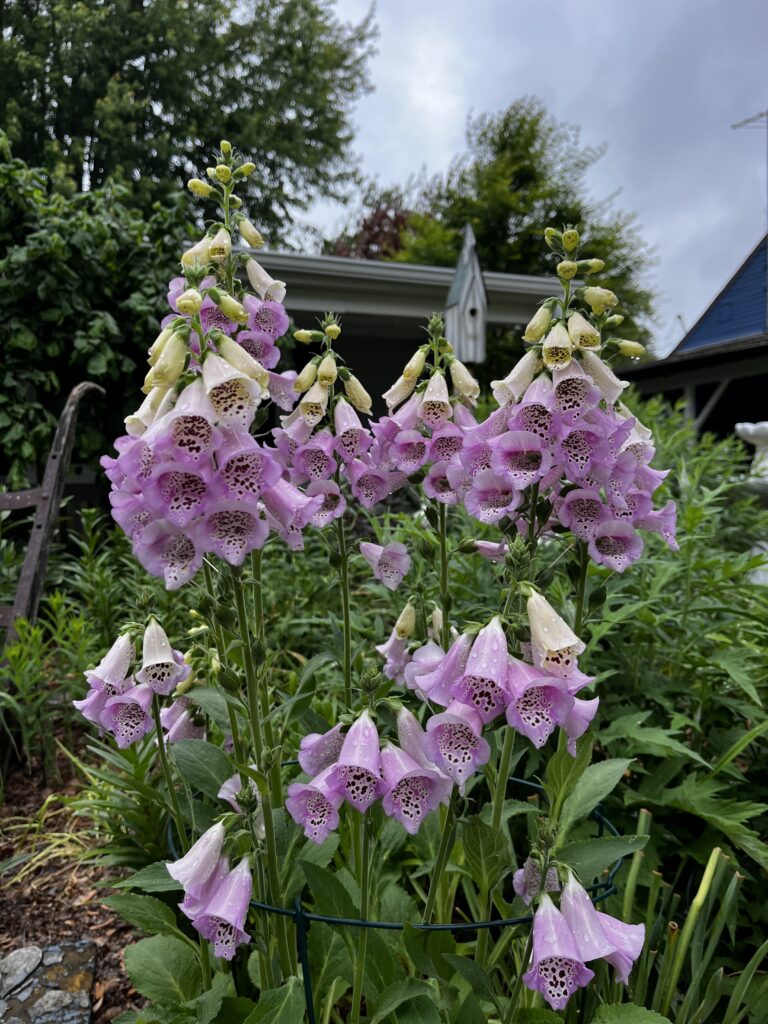
Foxglove in bloom

In the Food Forest

  • Apply Summer Compost or soil amendments
    • Compost (mushroom based for food forest and manure based for veggie garden). This is literally the single best thing you can add in the food forest this month!
    • Recommended Amendments: Azomite, epsom salts, chelated iron, hummus, chop and drop from nitrogen fixing plants.
    • Probiotics spray every other week. I use BioAg for this.
    • FREE 11-minute talk on probiotics for the yard, click here.
  • Plant new fruit trees and berry bushes. Here is a step-by-step process (with diagram) of how to plant a fruit tree or berry bush. Some of the info may surprise you. Remember, trees often take 3-5 years to reach a significant level of production. The best time to plant a fruit tree was 10 years ago, but the second best time is today. This is an ideal month to plant Avocado, mango, sugar apple, clumping bamboo, yellow star cherry, cherry of the rio grande, etc. It’s NOT ideal for stone fruit (plum, peach, nectarines), but can still be done if you prune them before planting.
  • Remove suckers from the base of fruit trees. These are likely a root stock coming back, and will essentially “suck” the nutrients from the top of the tree, so keep them cut / pinched off.
  • Chop and Drop!!! This is the prime time to chop and drop those soil building plants, because they still have the rest of the summer to grow again and provide a few more cycles. Remember, in order to truly get the nitrogen fixing and soil building benefits – you have to chop them down (and better yet to bury them under wood chips).
  • Banana TIP: If you are growing bananas in zones 8b and 9a (where frosts are likely in the winter), stop watering and fertilizing bananas that do not already have a flower. Wait until late winter to resume watering and feeding, as this will help you avoid having a partially formed rack that just gets killed in a frost. If the flower has already started, continue watering and feeding as usual. If you are in a generally frost free area – carry on as usual.
  • Get a plan and design This is a great month to plan and plant! The summer rains make food forest establishment easy. So, if you are interested in an in-person or virtual consultation, CLICK HERE.
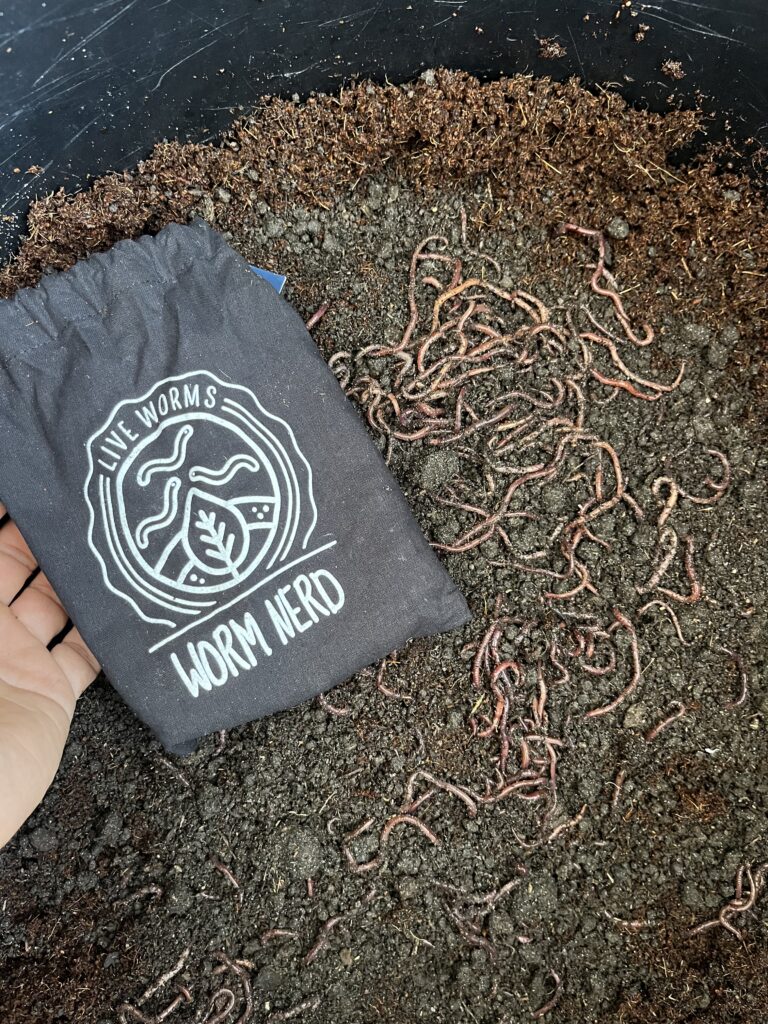
New worm bin set up with some red wigglers. My favorite part about this system isn’t even the worm castings – it’s the worm tea that can be used weekly on plants!

In the Shed

  • Set mouse / rat traps. We have really liked these bucket traps from Amazon
  • Oil hand tools: Keep hand tools oiled and clean after every use. A cheep olive oil wipe down will work wonders to help prevent rust, but you can also use a gun or motor oil as well.
  • Use the Rainy Days: When you have occasional rainy days, consider taking an hour to clean and organize in your shed or garage. Make a “donate” pile to bring to a local community garden if you find you have a surplus that could find a new home.
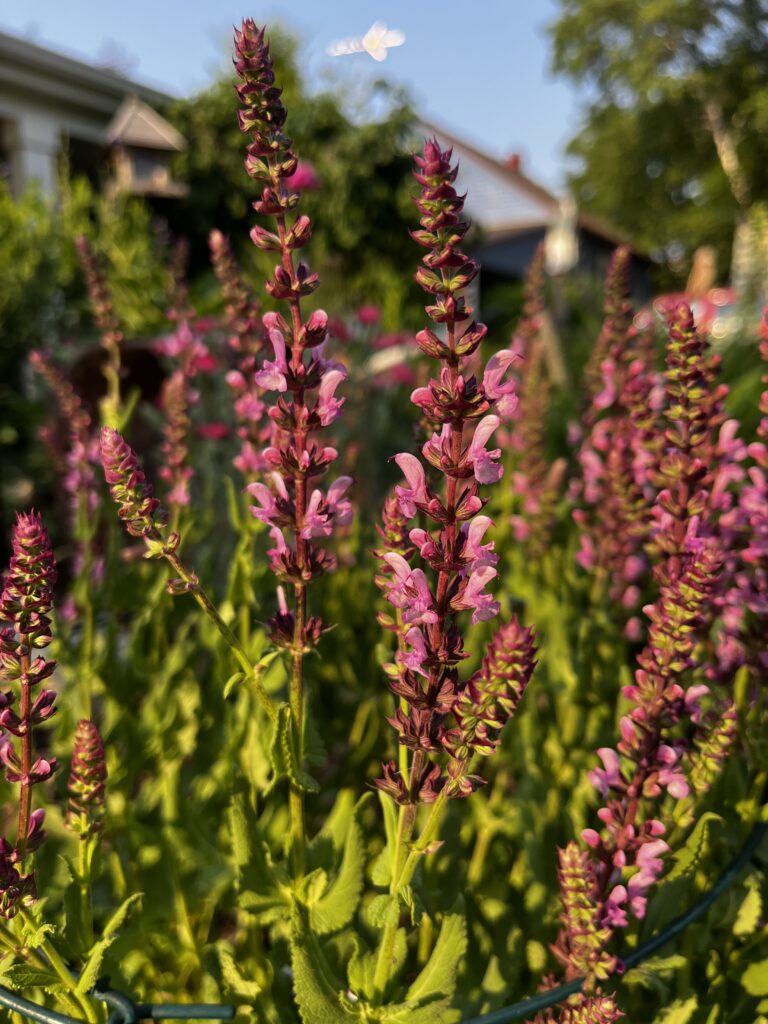
Salvia in my mom’s summer garden. There are so many varieties and colors with this plant and it always gives summer visual interest to the butterfly garden.

Livestock

  • Water rotations: In nature, animals don’t drink out of the purified tap. Sometimes their water is from a rain puddle, but other times from a stream or pond. To help mimic this and give their immune system a boost, try doing something different every time you refill their water.
    • Apple Cider Vinegar: 1 tsp per gallon
    • Honey: 1 TBSP per gallon
    • BioIivestock Probiotic: Dilution rate on bottle depending on species
    • Herbs: Add fresh oregano, thyme, rosemary, etc to their water to make a “tea”
    • Rainwater
  • Deworming Cattle / Horses: 1-1.5 cups of Basic H per 100 gallon watering container OR 1TBSP per gallon for chickens, goats, lamb.
  • Keep Chickens Cool in Extreme Heat: click the link for some creative ideas to help keep chickens cool in the hot summer months.
  • Check herd health daily: My friend Fred always says, “A good farmer is ‘out-standing’ in his field. Literally.” As a general rule of thumb you should have eyes on every animals, every day. Some animals may need morning and evening check in times, but it’s important to be attentive, especially if any animals have recently given birth.
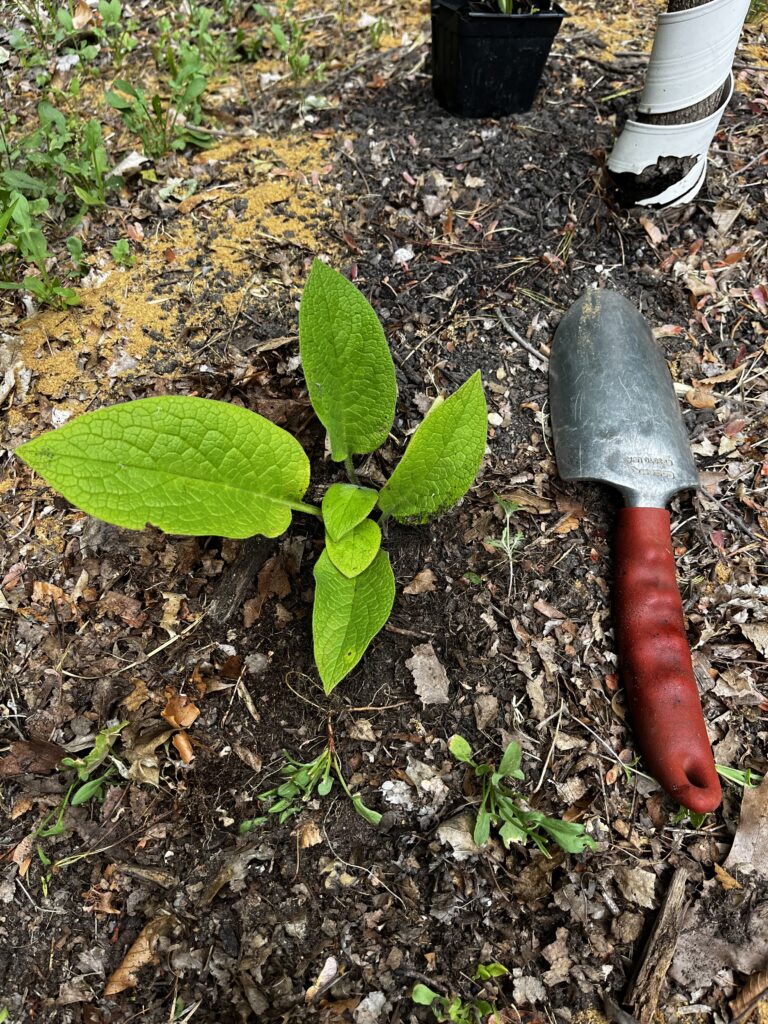
Comfrey (Bocking 14) can be planted on pasture edges or around fruit trees. It’s an excellent mineral mining crop and can be used as animal fodder and forage as well. It’s a suitable replacement for supplemental minerals and calcium for many farm animals.

In the Pasture

  • Plant: Not an ideal month for pasture planting… just let things grow and fill in.
  • Rotate Animals: Move animals as often as you can possibly manage. High intensity rotational grazing is optimal for soil and pasture health. If you are doing multiple animals: cows first, followed by sheep or goats, chickens last, and then give the pasture a break.
  • Pasture Edges: Plant support species on the pasture or food plot edges. Consider animal forage plants like Moringa and Mexican sunflower.

Around the House and Perennial Beds

  • Deadheading: Remove as many of the dead flowers as you can. This will promote more vigorous summer blooms. You may, however, want to let a few go to seed in order to save seeds for propagation next spring.
  • Fertilize flower beds: This time of year you can easily use bagged grass clippings in the annual beds to help fertilize and create mulch. If you are seeking to amend your soil, consider bone meal and azomite this time of year as your best options.
  • Annual Flowers: Plant some pops of color around the garden. Use as many native wildflowers and perennials as possible, because the vast majority of annuals do NOT provide nectar for bees and butterflies. However, using them sparingly can still give lasting bursts of color. Some annual flowers (nasturtiums, marigolds, calendula, etc.) are also edible and medicinal and can even be used as vegetable companion plants.
  • Air out the house: On a cool morning or early evening, consider opening up the windows to air out the house. This is also a great time to change your HVAC filters indoors from extended summer AC use.
  • Power-wash lawn furniture on hot summer day. When it’s too hot to be in the garden, get a power washer to clean off the porches, deck, patio, and the furniture. Many of them allow you to add a bit of soap (like Basic H) to the washer for added cleaning power.
Photo from a recent hike in the Daniel Boone National Forest in Beattyville, KY

Kids & Family Ideas

  • Visit a local hiking trail: Look up some hiking trails in your area and go out on a day adventure. Pack a lunch with you, bring extra water, and be sure to bring your camera and a foraging bag (if responsible foraging is permitted).
  • Wild Bird Feeding
    • Suet cakes for woodpeckers should be around the edges of the garden, because they will also help control caterpillars.
    • Safflower Seed: great for cardinals but also not a favorite of squirrels.
    • Water and birdbaths will help attract even more birds than the feeders themselves on hot summer days.
    • Hummingbird feeders: Never use dyed red nectar…this is completely unnecessary and not good for the birds. Also, remember that sugar water ferments quickly, so hummingbird feeders need to be changed every 3 or 4 days. If you cannot remember to change the nectar water, please take down your feeders because fermented water is a number one killer of hummingbirds.
  • Walking Sticks: Find and decorate walking sticks together. You can tie string around them and collect feathers, paint them, etc. Even as an adult, a good walking stick is a must when putting chickens up for the night.
  • Outdoor picnics: Plant at least one meal a week that is outside in nature. Maybe this week it’s grilling on the patio, but then next week might be a blanket in the grass with charcuterie boards. Perhaps sandwiches from your childhood while laying in a hammock, or a summer salad on the front porch as you wave at the neighbors passing by.

See you in the Garden

As always, thanks for taking time to join on the gardening and permaculture journey. Be sure to check out the continual flow of content available via our social media channels. Remember, PermacultureFX also does virtual consulting (using facetime, zoom, satellite images, etc.). We’d love to help you get a plan for your property and help you create abundance and wonder.

If this article was helpful, consider sharing on social media (or with your garden groups) to help set others up to win on their property. Happy Summer – and I’ll see you in the garden!

– Kristofer Edler

PS – If you are looking to keep growing in your Permaculture journey, we offer virtual classes, PDF’s, and exclusive content in our ever-growing Permaculture Patreon Community. There is now a 7-day FREE TRIAL!

May Gardening To-Do List for USDA Zones 9-11

NOTE: This list is geared toward USDA Growing Zones 9-11. If you are looking for the May Gardening List for Zones 3-8, click here.

We are officially past any dangers of frost and cold, and now the warm part of spring is certainly upon us! In many subtropical regions, this late spring season is often very dry, which can make it challenging in the garden and food forest. The rainy season, in places like Central Florida, is generally from the last week of May to the first week of October. So, for many folks, until rainy season arrives, our time is consumed with harvesting the last of the spring vegetables and daily checking gardens for watering needs.

Remember (especially in Florida), you cannot water gardens and fruit trees very well on a “perfect schedule”. Because of temperature fluctuations, wind, humidity, and other elements the length of time between watering can vary dramatically. Anyone who tells you to just water every day is going to have major issues as the season progresses.

Here is how to water properly

Use the “Finger Test” to see if your plants actually need water. Never just assume that they do. Put your finger in the soil down to the second knuckle. If it’s dry, then go ahead and water. However, if you feel coolness or moisture – then let it be. Generally speaking, most plants (especially fruit trees and berry bushes) actually like to dry out a bit between waterings.

“As a practice, it’s far better to water LESS frequently and MORE deeply.

Doing this will help establish a healthier root system and overall plant.”

-KRIS EDLER | PERMACULTUREFX FOUNDER

So, get ready for an exciting month! May is the time when our region makes the shift from “annual vegetable gardening” being the focus to a primary focus on perennial production from our fruit trees and berry bushes. So here is your May Gardening To-Do List to help you jumpstart your late-spring projects. For some, it may be helpful to print out this list and hang it somewhere to refer to it each week to check progress.

NOTE: This list is geared toward USDA Growing Zones 9-11. If you are looking for the May Gardening List for Zones 3-8, click here.

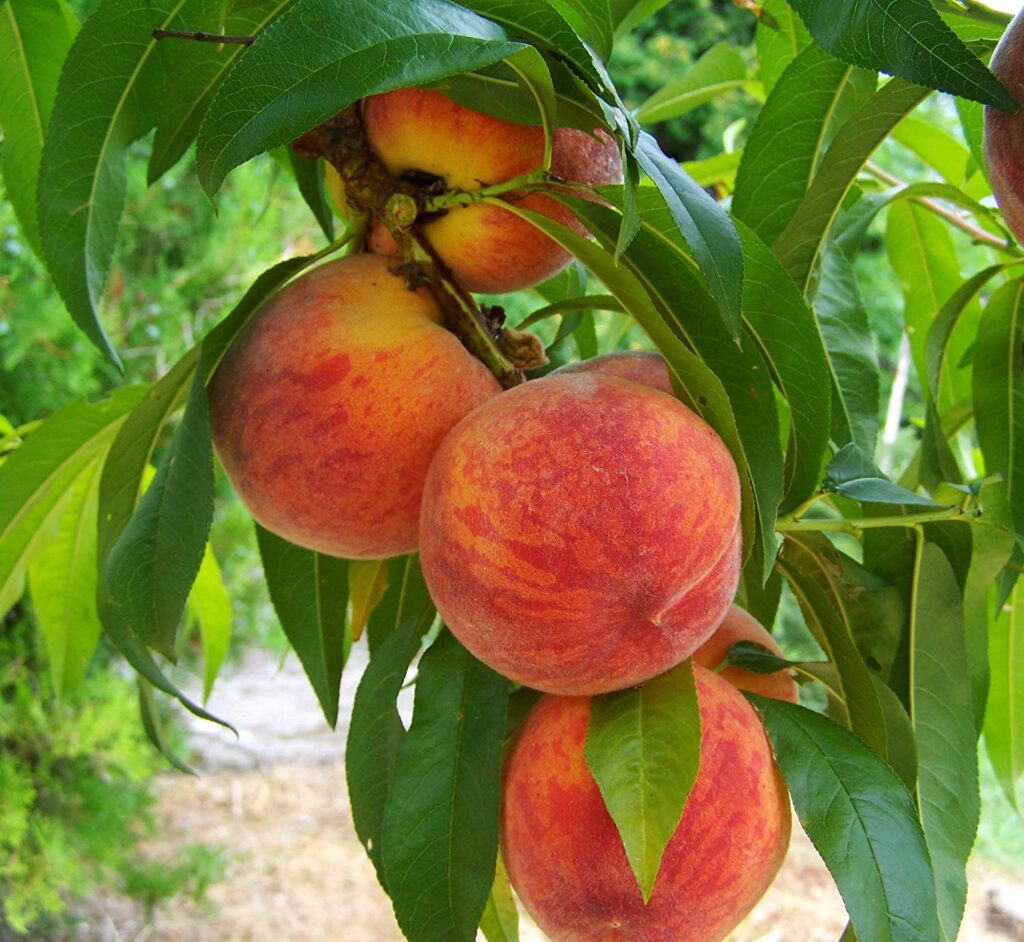
Tropic Beauty Peach
Tropic Beauty Peach | Self-pollinating, hardy to 20 degrees, low chill hours, deliciously sweet and juicy.

May Gardening To-Do List for USDA Zones 9-11

In the Garden & Greenhouse

  • Fertilizing the vegetable garden: If you have not applied a late spring probiotic to your soil or as a foliar spray, then now is the time to do that! This application will increase the health of your soil microbiome, give plants a better chance at fighting off disease and fungus, and is a proactive way to address garden pests before they do any damage. BioAg is my preferred spray for this.
  • To plant: Okra, potatoes, sweet potatoes, summer beans / peas, and Seminole pumpkin. The prime vegetable planting season is now almost over for sub-tropical zones, so it’s time to plant your cover crop. We recommend planting Sunn Hemp at the end of the month as a nitrogen-fixing cover-crop that can be tilled into the soil in August.
  • Tropical Spinaches: It’s time to plant tropical spinaches like longevity spinach, Okinawa, Surinam, Jewels of Opar, Brazilian Sisso, etc!
  • Salad Trees & Hibiscus: In this climate, some of the best edible greens actually grow as trees or bushes during the hot weather months. Some of our favorites include: South Sea Salad, Bele Hibiscus, Roselle (Jamaican Sorrel), Cranberry Hibiscus, and Katuk, and Kenaf.
  • To harvest: Salad greens, kale, tropical spinaches, last of the peas, beets, turnips, etc. Harvest tomatoes, peppers, eggplants, etc. When they start to struggle because of heat and/or powdery mildew – just put the garden to bed and cover crop it until after the rainy season. Focus on fruit trees, berry bushes, and edible tropical plants for the summer.
  • Compost: Turn pile 1x per week.
    • NOTE: For most people an outdoor compost pile doesn’t really generate a lot. However, using a worm bin (like the ones from Uncle Jim’s Worm Farm), can provide worm tea which creates way more bang for your buck. For most families, composting worms are going to give you a better result than a mere compost pile.
  • Cover Crops: For garden beds that are being put to rest for the summer, this is a great time to plant a cover crop. Sunn Hemp is in the legume family and does an excellent job with this. Not only will it grow 8-10′ tall by August, but produces gorgeous blooms and actually repairs the soil. Sunn Hemp repairs the soil in two ways. First, it fixes atmospheric nitrogen into the soil with nodules on the roots, which interact with bacteria in the soil. Secondly, when you till it in (or bury it) in your garden later in August, it will add much needed biomass to your soil. It can be used as animal fodder, but must be fed to livestock before it flowers.
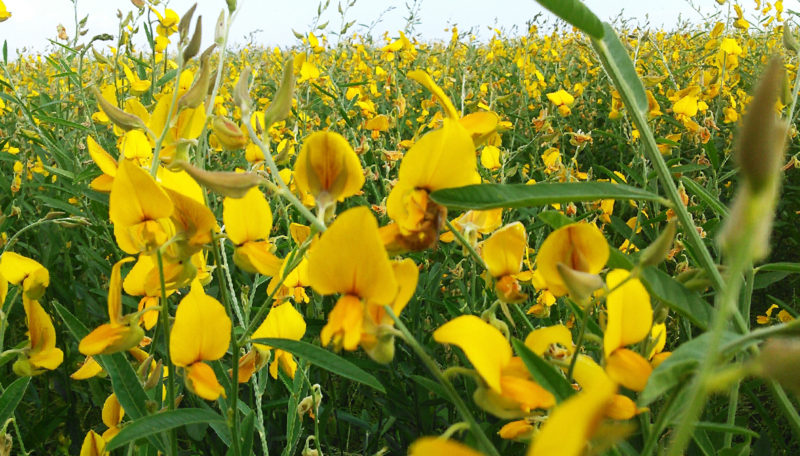
Sunn Hemp Cover Crop

In the Food Forest

  • Consider probiotics for your garden and yard (if you didn’t do it last month) FREE 11-minute talk on probiotics for the yard, click here.
  • Plant new fruit trees and berry bushes. Here is a step-by-step process (with diagram) of how to plant a fruit tree or berry bush. Some of the info may surprise you. This is a great time to plant avocado, mango, strawberry tree and other tropical trees. Planting this time of year gives them 7-8 months to root in and settle before winter. It should be noted that you will need to water more often until rainy season starts.
  • Ginger and Tumeric: Time to get those bad boys back into the ground! Remember, they love shade and LOTS of neglect. They also do much better in the ground (instead of pots), so plop them down, add some mulch on top, and walk away!
  • Harvest (and enjoy): peaches, nectarines, plums, mulberries, strawberry tree, moringa leaves / flowers, elderberry, blueberries, jaboticaba, cattleya guava (in some areas). Anyone else in food forest heaven, yet?!
  • Apply mulch (wood chips) to any areas that need it. Fruit trees like to have 4-6″ of wood chips around the base (extending all the way to the drip line). Remember to keep mulch a few inches back from the truck, because you don’t want the decomposing wood touching your tree.
  • Pruning: NO major pruning once trees flower. After they awaken for the spring, there is a lot of sap flowing, so you don’t want to cause a fungal or bacterial issue by pruning this time of year. Pruning should be done during late winter dormancy, so if you haven’t pruned fruit trees yet, it’s best to wait at this point. You can, however, still prune pines, decorative shrubs, and ornamental trees now.
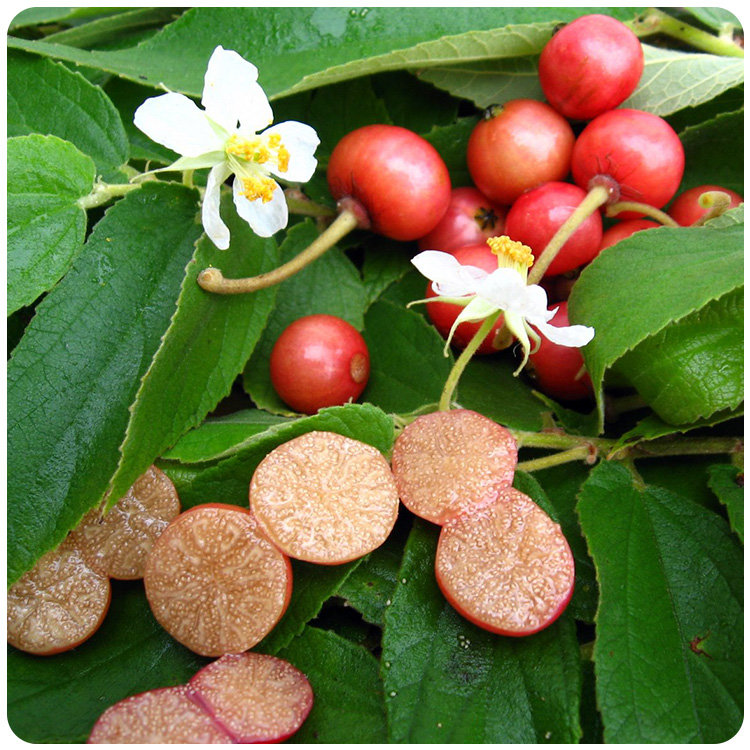
The Strawberry Tree (or Jamaican cherry) is a new favorite! The fruit is low in sugar, high in vitamin-C, and (get this) it tastes like strawberry skittles or cotton candy. Grows best in Zones 9b-12 and produces fruit from April – Decemeber. (Photographer unknown)

In the Shed

  • Put out yellow jacket and fly traps
  • Reset mouse / rat traps (peppermint essential oil on a cotton ball in storage areas will also repel them)
  • Spring cleaning time: Go through a couple storage areas this month and recycle, donate, and reorganize. Steward what you have with excellence.

Livestock

  • Water rotations: In nature, animals don’t drink out of the purified, and chemically treatred tap. Sometimes their water is from a rain puddle, but other times from a stream or pond. To help mimic this and give their immune system a boost, try doing something different every time you refill their water.
    • Apple Cider Vinegar: 1 tsp per gallon
    • Honey: 1 TBSP per gallon
    • BioIivestock Probiotic: Dilution rate on bottle depending on species
    • Herbs: Add fresh oregano, thyme, rosemary, etc to their water to make a “tea”
    • Rainwater
  • Spring Chickens: This is a great time to add to the flock by either purchasing heritage breeds or hatching your own. Whatever you do, stay away from Cornish Rock or Cornish Cross “meat birds”… more on that to come. It’s also an ideal time to add rabbits, quail, or other animals into your system.
  • Dogs: It’s time for spring check-ups on the fur babies. Once they are up to date on their appointments, go support a local groomer and send them to the doggie spa for a day. NOTE: I’d give a tip on cats… but the only thing I can think of is how much I don’t like them. Sorry, not sorry.

In the Pasture

  • Plant: Last chance to plant Timothy grass, perennial peanut, wildflower mixes, tobacco, clover mixes, and alfalfa can still be planted in some regions. Due to the usual dry weather this time of year, supplemental watering may be needed.
  • Hay / Straw: Any rotting or wet bales can be used in the garden or food forest as deep mulch. It can be spread 5-7″ thick in areas that are going to be “future” garden beds in order to prep the soil. First, roll out contractor paper (usually found in the paint section of a hardware store) over the grass and then cover with the straw or other mulch. This is a great opportunity to do “layer mulching” if you have other materials available.
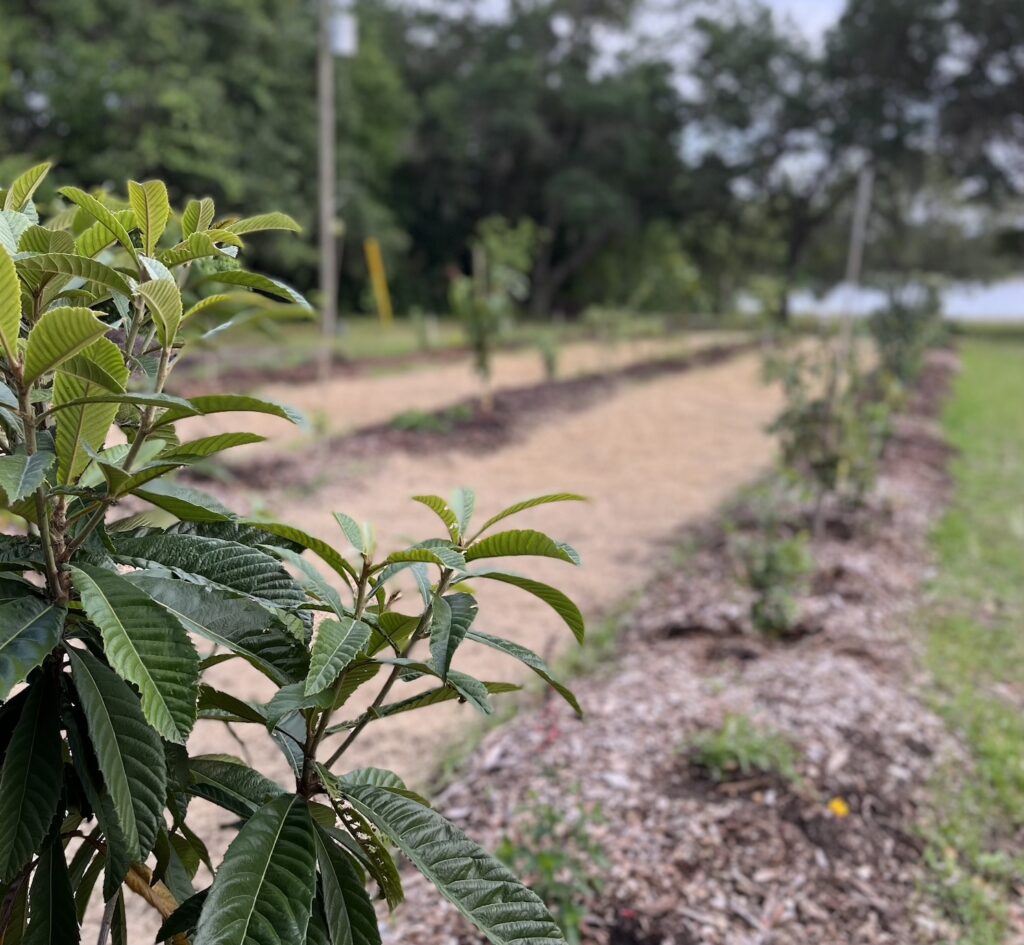
New food forest installation example. There are three 100′ long rows of fruit trees, berry bushes, and native pollinators with over 90 plants. These rows have been layered with contractor paper (for weed suppression), 1″ of compost, and 6″ deep of wood chip mulch. The rows are 3′ wide. Between the lanes, the grass has been removed and reseeded with a clover mix (and lightly covered with straw).

Around the House and Perennial Beds

  • Power washing time: Use an organic soap (like Basic H) to power-wash the house, sidewalks, and other recreational vehicles.
  • Cut back last years growth: Remove any dead material left over from last fall and add to the compost pile.
  • Fertilize flower beds: Use kelp, blood meal, and/or fish emulsion. I like to use blood meal in March/April and then in May/June use bone meal. Kelp and fish emulsion can be used anytime during the growing season. Alternatively, apply a 1/2″ layer of compost to flower beds or at the base of each flower. Keep away from the stems, so it doesn’t “burn”.
  • Perennial Flowers: Using native wildflowers is so much easier than annuals, not to mention will save you money because they come back every year. Here are some of our favorites!
  • Air out the house: On a day you are home, open up every window in the house and turn on fans to circulate fresh air into the house. Change the filters in the HVAC system for the spring months. This is also a great time to vacuum out floor vents and air returns.
  • Clean out the freezer and disinfect really well. It’s often best to do this the day before garbage day, so you can take old items directly to the road.
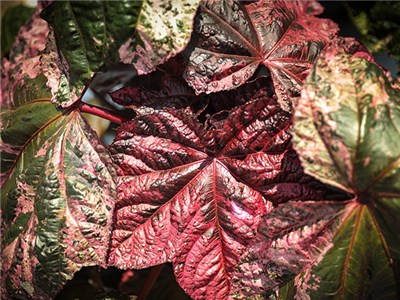
Bele Hibiscus (aka Mahoe Hibiscus Tree): Delicious, edible leaves that are great in soups, stews, salads, or used for dolmas. Flowers are also edible (fresh). Grows in zones 9-12 in part sun to full shade.

Kids & Family Ideas

  • Nature Hike: Create a mini-scavenger hunt before going on your nature hike. Have kids look for things like: a feather, a seed pod, a leaf bigger than their hand, a cool rock, a weird stick, etc.
  • Wild Bird Feeding
    • Set out orange halves and grape jelly for the arriving orioles
    • Put hummingbird feeders out on April 15th (never use the kind with red dye), and be sure to change the water in them every week.
    • Hang a new birdhouse for spring nesting season
    • Add white millet to feeders to attract indigo buntings (bright blue birds)
  • Local Farm Visit: Many local farms offer free tours, kids activities, etc. Look up a local farm to visit in your area and give your kiddos exposure to the animals, crops, and fruit trees.
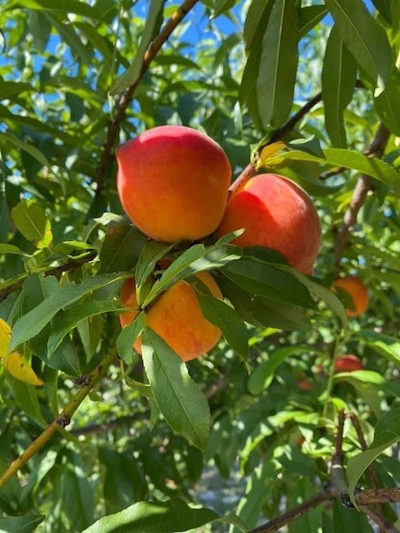
April gardening list peaches
Tropic Beauty Peach in Central Florida

See you in the garden

As always, thanks for taking time to join on the gardening and permaculture journey. Be sure to check out the continual flow of content available via our social media channels. Remember, PermacultureFX also does both in person AND virtual consulting (using facetime, zoom, satellite images, etc.). We’d love to help you get a plan for your property and help you create abundance and wonder.

For those looking for on-going homestead mentorship, online permaculture classes, and access to our ever-growing library of resources – consider becoming a member of our Patreon Community. The Abundance Tier even has a FREE 7-Day Trial, so you can bing watch and see if it’s a good fit for you.

Lastly, if this article was helpful, consider sharing on social media (or with your garden groups) to help set others up to win on their property.

Happy spring, and I’ll see you in the Garden!

– Kristofer Edler

March Gardening To-Do List (Growing Zones 3-8)

Here’s a list of what you should do in your garden in March, if you live in the Midwest (specifically in USDA zones 3-8). Granted, weather isn’t exactly a science… well it is… it’s just not an exact science. Just keep a close watch on your weather and plan your planting accordingly. If you are not sure what your growing zone is (or how to use it), watch this tutorial video. If you are in a warmer climate, don’t worry, you can CLICK HERE for the Zone 9-11 March To-Do List.

Without further delay, ladies and gentlemen, here is your completely arbitrary March Gardening To-Do List!

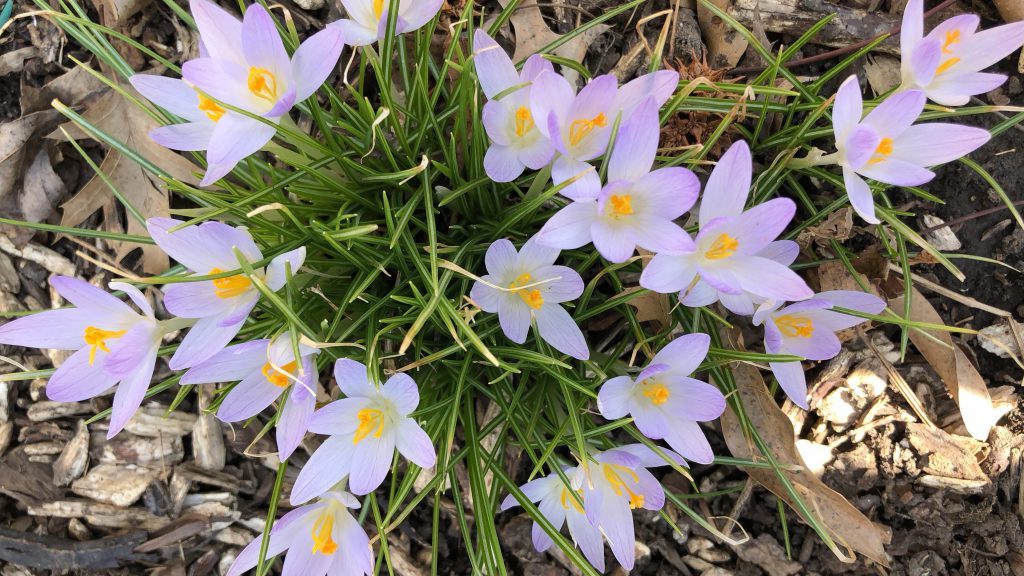
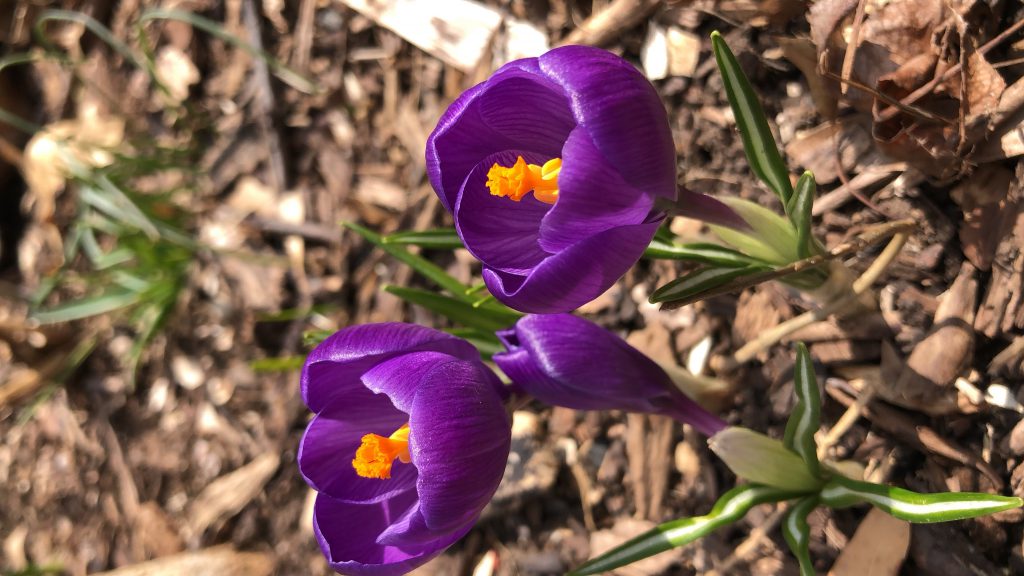
crocus bulbs in bloom
Crocus in the spring garden

In the Garden

  • Take soil tests and send to your local extension office. Take samples from each area of your yard and make sure to get the detailed report. The most important part for me is not the NPK… it’s the amount of organic matter! Generally speaking if you have a higher percentage of organic material in your soil, the rest of the soil health will follow suit.
  • Make minor amendments before the spring rains (add bone meal, blood meal, etc.).
  • Spread chicken poop and hay from the nesting boxes on the compost pile and get it working before it’s warm.
  • Start planting some frost friendly veggies (radish, Swiss chard, cabbage, broccoli, some lettuces, etc.)  We recommend direct sowing a little every week, so that way your harvest is staggered.  It also helps to insure a diversified crop and give extra insurance that if one round dies… another one will do just fine!

In the Greenhouse

  • Plant seed trays: tomatoes, peppers, eggplant, kale, broccoli, cabbage, etc. Start perennial seeds for food forest planting: goji berries, gooseberries, trees from seed, etc.
  • Add black 5-gallon buckets of water (with lids) for radiant heat source, if you do not have a heated greenhouse.
  • TIP: Always plants more than what you think you’ll need. The worst case scenario is that you have some to share with neighbors, friends, or gorilla plant in a local park.

In the Food Forest

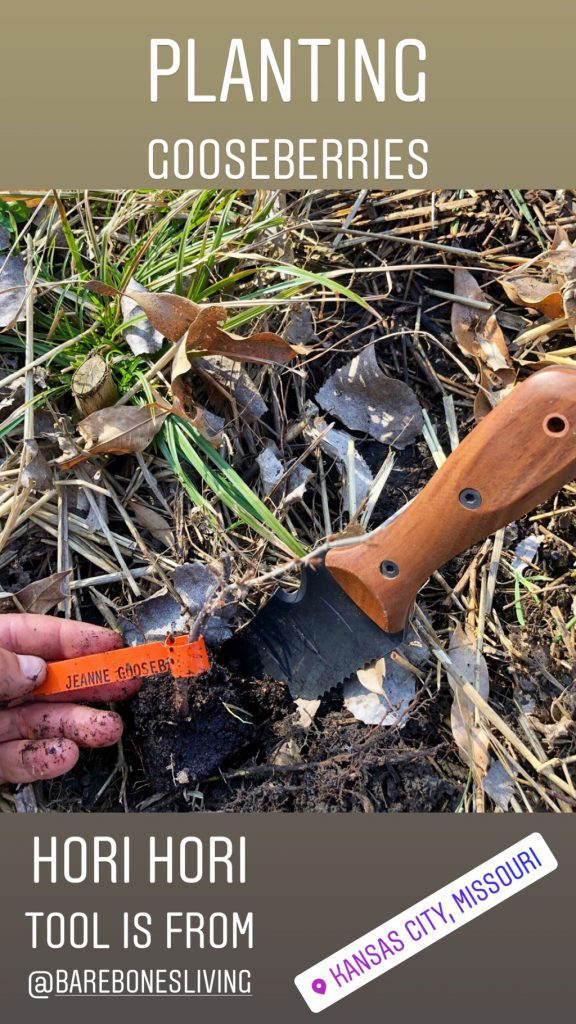
This hori hori tool, from Barebones Living is one of my new favorite gardening tools.
  • Break up any large sticks and twigs. They will decompose much faster if they are in direct contact with the soil.
  • Remove leaf cover from the soil and use as a mulch around the base of trees / bushes (cover the sticks). You can chop it up a bit with the mower if the leaves are still crispy.
  • Plant alley crops between rows and plantings. In our area I often use a blend of red clover, white dutch, yellow closer, and crimson clover. I plant this between the rows.
  • Plant living mulches around the base of the trees (turnips, bocking 14 comfrey root, berries, herb roots, etc.).
  • Feed native wild birds before nesting season starts in order to encourage them to live in your area. They are fantastic bug control and leave behind little bits of birdie poo.
  • Hang wild bird houses and bat houses before nesting season begins.
  • Set out orange halves and grape jelly to attract early migrating orioles.
  • Last chance to prune apple trees (before buds open)!
  • Spray your spring foliar spray on every perennial in the food forest! Get our recipe here.
  • Add fresh mulch to trees and shrubs (up to 5″ thick). Remember to always keep the mulch away from the trunks of the trees.
  • Get a permaculture consultation to help you come up with a game plan for your overall property, garden, and food forest. PermacultureFX now offers digital consultations (at a reduced rate)! Virtual design services are a great way to start your food forest with the best chances for growing success. We’ll tell you what to plant, where to plant, how to get it in the ground, and even how to harvest and maintain your food forest. Travel is an option for those who prefer in-person services.

In the Shed

  • Sharpen mower blades and all cutting tools.
  • Oil any metal that rusted over the winter. Remove tarnish with steel wool. Ax heads should be treated with bees wax.
  • Check for broken pots from winter cold.
  • Set a few extra mouse traps in the shed, greenhouse, and garage.
  • Start up the mower, weed whipper, and other tools for the first time. If you have difficulty starting them, you can always use a bit of Sea Foam to get things moving. Use two ounces per gallon of gas. It will work wonders!

In the Chicken Coop

  • Remove winter bedding, if you used the deep bedding method.
  • Deep clean…deep clean…deep clean! We use Shaklee’s Basic H2, because it’s organic and will also take care of mites, lice, etc.
  • Lower fat content (corn) and increase protein sources. If you are doing a mealworm farm, it’s a great time to give the girls an extra boost!
  • Feed extra omega-3’s. Get some feeder fish (minnows) from a local pet store and put them in a shallow pan. Watch your chooks go nuts for them!
  • Use honey, garlic, and ACV in their water once per week to give them an extra immune boost before the springtime. I also add a product for livestock by SCD Probiotics based out of KCMO.

Around the House

  • Clean out the gutters from any winter debris.
  • Remove winter window treatments and wash windows (inside and out).
  • Power-wash the sides of the house, cement, and garage doors. We use Basic H2 for this as well, because it organically takes care of mold and mildew easily.
  • Oil doors and hinges (interior and exterior).
  • Prune any trees around the yard before leaf buds begin to open.
  • Get hoses ready to bring outside.

In the Perennial Flower Beds

  • Finish cutting back any dead growth from last year.
  • Trim back winter ferns and greens (holly, lenten roses, etc.)
  • Remove leaves or debris from the top of bulb areas, leaving only compost or wood chips. The debris should be composted and added back to the beds later.
  • Start planning mulch and compost deliveries now. Look for sales or companies to bring it to you in bulk.
  • You can also plant cold season annual flowers at this time as well. Snap dragons, violas, pansies, and calendulas do great this time of year.
  • Spring sow any native wildflowers. One of my favorite Midwest companies for this is Prairie Moon Nursery (online), because they do seed mixes geared toward your specific sun exposure and soil type.

  • IMPORTANT TIP: Never use mulch that has been colored or dyed (red or black). Let’s just use our heads on why that’s a bad idea.

How to Plant a Food Forest | Part 3 – Selecting Species and Planting

Once the soil has been prepared, you can begin selecting species and planting trees for your site. There are several options for this:

  1. Do online research to see which trees, bushes, and wildflowers are hardy in your area.
  2. Visit a locally owned greenhouse or nursery to see which ones may do well for you. Big box stores are something we recommend avoiding when it comes to fruit trees and berry bushes. They generally sell the same varieties nation wide (which means they may not work in your area) and their quality often suffers. Find a local nursery and build a relationship with one that you respect their growing methods (hopefully organic).
  3. Get a permaculture consultation to help you determine what your site can handle. These can be done in person OR virtually.

There are many things to consider when putting fruit trees and berry bushes in the ground. Unfortunately, it’s not as easy as merely deciding what you like to eat and planting it. If you live in Michigan, no matter how much you like avocados, they just won’t survive without a heated greenhouse. Likewise, if you live in Florida, the traditional Haas avocado that you buy in the grocery store hates the humidity. So, there are other varieties that will do better in that region. Learning what does best in your area is an important step and also a lifelong journey. Enjoy that learning process.

Here are some important things to keep in mind when selecting species and planting your new food forest

  1. Understand the cold hardiness zone for where you live. More important than the higher temps, it’s critical to know your minimum temps. Freezing is generally more likely to harm a sensitive plant than higher temperatures. If you want to learn more about your growing zone, click here.
  2. Know your sun exposure. If your yard is mostly shade, you are unlikely to do well planting tree species that prefer full sun. Though a mis-planted tree may “survive”, it may not do well or produce fruit. Keep in mind that there is full sun and full shade in every USDA growing zone, so regardless of where you live – there is something that will grow and thrive on your site. Choose well and work in harmony with your site.
  3. Plant during the right season. Depending on where you live, the ideal time for planting fruit trees may GREATLY vary. Don’t assume that just because a nursery tells you to plant it that it is the ideal time to do so. Remember, their job is to get you the plant – it’s your job to steward it well.
  4. Understand the differences in varieties. Within each type of tree (peach, pear, mango, etc.) there are hundreds and even thousands of different varieties to choose from. A peach is simply NOT a peach. For example, those peaching grown in Georgia are bred for that specific growing zone and will not produce fruit in Central Florida. However, varieties of peaches like Tropic Beauty (our staff favorite), Tropic Snow, and Florida prince are bred to require less “chill hours”, so they will bare fruit much better in zone 9 and 10. Likewise, avocados have a WIDE range in their varieties. Some (like “Fantastic” or “Joey”) are cold hardy down to 15 degrees. Some avocados are better for slicing and dicing (like Winter Mexican or Wurtz), while other avocados are more ideal for guacamole (like Brogdon, Oro Negro, or Mexicola). The benefit of having someone to consult with is that you are more likely to get a variety that meets your preferences in flavor, but also one that will THRIVE on your particular site.
  5. Think in layers. Don’t just plant one height of trees all over the property. Think about creating production at various heights and levels. What can you grow as a root crop? A smaller perennial? A bush layer? A dwarf tree? Top story tree? Vine? By choosing to plant multiple layers in your system, you not only maximize your space, but create a scenario where various plants can work in synergy with one another. One might provide the needed shade for another. Or, better yet, one might actually fix atmospheric nitrogen into the soil to fertilize another plant.
New Food Forest Installation

Now, it’s time to get planting

  1. Plant away! Use something to suppress weeds. Apply compost. Layer up 4-6″ of wood chip mulch. For more in-depth planting instructions, CLICK HERE.
  2. Finish a smaller area before moving on to the next. This is one of the most common mistakes that new food foresters make… they want to just put the tree in the ground and walk away. However, one of the worst things you can do for your new tree is leave it to fight with the grass around the base. Cover the soil properly, using the method above and completely finish one area before moving on. This will not only give your tree its best chance at thriving, but it will also give you a sense of completion.
  3. Know when to water. There is no possible way to simply say, “water your plants three times a week.” Differences in heat, sun exposure, wind, and humidity all vary so much that it’s impossible to set a specific watering schedule. So, to know when to water, put your finger in the soil down to your big knuckle. If you feel moisture, do NOT water. Plants actually need to dry out between watering. This not only causes their roots to expand and grow deeper into the soil, but also helps prevent root rot.
  4. Maintain your food forest and garden by checking back on the blog for our free monthly To-Do Lists. We will help remind you when to fertilize, when to plant the next crops, and when to prune.

So, now that you’ve read the theories and have done some research – it’s time to get outside and plant. Remember, you can always find more help, information, and inspiration on our social media account.

See you in the Garden!

How to Select a Location for a Food Forest

food forest planning
Food forest planning

Knowing how to select the location for a food forest or perennial garden is possibly just as important as knowing what to plant. Before you start digging, take time to examine your site. Study. Watch. Learn from the environment around you. Take notes on some of the topics below to help you decide which location will be most suitable for your new food forest or perennial garden.

  1. Sun and soil requirements:  What pH will be needed for those plants?  How much organic matter exists on site already?  Does the site meet the sun requirements for the species selected?
  2. Identify precursor species:  Knowing what plants are already thriving will tell you about the site, soil, and environment.  For example, if there are a lot of dandelions or tap root plants, the soil is trying to rebuild minerals and nutrients.  If there are signs of plants with shallow, hair-hair-like roots, the soil may be trying to stabilize itself from erosion or drying out.  Do you see acid or alkaline loving plants growing native?  
  3. Space to grow and fill out:  Do the plants have room to thrive and have airflow at their mature size?  Do you have room to move among the plants or rows?  Do you need extra or protected space to make allowance for animals or livestock?
  4. Ease of watering:  Is there water access?  The first 30 days are often the most important as the plants establish, so you will want to have easy water access points.
  5. Ease of maintenance:  Is the area something that you frequently visit or drive by?  Is this area one that can be easily maintained or get tools and equipment to as needed?  Will you need truck or tractor access?
  6. What is the long-term use for this area?  Consider mapping out 3-5-10+ years.  Is your current use of the space preparing the site adequately for those goals?
  7. Ease of Harvesting:  Will you or others be able to quickly and successfully harvest?  Are there rows or adequate spacing between key areas?  Are 90% of the crops within arms reach?  Will you see and be able to easily use the crops you have planted when the harvest time arrives?


Three Foundations of Permaculture | Matthew Capps

permaculture destination addiction

Three Foundations of Permaculture

The word “permaculture” is a portmandeau word, which combines the sounds nad meanings of two distinct words, in order to create a new word. In this case, the words ‘permanent’ and ‘agriculture’ are blended to create a design system that utilizes the cultivation of earth and community in a way that brings about long-term abundance. Permaculturists, over the years, have identified three veins running through this central idea. The three foundations of permaculture have supplied life and provided boundaries to the wild growth of the permaculture movement over the past fifty years. These foundations are Earth Care, People Care, and Fair Share. Coined and popularized by David Holmgren, these foundations balance and invigorate each other, and are essential to the purpose and spirit of the practice.


The First Foundation: Earth Care

Earth Care is probably the most prominent and easily recognizable foundation of permaculture, but perhaps as little understood for the light of its popularity. People sometimes think of Earth Care as a secret method, or a set of strings to pull, that will unlock the wealth of the earth for human use. This is the antithesis of Earth Care, and a harmful mindset to carry. Earth Care is the unselfish cultivation of the planet, so that it may live and be abundant for its own sake. As stewards of this beautiful and intricate creation, we are responsible to bring it to fullness. First we study the design so masterfully laid in every aspect of the natural system, then we order and channel every element into that design until life and energy flow as they were meant to. Practitioners of permaculture design are not changing the trajectory of nature, but instead are helping it along the path to speed up bioremediation and the healing of the land.


people careThe Second Foundation: People Care

The second foundation of permaculture is the notion of People Care, which emphasizes personal wellness, physically and spiritually, and relational wellness between individuals. As with the first foundation, People Care is not interested with the indulgence of the body in excess or unhealthy food, but in eating which brings wellness and strength. In the same way, greed and pride are denied and the community is cultivated by a supernatural spirit of giving, love, and hope. These internal realities and codes of living help cultivate a mindset of wellness that impacts the minds, bodies, and spirits of the individuals. In such a community, independence and self-reliance are exchanged for responsibility and the willingness to help. This atmosphere of selfless service and goodwill provides for the long-term needs of individuals as well as the health of an interdependent community.


The Third Foundation: Fair Share

This third foundation puts boundaries in place, ensuring that the abundance produced by the first two foundations is not abused or misused. In many cases, kindly permaculturists give away most or all of their produce, and are forced to look beyond their own land for livelihood. Though well intended, it’s important for us to receive fair return on our labor. In other cases opportunists use the principles of permaculture to increase their own wealth, giving only when necessary, holding back from earth and man alike. Neither of these extremes is in line with permanent agriculture, because they destroy balance and cut off life and energy from a part of the system. The foundation of Fair Share is meant to ensure that the permaculturist retains just enough to meet his own needs, pay his workers, and sow the surplus back into the earth and the community. Fair share, however is not merely about financial or monetary gain, but also about the productive abundance that is sown back into the individuals participating.

The three foundations of permaculture are like elements in nature, are interdependent and from them flow all the designs and techniques within permaculture. It’s the goal of each of these elements to create a healthy and thriving community that cares for it’s residents and the land they dwell on. When properly in balance, it creates an environment conducive to health and wellness of people, land, and economy. The community, family, or individual who practices them will find fresh meaning and vigor in the pursuit of peaceful and productive life.