Mushroom hunting is something that many foragers and homesteaders want to try, but for some reason are put off by the fear of being poisoned. However, I would suggest that although mushroom identification can be challenging at first, there are a few species that are easy to identify, hard to miss, and have very few (if any) look a-likes. These species are great starting points for those who want to get starting in the mushroom world. Lion’s Mane, Chaga, Chicken of the Woods, Morel, and Oyster mushrooms are among some of these species that are both easy to identify and use. In this article, we’ll give you a step-by-step process of how to find and harvest chaga mushrooms. A later article (after ours have dried) will be created with tea and tincture recipes for chaga and a few bonus tips on how to use chaga in your coffee.
Health Benefits of Chaga – The King of Mushrooms
- Nutrient-dense superfood. …
- Slowing the aging process. …
- Lowering cholesterol. …
- Preventing and fighting cancer. …
- Lowering blood pressure. …
- Supporting the immune system. …
- Fighting inflammation. …
- Lowering blood sugar.
How to Find Chaga
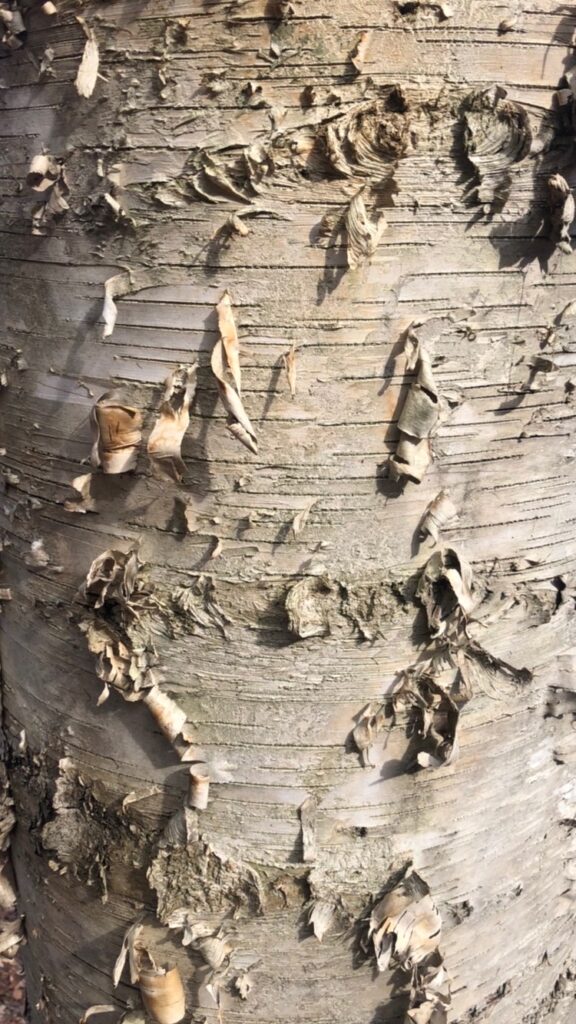
Step One: Find White Birch
Though chaga will grow on a varieties of trees, the most common is the white (or paper) birch tree (Betula papyrifera). In fact, when growing on this type of tree, the chaga mushroom is the only species that has this growth habit, so you don’t have to worry about mistaking it for another species. Often times, these species of trees grow in sandy soil near pine and oak trees. Because of the bright white bark pealing from the tree, they can be easily seen in the distance. The white bark also makes chaga easy to spot on the side of the trunk.
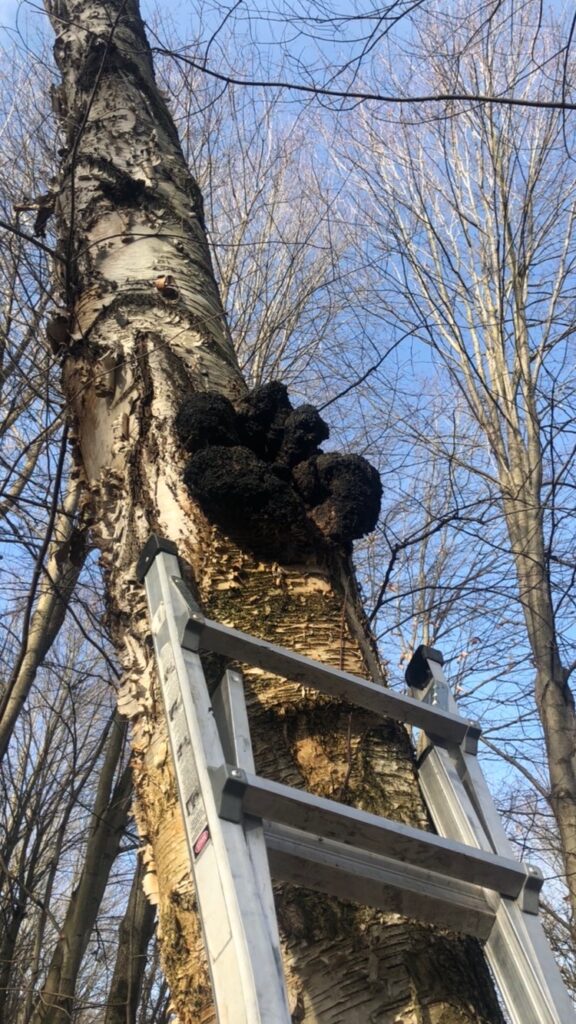
Step 2: Look Up
More often than not, chaga will grow 8-10′ or higher in the tree. When hunting, bring a ladder and leave it in the truck while you are looking. Then either mark the tree with bright ribbon OR by dropping a pin on your GPS. You have found a specimen, you can go back and get the ladder. Generally speaking, the larger and healthier species will be higher up in the tree, so be sure to bring a friend with you to help hold the ladder while harvesting. It’s also helpful to have someone to hand the chunks to as you cut them, so you don’t have to drop them on the ground.
How to Identify Chaga
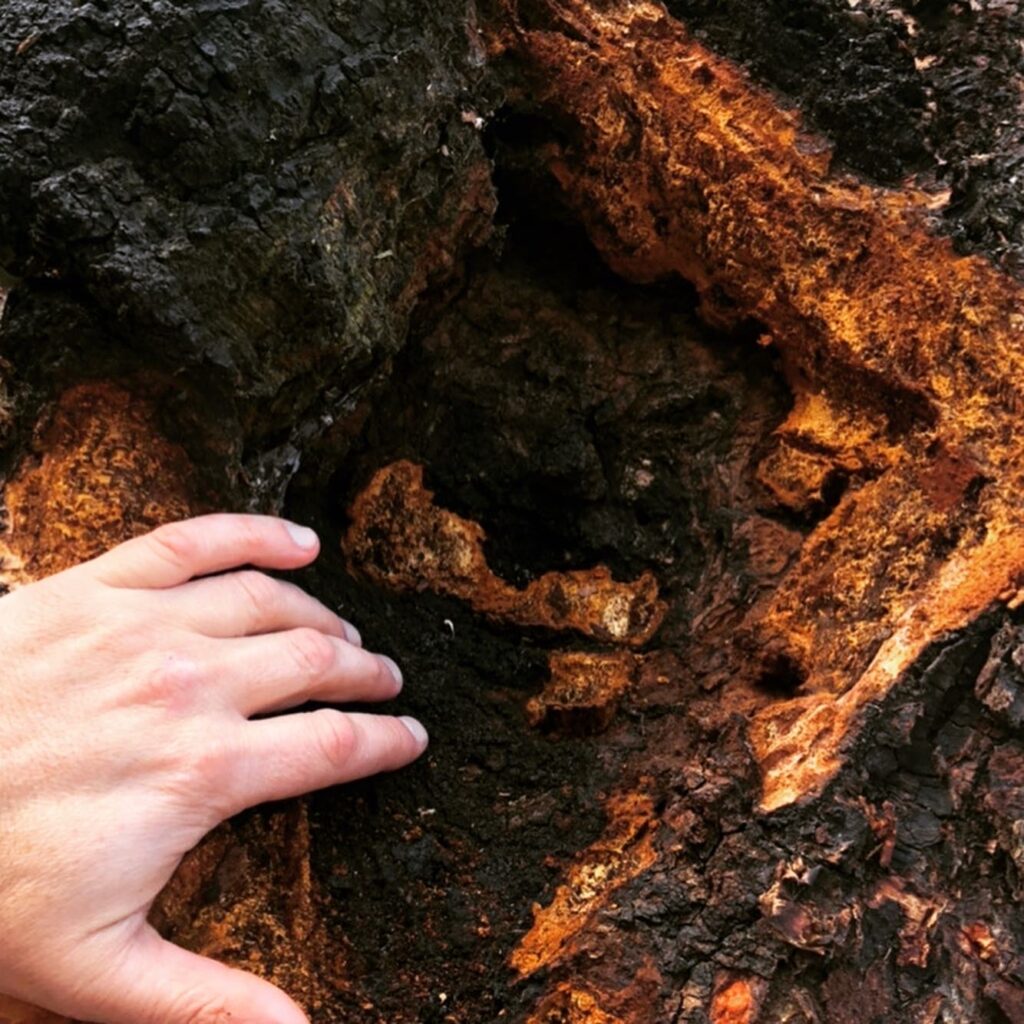
Step 3: Look for back and red
When you cut open the chaga, a healthy specimen will have a rough black exterior that resembles burned wood. The interior will have a red / burned orange umber. If the interior looks like wood and has rings, you have found a birch canker which is not edible. However, the black and umber coloring are your primary indicators for a healthy chaga specimen.
How to Harvest Chaga
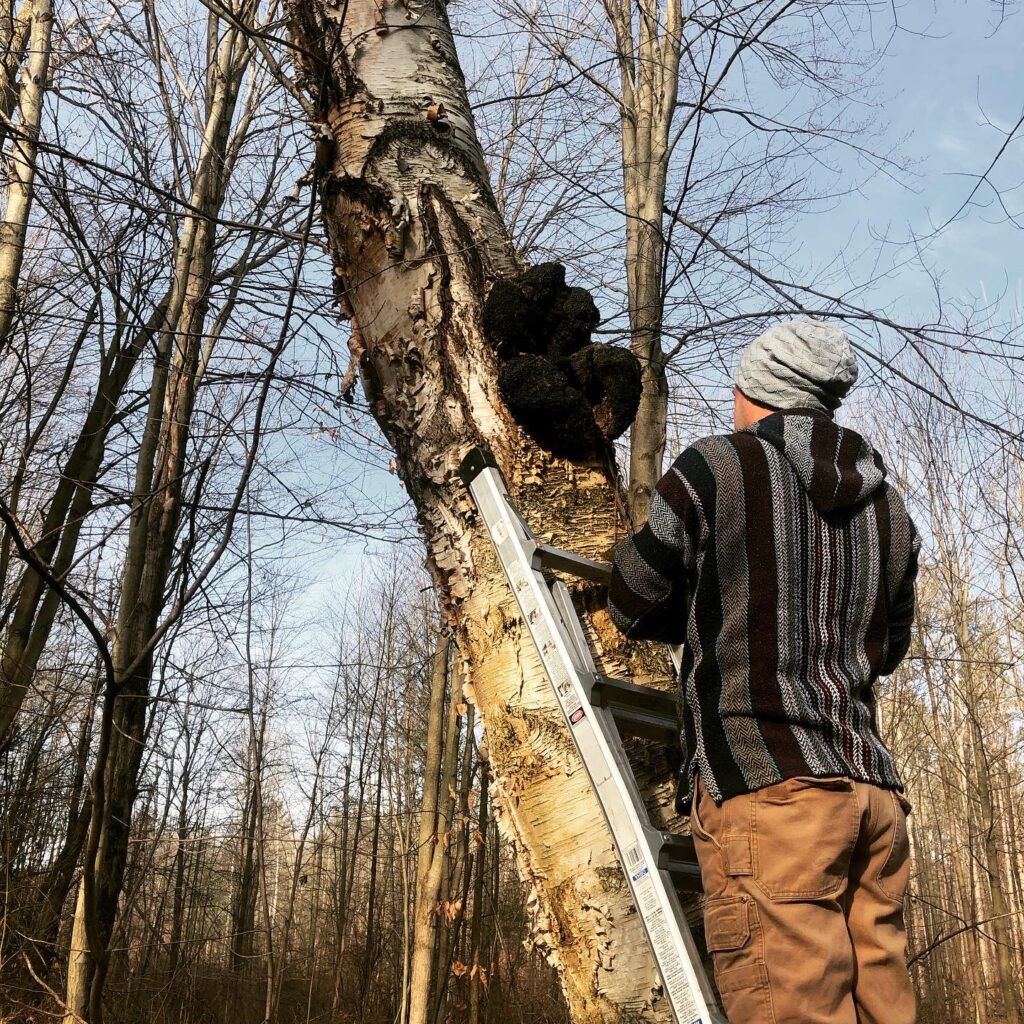
Step 4: Think about safety
It’s highly recommended to have two people harvesting chaga. One person to hold the ladder (preferably with a helmet and glasses) and a second person who is climbing and chopping. A safety helmet is wise, in case the axe is dropped during harvesting, and the eye protection is best for the person below because chaga tends to come off in hard chunks (with lots of dust).
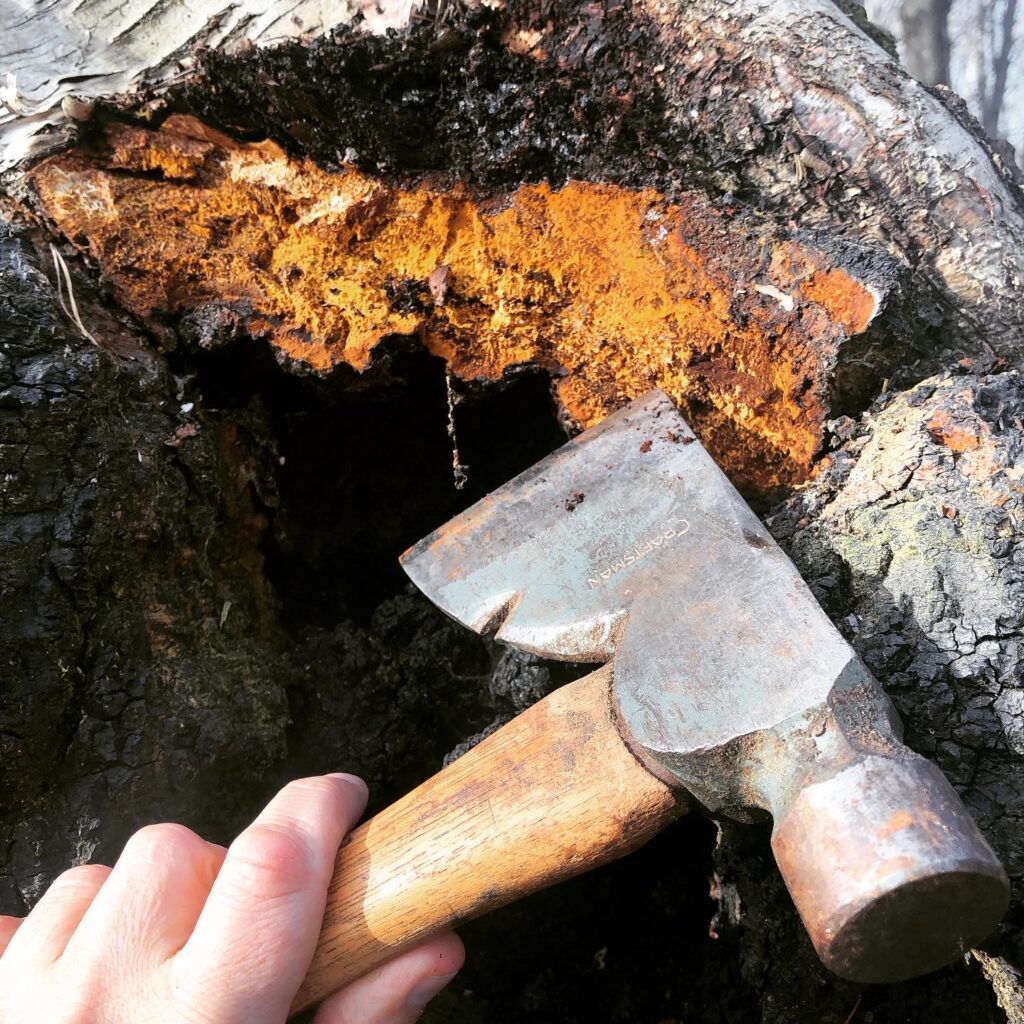
Step 5: Use a hand axe to remove
Chaga is nearly impossible to remove with just a knife. The black exterior is extremely hard and the high moisture content makes it like removing part of the tree itself. Use the axe to cut it off in manageable chunks. At this time, you’ll see the healthy and living red interior of the mushroom. Only remove <80% of the mushroom, as it may continue to grow in the years ahead. Often times, the same tree will produce more mushrooms.
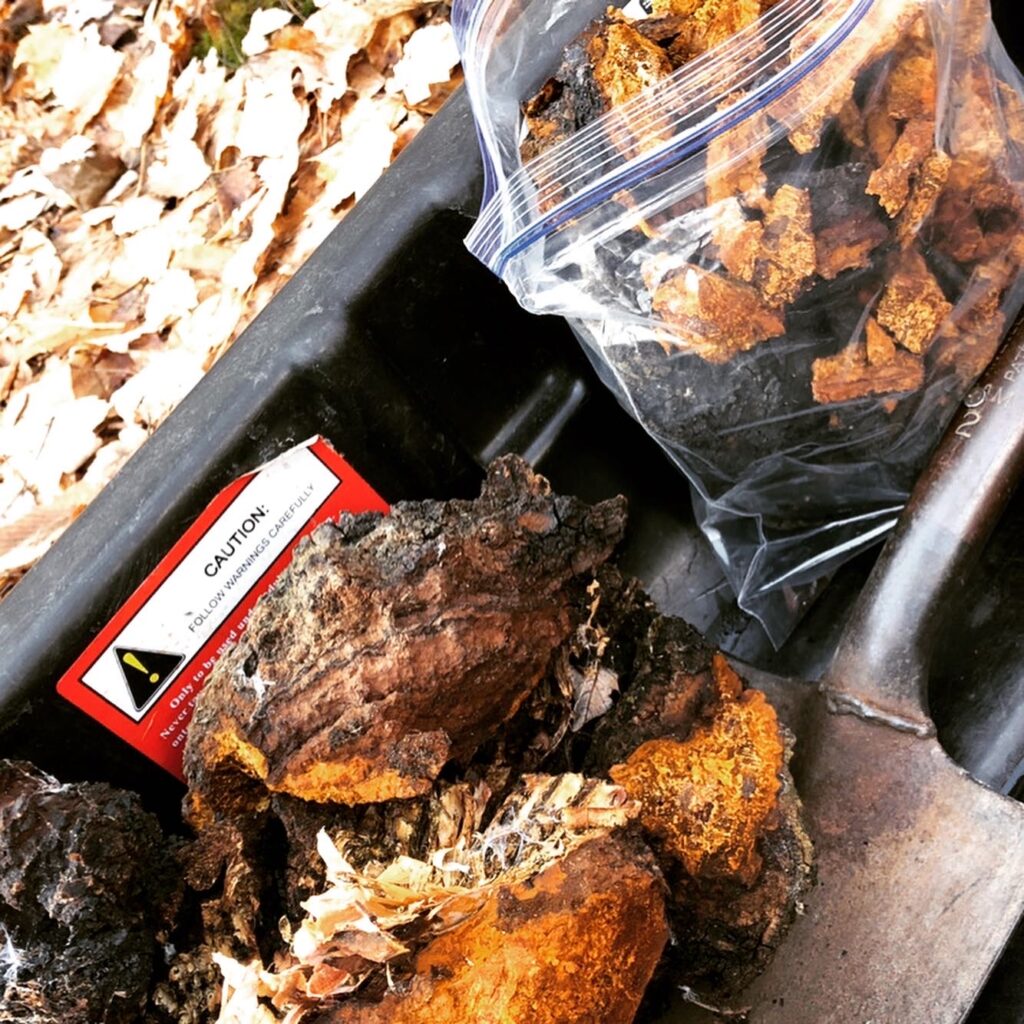
Step 6: Bag it up
As you harvest, because of the way chaga breaks free, you’ll have a variety of sized chunks. I try to bring a few gallon zip-lock bags for the smaller pieces, because I don’t want to waste any. In some cases, you can even bring a tarp for the base of the tree to help collect the smaller chunks as they fall. Don’t worry, if you miss any pieces, the wild turkeys will eat them and be thankful.
How to Prepare Chaga for Use and Storage
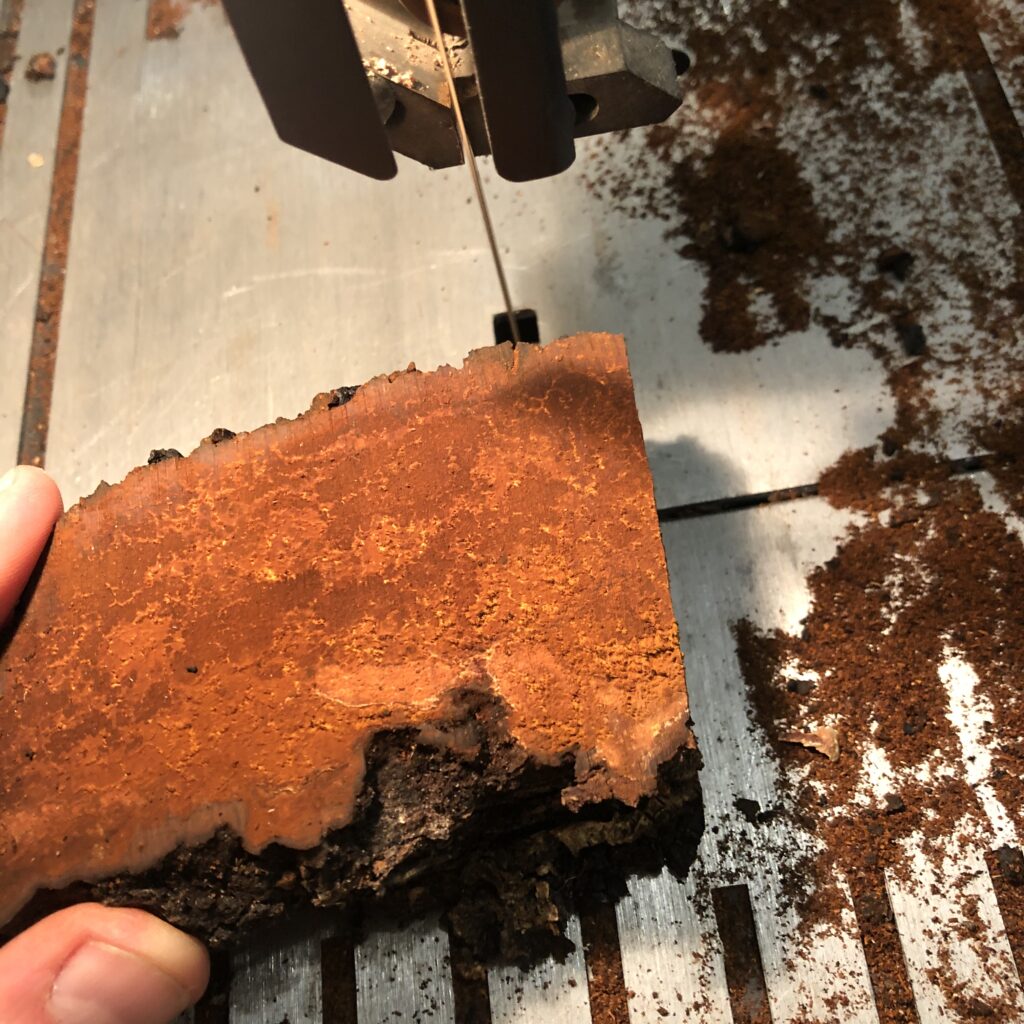
Step 7: Cut it up
Chaga has a very high moisture content, so it needs to dry well before consuming and storage. Using a band saw, cut the chaga into chunks about 1″ each. This is possible using a knife, but will likely dull the blade, because the black exterior of the mushroom is extremely hard.
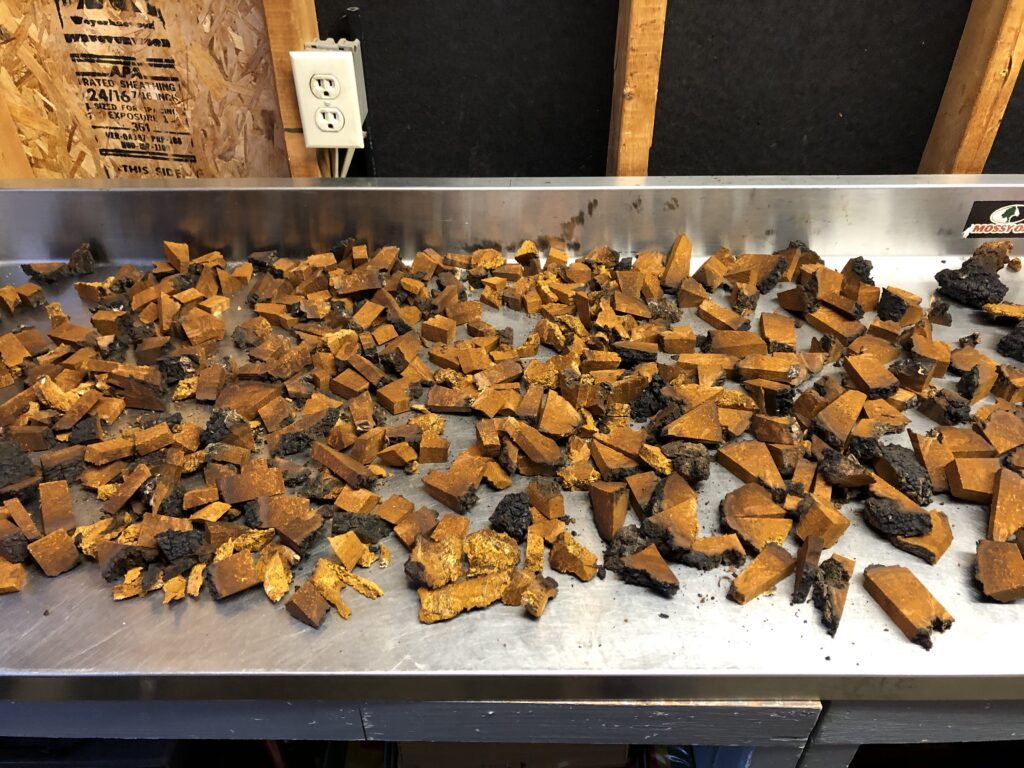
Step 8: Lay it out to dry
Chaga needs to dry for 6-8 weeks before storage and use. Spread your 1″ chunks out on a sterile surface and turn them weekly to help them dry on all sides. This step should be done in a warm, dry location (i.e. on top of a refrigerator). Once dried, chaga can be used and stored for years.
Your chaga mushroom is now ready for storage and use. There are many ways to incorporate chaga into your diet. In a later article, we’ll give you more tips on how to process, store, and use the chaga.
This is just one of the many topics that will be covered in our winter permaculture design certification course. For more information on this course or upcoming events, click here.

