December Gardening To-Do List for Zones 3-8

december garden calendar


December Gardening To-Do List

Even in the midst of our winter hibernation, there are still things we can be doing outside as we look back on fond memories of the last growing season. For those in a cold-temperate climate, the winter season offers us something unique – a time of planned rest. If you are from a warmer climate (USDA Zone 9-11, CLICK HERE for a list specific to subtropical climates).

Winter is a time of restoration, rejuvenation, and healing. It’s like a divine pause for us to reset. During this time there are still crucial things happening that our eyes don’t always see easily.

Sometimes though, we have to see more with our eyes closed than our eyes open.

Chickens and ducks are resting their bodies in order to restore nutrient levels after a busy laying season and fall feather molting. Fallen leaves and plants are decomposing and returning important nutrients to the soil. Fungal networks are expanding underground to strengthen the soil web. The cold is killing off bacteria and disease in the soil and helping with insect control. The roots of trees continue to grow deeper, even in depths of the winter months. Winter is indeed a time of unsung activity, but should also be a time of rest for you and your garden.

Here are the items we recommend adding to your December Gardening To-Do List.

In the Garden & Greenhouse

  • Continue cover the soil with organic matter. You can use chopped up leaves (i.e. picked up with the lawn mower), straw, compost, etc. Better yet, just use layers of each.
  • Continue to plant garlic or root crops (Jerusalem artichokes, strawberry root stock, etc.)
  • Remove any remaining dead plant matter from last year. Tomato wilt and fungal diseases can stay in the soil, if it doesn’t get cold enough over the winter.
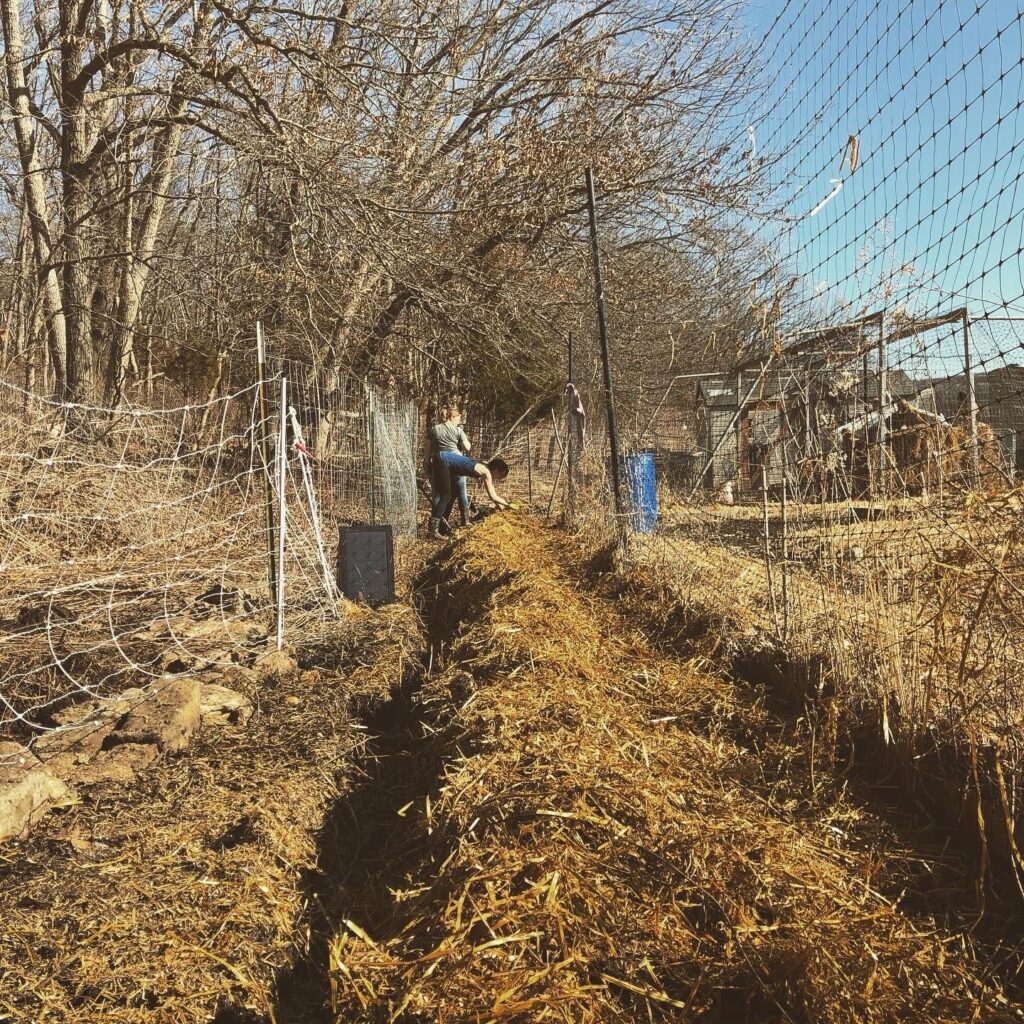
  • If you are preparing any new garden beds, you can cover the grassy areas with black tarps for the winter to start killing off the grass and weeds, so it’s easier to work in the spring.
  • Turn the compost pile every few weeks to keep things decomposing over the winter. Add an occasional bucket of water to keep moisture levels up, especially if there are a lot of leaves in the pile.
  • Plant seeds that need to be cold stratified (pawpaw, acorns, etc.)
  • Apply winter soil probiotic and microbial spray (I use a product called BioAg, which is produced in Kansas City, MO).
  • Test soil samples and begin making amendment plans for springtime.

In the Food Forest

  • Prune all fruit and nut trees, shrubs, and bushes. Remove branches that are preventing light from getting to other branches. Open and airy scaffold structure is best to promote fruiting.
  • Remove all rotten or hard fruit (still on the trees) and put in the compost pile.
  • Check for deer damage (eating branches, buck rubs, etc.) at least weekly. Save some deer bones from hunting season to make bone sauce for deer repellant (recipe coming soon). Pack the snow around the base of tree trunks to pack down vole and rodent tunnels.   TIP:  For Patreon members, there is a video class on how to prevent deer from eating your fruit trees for 10+ years.  
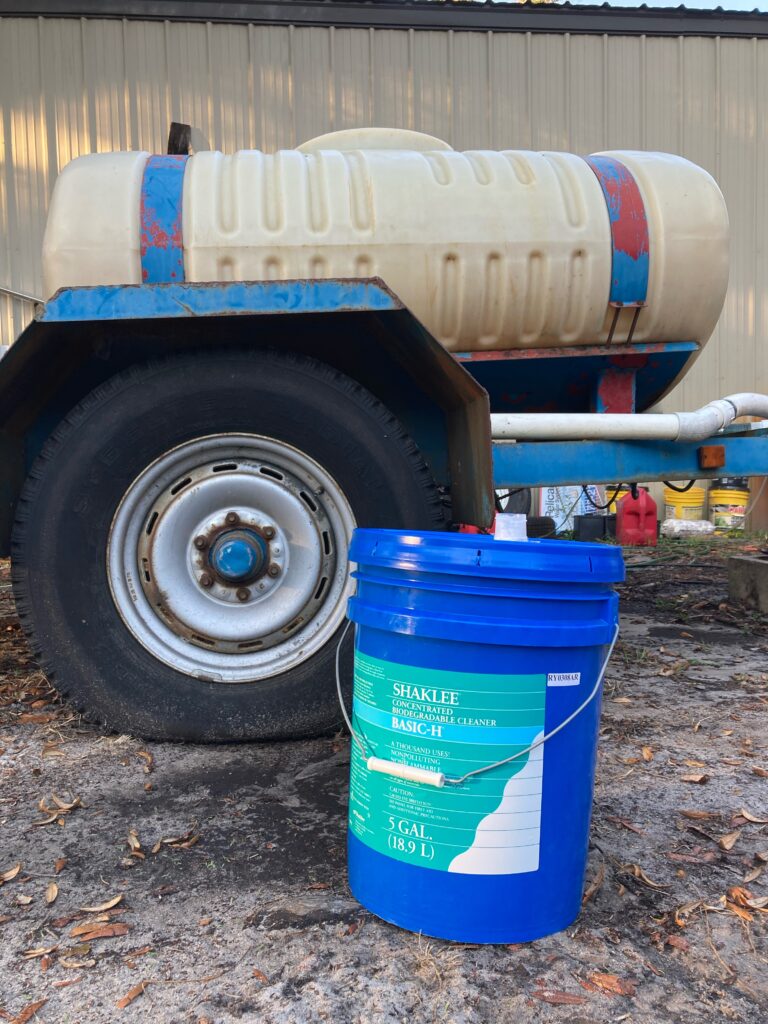
  • Order organic orchard supplies for the coming season – be sure to look for holiday sales! Include seaweed extract, BioAg, neem oil, Basic H (for all foliar applications), and fish emulsion.
  • Finish any winter mulching (wait for compost until spring, so you don’t add too much nitrogen now).
Winter Gardening List at BRFE
Blue River Forest Experience – Permaculture Property in Stillwell, KS that hosts after school programs for kids

In the Shed

  • Check mouse traps frequently. Add cotton balls with peppermint oil to deter rodents.
  • Finish oiling up any tools that got missed.
  • Look for online sales for any equipment that need to be replaced.

In the Chicken Coop

december chicken care
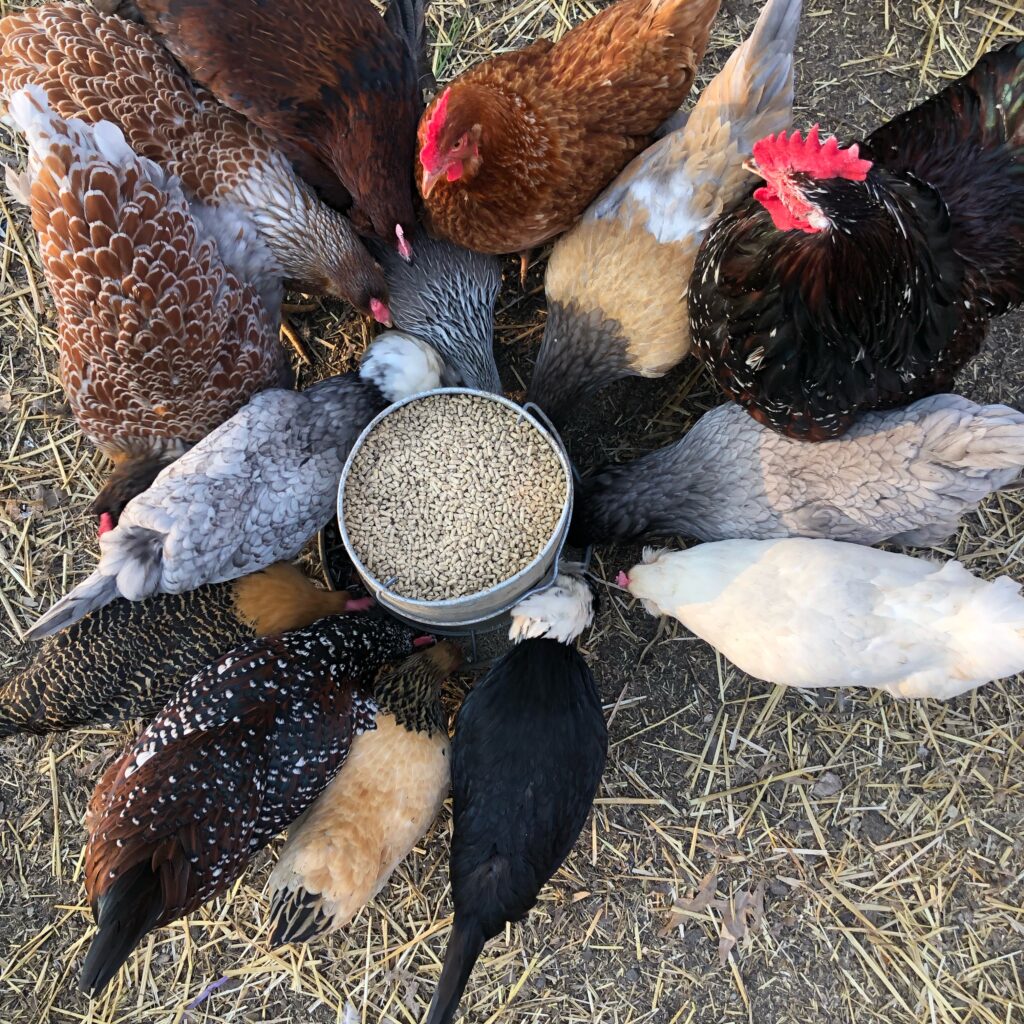
  • Feed extra protein (meal worms, black oiled sunflower seeds, bugs, etc.) to help them during their recovery season.
  • Do NOT use supplemental lighting to increase egg production. Chickens need this off season to let their bodies rest. Let them have a natural rhythm of rest too.
  • Add a small amount of corn or millet to their diet to help with caloric intake in the winter months. This helps keep them warm naturally. NEVER use heat lamps in a coop or run.
  • Purchase suet blocks (>5% protein) as you see them on sale. The fat content helps birds stay warm for the winter. (click here for more tips on keeping birds warm)
  • Rotate straw and bedding in the coop to keep things clean and sanitary.
  • Keep water unthawed
    • Use an electric water heater (OR)
    • Use two watering containers and bring them in at night / rotate them
    • Note: The salt water bottle in the container does NOT work outside of 1-2 degrees below freezing and only for a short time. This can work as an addition, but should not be your primary means of keeping water unthawed.
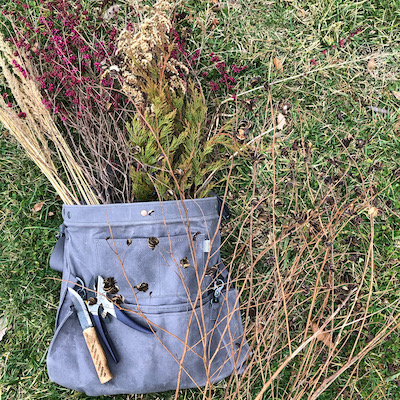
  • Add garden and flower bed cuttings to their run for them to “go through” and eat bugs and seeds before composting them.
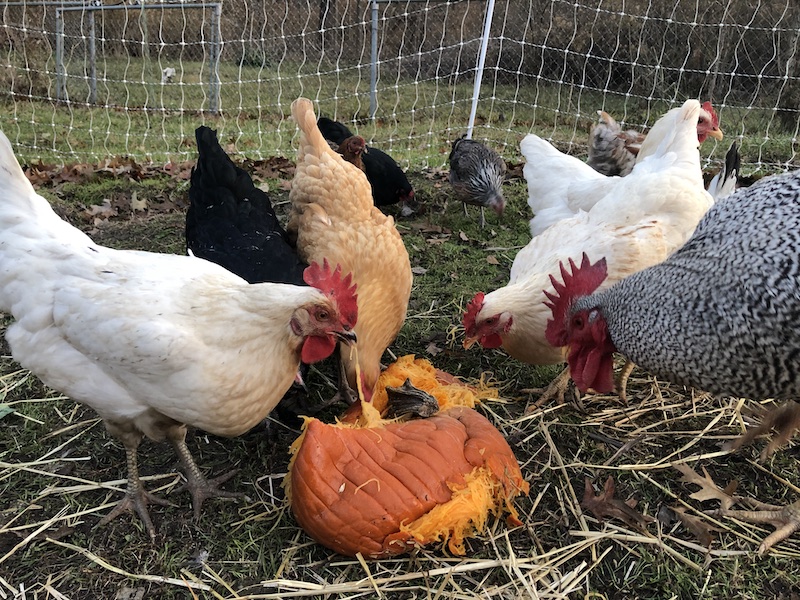
  • Feed spent pumpkin and squash (from fall decor) to chickens. It helps boost their immune systems and can be a preventative for worms. NOTE: Pumpkin seeds are NOT a proven treatment for worms, but a great as part of your preventative maintenance regime. You may need to break them open for the birds to get at the inner meat of the pumpkins.
  • Give healthy protein / omega 3 treats: One cheep way to do this is to go to a local pet store and get feeder fish (cheep minnows). Put them into a shallow tray (with a bit of water) and watch the birds catch them! You can also purchase live crickets from pet stores and feel them fresh veggies for a day or two. Feed several per day to your birds for a healthy winter treat.

Around the House & Perennial Beds

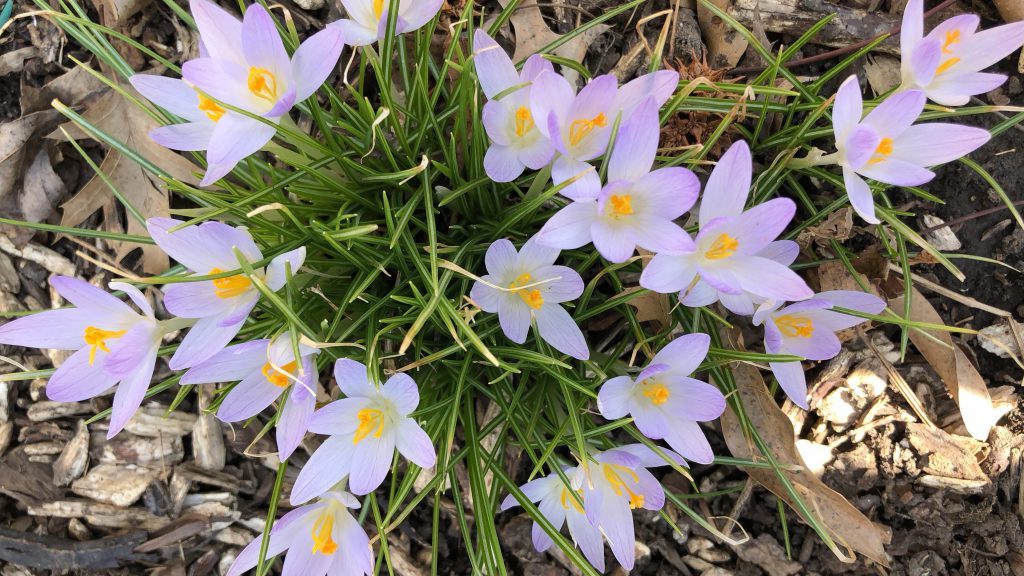
  • Continue to plant spring bulbs every time the soil thaws. This can be done all winter. Click here for some of our favorite bulbs to plant in the winter.
  • Pay attention to windows and address any drafts immediately. Older winters should have plastic over them (purchased at a local hardware store), which will help save $$ on heat bills. Pull blinds to keep heat inside at night and open them during the day to let natural light inside.
  • Water house plants carefully.
    • Only water them when you can put your finger in the soil and it feels dry up to your first knuckle (about 1″ deep). If the soil feels or looks damp – do NOT water.
    • Water in the sink until water runs out of the bottom, so you know the full root ball is saturated. Let it drain for a few minutes before returning to a sunny spot near a window.
    • Rotate plants every view days for even light distribution.

Winter Ideas for Kids

Natural winter decorations
  • Take nature walks on nice days.
    • Have kids look for interesting textures and shapes
    • Look for buck rubs or signs of animals
  • Put out bird feeders and make fun food treats for wildlife. Consider a natural Christmas tree outside for the birds with all edible ornaments and garland.
  • Visit a nature center or arboretum in your area and let the kids pick out a new house plant to take care of.
  • Attend a local gardening, mushroom, or permaculture event in your area.
  • Visit a local farm. Many offer family friendly activities.
  • Have kids help you pick out seeds for next year in the seed catalogues. Consider giving them their own section of the garden to plant in the spring. Involve them in the entire process of planning as well as planting and maintenance. It’s amazing the veggies kids will eat when they picked it out, planted it, and grew it themselves.

Time to Plan

During these winter months while the fruit trees and gardens are dormant, it’s the perfect time to plan for the spring. If you are interested in a personalized permaculture consultation for your property, we do both in-person visits to your site AND virtual visits (for those out of our area). CLICK HERE to learn more.

permaculture mentorship

Looking for On-Going Permaculture Mentorship?

As a subscriber to our Patreon, you will have access to our ever-growing library of permaculture videos, classes, and PDF resources.  This is a perfect opportunity to learn and grow at your own pace, while also having access to a knowledgable community of permaculture homesteaders. 

Patreon subscribers are also able to interact daily / weekly with Kris and his team, to receive mentorship and immediate consultation tidbits.   This membership is like having a permanent virtual homestead or farm consultant on speed-dial.   Consider joining us on Patreon or evening giving a subscription as a gift!  CLICK HERE TO GIFT A SUBSCRIPTION.    

Pro-tips:   To avoid App store fees, you can initially subscribe on the desktop version to save some extra money!  There are also FREE 7-day trial options available for some membership tiers. 

November Garden To-Do List for USDA Zones 9-11

November Garden Tasks

Home, Garden, & Food Forest To-Do List

Finally – the summer heat has ended and there are slightly cooler temps in the forecast.  While some fruit trees and berry bushes are finishing up their production, the annual vegetable garden is maturing and starting to produce.  In the cooler climates (USDA Zones 3-8), the gardening season is just ending, but here in the subtropical areas, we are just getting started.  If you are looking for the “November To-Do List” for USDA Zones 3-8, click here.

For those of you in USDA Zones 9-11… here is your November property to-do list.  Be sure to share it with friends on social media and let’s get out into the garden together!

In the Garden

  • Things to Plant by Seed:  radishes, turnips, beets, mustard greens, Swiss chard, collard greens, bok choy, komatsuna greens, kale, cabbage, broccoli, cauliflower, cosmos, zinnia, sunflowers, and onion sets.  
  • Harvest:  Greens, kale, tomatoes, peppers, eggplants, cucumbers, okra
  • Fall Tea:  Jamaican sorrel (Roselle) calyxes can be used for tea.  You can also use leaves from olives, moringa, Spanish needle, cranberry hibiscus, and lemon balm for refreshing teas and tisanes.  Enjoy these teas over ice and add organic raw honey from a local bee keeper.
  • Mulch:  Keep bare soil covered completely to prevent water evaporation and protect microorganisms.  Add a little more compost and wood chips around fruit trees and berry bushes (wood chips create a fungal dominated soil, which trees prefer).  Add another layer of straw around garden veggies, because straw creates a bacterially dominated soil, which is preferred by annual veggies.

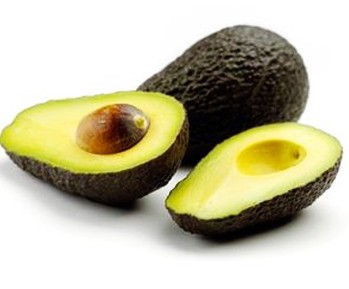
Winter Mexican Avocado is a late season cultivar. Ripens November through January.

In the Greenhouse

  • Start taking cuttings: cranberry hibiscus, roselle, surinam spinach, longevity spinach, etc. Save cuttings in a protected area for your “insurance policy” in case we have a hard winter.
  • Trees to plant: peach, plum, pear, nectarine, blueberry, elderberry, loquat, moringa, pecan, persimmon, black surinam cherry, yellow star cherry, etc. A Natural Farm, located in Central Florida has an incredible selection of certified organic fruit trees and berry bushes for Zones 8-11 and they actually ship nationwide.
  • Clean and sterilize equipment and unused pots
  • Set mouse traps to control critters in sheds and greenhouses
  • Hang up yellow jacket traps!
  • Remove your shade cloths on the greenhouse and have your solar tarps put back up.
  • Move orchids, vanilla, pandan, and other cold sensitive plants into the greenhouse

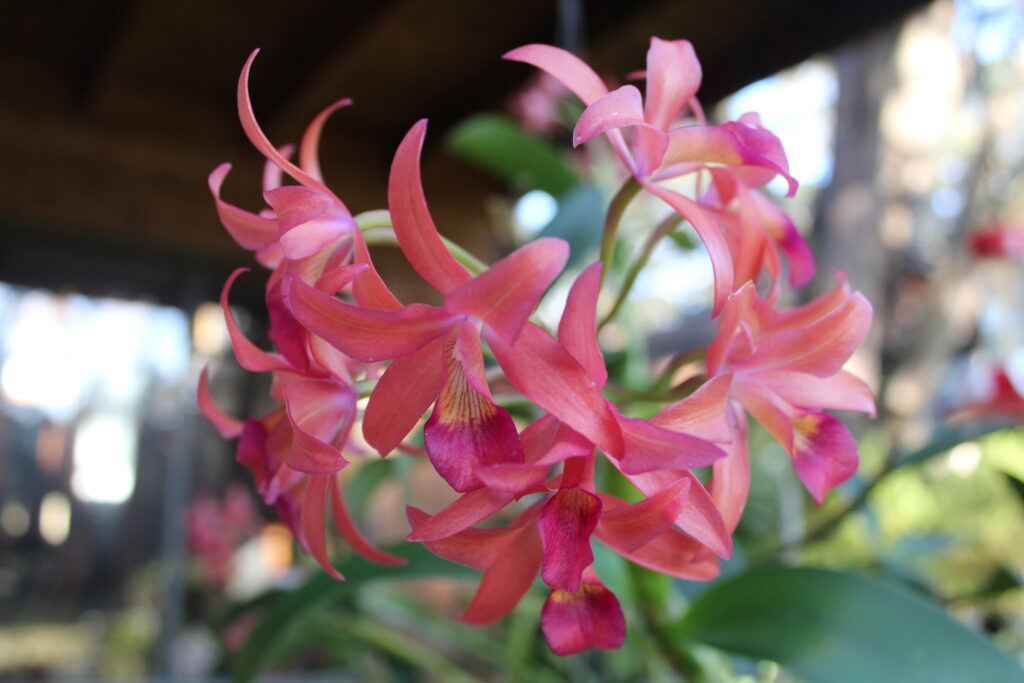
Time to start moving orchids indoors on cooler nights

In the Food Forest

  • Harvest Berries: dwarf ever-bearing mulberry, Barbados cherry, strawberry tree, etc.
  • Harvest ripe fruit: Sugar apple, star fruit (carambola), java plum, June plum, winter Mexican avocado, Apple cactus, dragon fruit, pineapples, Jaboticaba, persimmon, etc. Many varieties available online at A Natural Farm.
  • Plant cold hardy fruit trees: Peach, pear, plum, nectarine, blueberry, elderberry, tropical cherries, loquats, etc. Use our FREE GUIDE on “How to Plant a Fruit Tree or Berry Bush” as a quick tutorial.
  • Probiotic time! This is an excellent time to refresh the probiotic in your soil, spray fruit trees, berry bushes, and help activate compost piles before winter. We recommend using BioAg
  • Mulch: Apply mulch / wood-chips around the base of fruit trees. Keep the wood chips away from the base of the tree, because if they touch the trunk it can cause rot or bacterial issues. Wood chips will encourage mycorrhizal activity and strengthen the root system.
  • Chop & Drop: Time to harvest the last of the moringa, legumes, and pigeon pea for chop-and-drop. Chop and drop your pigeon peas and Mexican sunflowers.
  • Watch for fungal issues on leaves and apply organic neem spray as needed. This time of year with cool air and moisture, fungal issues can pop-up overnight. Trees that are the most susceptible: sugar apple, sour sop, June plum, kratom, ginger, and coffee.
  • Bananas: leave all the dead leaves around the truck for winter insulation. Do not cut the dead matter back until Easter.
  • Hold off on fertilizing and composting until late February. Focus on mulch. Plants need to focus this time of year on root growth and hardening off (instead of new foliage growth).
  • Pastures: Plant wildflower seeds (in small batches) to make use of the last of the rainy season. Plant black oats, winter wheat, daikon radish, turnips, clover mix, and sunflowers.
  • TIP: When your neighbors rake their leaves and do their fall yard clean-up, ask for the bags of leaf litter (usually out at the road) to add to your compost pile. That’s free organic matter to help build your soil! Their trash is your treasure.

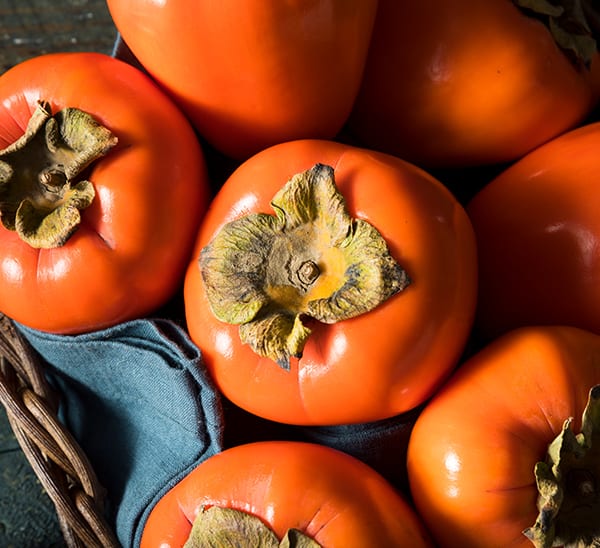
Persimmon are best when fully ripe or after falling from the tree.

In the Shed

  • Use SeaFoam in each power tool to help clean things out a bit.  After heavy summer use, give power tools a quick check (oil, air filters, and clean off exteriors). 
  • Check mouse traps and keep animal feed in sealed containers.
  • Give cutting tools a good cleaning (using rubbing alcohol) and oil afterwards to prevent rust.
  • Check for holes in the walls or along the floor to prevent mice from entering over the winter. Fill or patch accordingly.
  • Bleach all storage containers to sterilize them for the winter.
  • Plug in ultrasonic mouse deterrents to prevent nesting during winter months.

In the Chicken Coop

  • Chickens:  Feed extra protein, omega-3 fatty acids, and B-vitamins this month. Birds are finishing with their fall molting season, so they need the extra boost to help replenish their feathers and energy reserves. You can help them out by feeding them live minnows, meal worms, canned tuna, etc.
  • Quail:  Mix apple cider vinegar and honey with their water once a week. Pick fresh flowers and grass seed heads to put inside their coop and nesting area. This is a great time to provide supplemental protein using meal worms and small crickets.
  • Coop clean out: On a sunny day with a breeze, clean out the coop in the morning. Use Basic H organic cleaner and spray everything out. Leave the coop open all day to dry it out with good airflow. Clean out all waterers and feeders using a bleach solution.
  • Add wood ash to the dustbath to help prevent and treat lice and mites.
  • Add BioLiveStock (probiotics) to all animal waterers this month to help their microbiome and gut health as they enter the winter months.
  • Plant winter cover crops on previously foraged areas: clover, radish, turnip, sorghum, sunflower, and lezpedeza.
  • Feed spent pumpkins and fall gourds to the chickens and goats. They might need to be cut open first, but this highly nutritious snack is perfect for the barnyard friends!
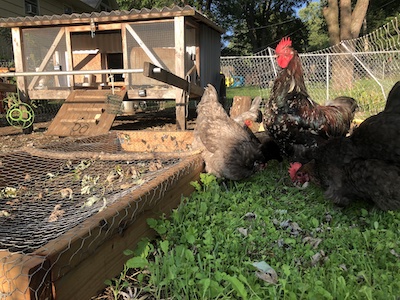
Chickens eating a ground cover of wheatgrass, radish, and clover.

Around the House

  • Open up the windows on cooler days to help air out the house and let in fresh air
  • Check batteries in smoke alarms and carbon monoxide detectors
  • Wash windows (inside and out). Use a product like “Invisible Glass” to avoid streaks.
  • Spray tire shine and protectant on vehicle and trailer tires to prevent winter damage
  • Stop fertilization from November – February on all house plants (especially nitrogen). Instead, use kelp to help stimulate uptake of remaining minerals and stimulate root growth.
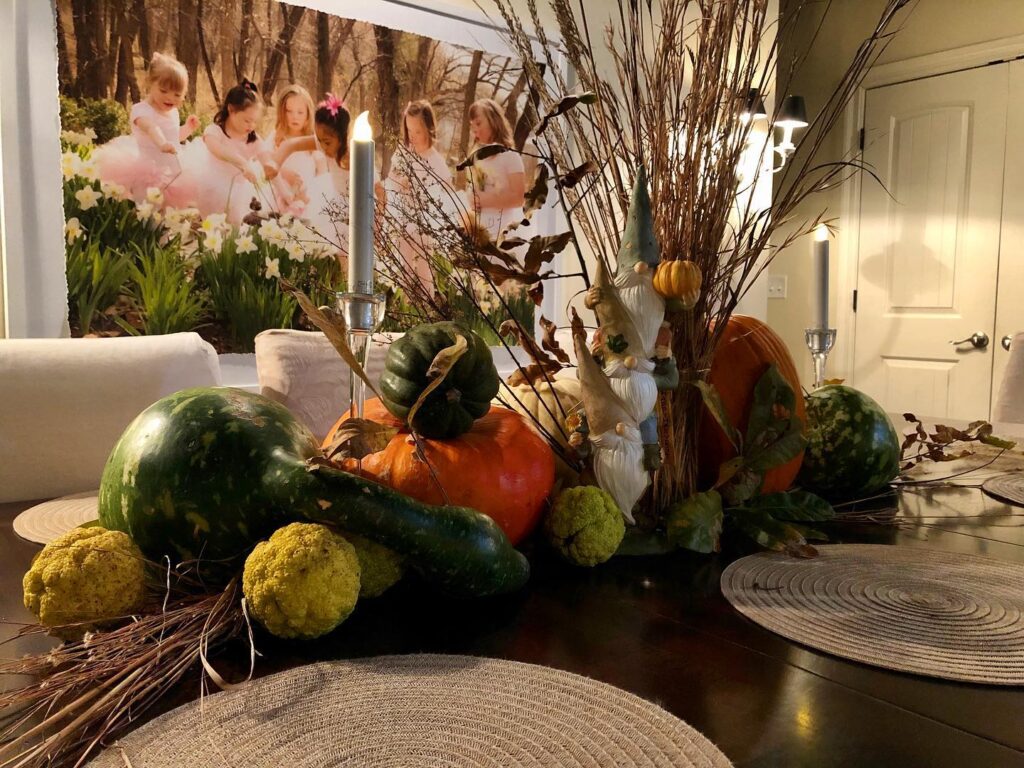
Bring gourds, pumpkins, and squash indoors are “store” on your table as an edible decoration until you are ready to eat them. Collect dried grasses and branches while out on nature walks, but always ask for permission if you don’t own the land yourself.

In the Perennial Flower Beds

  • Dead-heading: Only cut back perennials with “soft stems” that will rot over the winter. Leave as many seed heads and spent flowers as you can for winter homes for insects and food sources for wild birds. Wait until early spring to cut them back.
  • Cut back any spent annual flowers and keep planting winter flowers (pansies, snapdragons, violas, cosmos, zinnia, etc.)
  • Take cuttings of cassava, Mexican Sunflower, chaya, etc. Store indoors OR start them in a protected porch.
  • Add extra wood chips to areas that are in full sun in order to protect soil health and microbial activity
  • Before a rainy day, add probiotics to your soil for the winter months. This is a great way to help balance out nematodes in the soil, build soil structure, and improve overall soil health. You can purchase organic products like BioAG (that’s what we have used for over a decade), which will store on the shelf for years and has a fantastic probiotic blend.

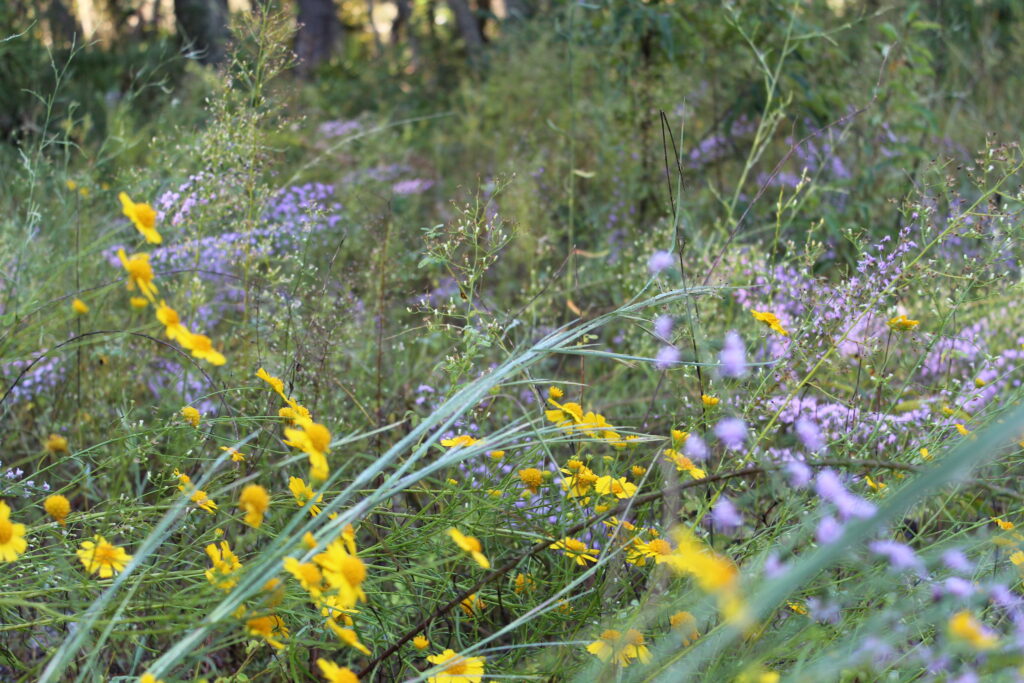
Fall is a great time to plant native wild flower seed mixes

If this list was helpful to you, consider sharing it on social media or sending to friends who may benefit from it as well.

See you in the Garden!


permaculture mentorship

Looking for On-Going Permaculture Mentorship?

As a subscriber to our Patreon, you will have access to our ever-growing library of permaculture videos, classes, and PDF resources.  This is a perfect opportunity to learn and grow at your own pace, while also having access to a knowledgable community of permaculture homesteaders. 

Patreon subscribers are also able to interact daily / weekly with Kris and his team, to receive mentorship and immediate consultation tidbits.   This membership is like having a permanent virtual homestead or farm consultant on speed-dial.   Consider joining us on Patreon or evening giving a subscription as a gift!  CLICK HERE TO GIFT A SUBSCRIPTION.    

Pro-tips:   To avoid App store fees, you can initially subscribe on the desktop version to save some extra money!  There are also FREE 7-day trial options available for some membership tiers. 

November Garden To-Do List for USDA Zones 3-8

November Garden Tasks


The outdoor air is now officially crisp and has the smell of autumn.  The mornings require jackets and scarves, and the evenings are perfect for snuggling under a blanket next to a campfire.  It’s time to finish cleaning up from the growing season and get ready for winter rest and winter planning.  This November Garden To-Do List is geared toward those in cooler climate areas (USDA Zones 3-8), but if you are looking for a list for this month for USDA Growing Zones 9-11, CLICK HERE.

For those of you enjoying “true fall”… here is your November property to-do list.  Be sure to share it with friends on social media and let’s get out into the garden together!

In the Garden

  • Things to Plant by Seed:  Garlic and spring bulbs.  For a list of what you can do all winter for spring bulbs…click here.  
  • Harvest:  The last of the winter veggies… kale, cabbage, fall turnips, Swiss chard, and greens.
  • Mulch:  It’s time to cover those gardens for the winter.  NEVER leave soil exposed to the winter elements in the garden, food forest, or flower beds.  Add wood chips around fruit trees and berry bushes (wood chips create a fungal dominated soil, which trees prefer).  Keep the chips away from the stems and trucks though.   Add another layer of straw around garden veggies (and spent garden beds), because straw creates a bacterially dominated soil, which is preferred by annual veggies.  These will decompose slowly over the winter and make things nice and rich for you in the springtime. 
November Garden Calendar
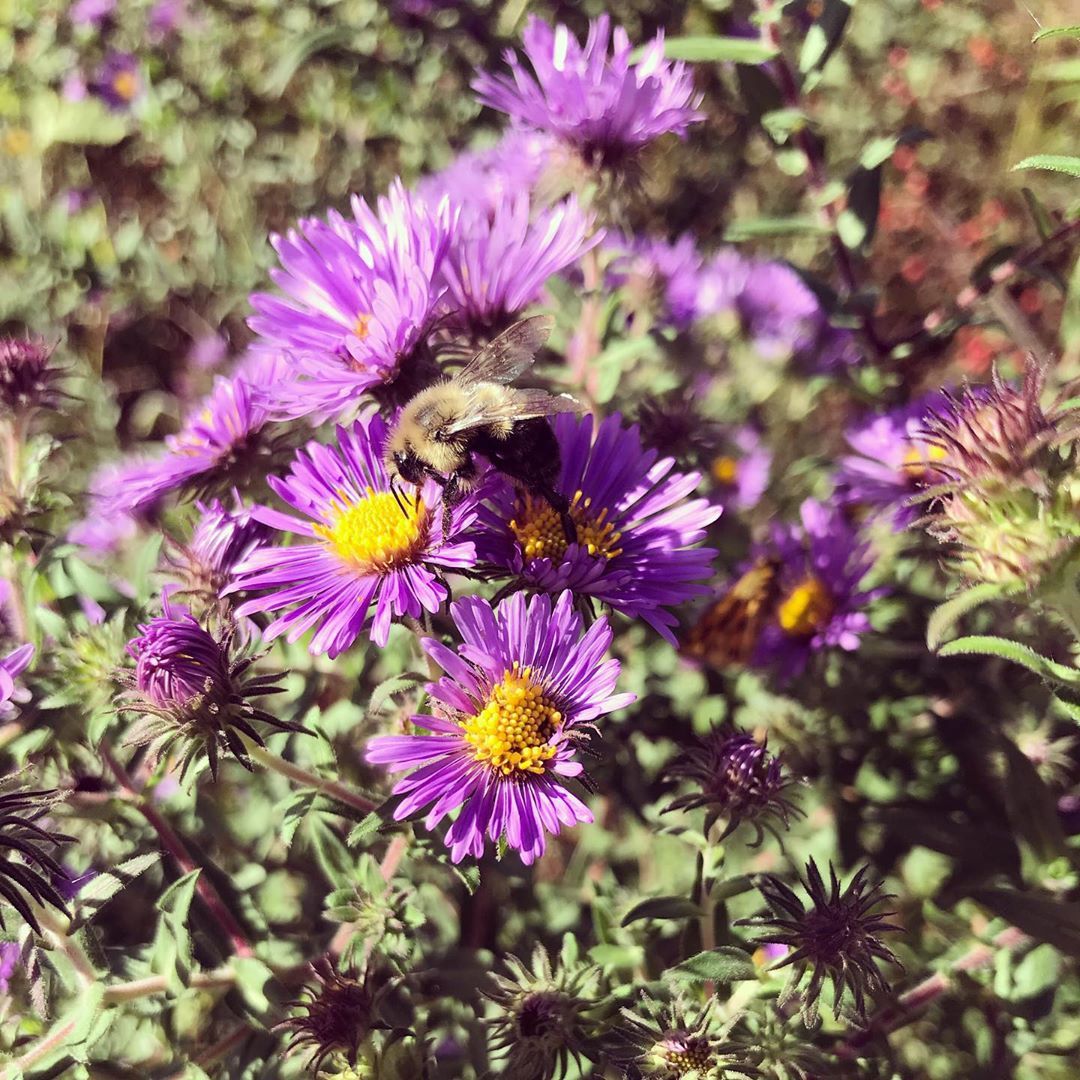
Elliot’s Aster

Enjoy the last blooms of the native asters before they go into dormancy. Save seed to spread other places too!

In the Greenhouse

  • Start taking cuttings: If you are planting in the ground, it’s time to start greens like radishes, turnips, and beets. If you are planting in raised beds or tray in the green house, you can do much of the same and even microgreens!
  • Clean and sterilize equipment and unused pots
  • Store pots in a shed or garage with cardboard between them to prevent winter cracking
  • Set mouse traps to control critters in sheds and greenhouses
  • Stop fertilizing all houseplants until spring

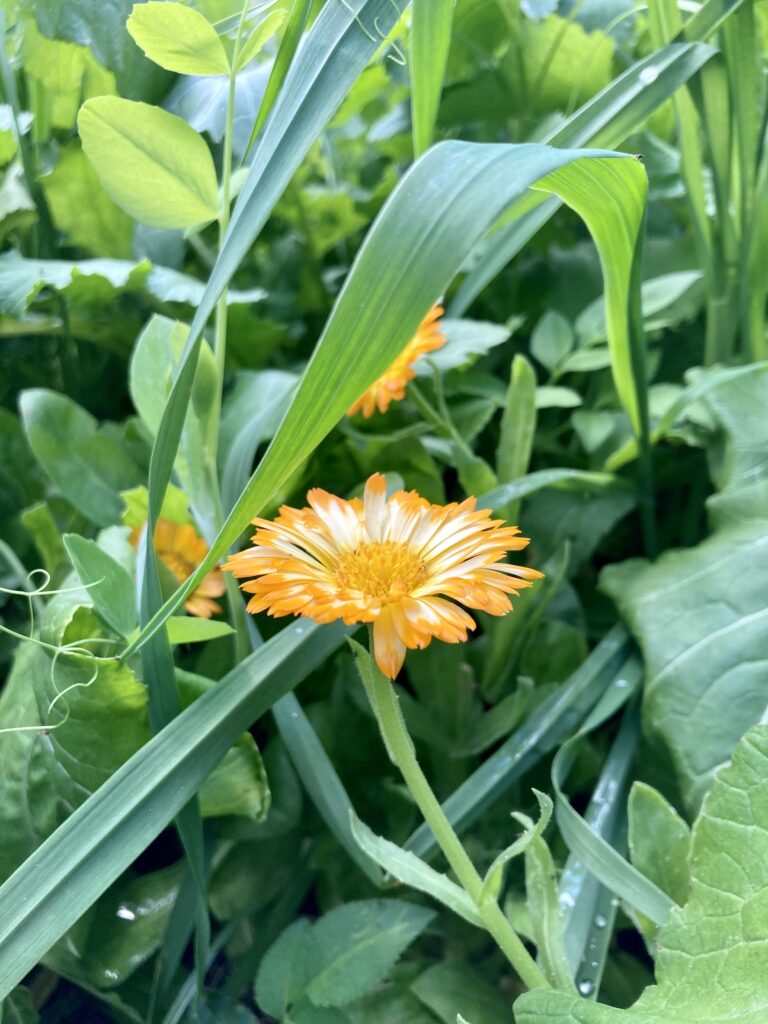
Cold season flowers and cover crops can be grown in the greenhouse or poly-tunnel all winter long! This calendula pic was from December in Kansas.

In the Food Forest

  • Harvest ripe fruit: Persimmon, last of the paw paw, acorns, nuts, and other final forest gifts.
  • Plant cold hardy fruit trees: Peach, plum, pear, nectarine, blueberry, elderberry, goji berry, lingonberry, aronia berry, hazelnut, pecan, persimmon, and appleUse our FREE GUIDE on “How to Plant a Fruit Tree or Berry Bush” as a quick tutorial.
  • Probiotic time! This is an excellent time to refresh the probiotic in your soil, spray fruit trees, berry bushes, and help activate compost piles before winter. We recommend using BioAg, by SCDProbiotics.
  • Mulch: Apply mulch / wood-chips around the base of fruit trees. Keep the wood chips away from the base of the tree, because if they touch the trunk it can cause rot or bacterial issues. Wood chips will encourage mycorrhizal activity and strengthen the root system.
  • Chop & Drop: Time to harvest the last of the legume trees (honeysuckle, Japanese pagoda, Siberian pea, Russian Olive, etc.) and drop them at the base of your fruit trees.
  • 1 and apply organic neem spray as needed. This time of year with cool air and moisture, fungal issues can pop-up overnight, so a nice fall application can help prevent this damage over the winter months.
  • Pastures: Sow wildflower seeds to improve pasture health.
  • TIP: When your neighbors rake their leaves and do their fall yard clean-up, ask for the bags of leaf litter (usually out at the road) to add to your compost pile. That’s free organic matter to help build your soil! Their trash is your treasure.

Persimmon are best when fully ripe or after falling from the tree.

In the Shed

  • Use SeaFoam in each power tool to help clean things out a bit before fall storage.  After heavy fall use, give power tools a quick check (oil, air filters, and clean off exteriors). 
  • Check mouse traps and keep animal feed in sealed containers.
  • Give cutting tools a good cleaning (using rubbing alcohol) and oil afterwards to prevent rust while they are stored for the winter.
  • Check for holes in the walls or along the floor to prevent mice from entering over the winter. Fill or patch accordingly.
  • Bleach all storage containers to sterilize them for the winter.
  • Plug in ultrasonic mouse deterrents to prevent nesting during winter months.

Animals, Poultry, and Livestock

  • Chickens:  Feed extra protein, omega-3 fatty acids, and B-vitamins this month. Birds are finishing with their fall molting season, so they need the extra boost to help replenish their feathers and energy reserves. You can help them out by feeding them live minnows, meal worms, canned tuna, etc. Do NOT heat your coops over the winter. Instead, follow this guide on “How to Help Chickens Stay Warm in the Winter.
  • Quail:  Mix apple cider vinegar and honey with their water once a week. Pick fresh flowers and grass seed heads to put inside their coop and nesting area. This is a great time to provide supplemental protein using meal worms and small crickets.
  • Add wood ash to the dustbath to help prevent and treat lice and mites.
  • Add BioLiveStock (probiotics) to all animal waterers this month to help their microbiome and gut health as they enter the winter months.
  • Feed spent pumpkins and fall gourds to the chickens and goats. They might need to be cut open first, but this highly nutritious snack is perfect for the barnyard friends!
Chickens eating a ground cover of wheatgrass, radish, and clover.

Around the House

  • Open up the windows on warmer days to help air out the house and let in fresh air
  • Check batteries in smoke alarms and carbon monoxide detectors
  • Have chimney cleaned and inspected before starting for the first time in the winter
  • Spray tire shine and protectant on vehicle and trailer tires to prevent winter damage
  • Slow down or stop fertilization from November – February (especially nitrogen) on all house plants. Instead, use kelp to help stimulate uptake of remaining minerals and stimulate root growth.
Bring gourds, pumpkins, and squash indoors are “store” on your table as an edible decoration until you are ready to eat them. Collect dried grasses and branches while out on nature walks, but always ask for permission if you don’t own the land yourself.

In the Perennial Flower Beds

  • Dead-heading: Only cut back perennials with “soft stems” that will rot over the winter. Leave as many seed heads and spent flowers as you can for winter homes for insects and food sources for wild birds. Wait until early spring to cut them back.
  • Add extra wood chips to areas that are in full sun in order to protect soil health and microbial activity
  • Before a rainy day, add probiotics to your soil for the winter months. This is a great way to help balance out nematodes in the soil, build soil structure, and improve overall soil health. You can purchase organic products like BioAG (that’s what we have used for over a decade), which will store on the shelf for years and has a fantastic probiotic blend.

Fall is a great time to plant native wild flower seed mixes!

If this list was helpful to you, consider sharing it on social media or sending to friends who may benefit from it as well.

Looking for On-Going Permaculture Mentorship?

permaculture mentorship

As a subscriber to our Patreon, you will have access to our ever-growing library of permaculture videos, classes, and PDF resources.  This is a perfect opportunity to learn and grow at your own pace, while also having access to a knowledgable community of permaculture homesteaders. 

Patreon subscribers are also able to interact daily / weekly with Kris and his team, to receive mentorship and immediate consultation tidbits.   This membership is like having a permanent virtual homestead or farm consultant on speed-dial.   Consider joining us on Patreon or evening giving a subscription as a gift!  CLICK HERE TO GIFT A SUBSCRIPTION.    

Pro-tips:   To avoid App store fees, you can initially subscribe on the desktop version to save some extra money!  There are also FREE 7-day trial options available for some membership tiers. 

October Gardening To-Do List for Zones 3-8

october gardening to do list

The air is changing, the leaves have started to turn, and the smell of apple cider beckons me. The farmer’s markets have gotten out their pumpkins, squash, and corn stalks and I find myself cramming as many as I possibly can inside my little car. The way I see it is that when I buy more pumpkins, it’s not only decoration… but also food! I get to enjoy some of them and then the remainder go out to the chickens, so I have decided that this year I am not going to show any restraint in my pumpkin buying.

Aside from decorating though, there is plenty to do outside to prepare for the fast approaching colder months.

Blue River Forest Experience in Overland Park, KS

Here is a list of things you should be doing in your yard in the month of October. Pay attention to the garden, house, shed, orchard, animals, and of course… the kiddos! This is your October Gardening To-Do list for Zones 3-8. For a list specific to USDA Growing Zones 9-11, click here.

In the garden

  • Harvest late season veggies that you planted in August, including: kale, lettuce, cucumbers, Swiss chard, brassicas, etc.
  • Harvest and process the last of your late summer veggies (especially nightshades) like tomatoes, eggplants, peppers, etc. Watch the weather carefully for early frosts, so you can cover plants with sheets or poly-tunnels to extend your growing season.
  • Harvest and dry herbs (rosemary, holy basil, oregano, etc.)
  • Plant garlic for next year.
  • Save seeds and store in a cool, dry place.
  • Store winter veggies like squash and pumpkins.
  • Plant cover crop mixes for the winter (clover, legumes, vetch, winter wheat, etc) OR cover your soil with 4-6″ of straw or wood chips. Never leave garden soil exposed to the elements, especially in the winter.
  • Apply fall probiotic spray (I use BioAg by SCD Probiotics) to all gardens, flower beds, and orchard soil. I use this both as a foliar and soil spray to help keep microflora healthy and the soil biome in pristine condition.
  • Test garden soil and make fall amendments. As a general rule, this time of year is the most ideal for adding a LIGHT layer of compost (you don’t want to stimulate new growth), and for spreading wood chips and mulch.
BioAg Probiotic Concentrate

In the Greenhouse

  • Plant another round of: kale, cabbage, Swiss chard, radishes, diakon, mixed greens, snow peas, etc.  This is expecially important if you are growing veg in your greenhouse or polytunnel over the winter. 
  • Plant seeds that need winter stratification, like Paw Paw or Chestnut, so they get a jumpstart in the springtime.
  • Bring all outdoor pots inside the greenhouse to extend growing season.
  • Start cleaning tools. All metal should to cleaned with steel wool and then rubbed down with oil to protect them over the winter. Store in a dry place to prevent rusting.  OR you can store in an oil / sand bucket.  There is a new video on this in Patreon.  
October Gardening To-Do List | Plant Diakon Radishes

In the Food Forest

  • Harvest apples, paw paw, persimmons, blackberries, and any remaining fruit.
  • Spray all fruit trees with probiotics and neem oil (for bugs and fungus control), and keep areas beneath the trees clear of waste. This is your last spray of the year.
  • Refresh compost and mulch around the base of the trees for winter. You can also use chopped leaves from trees around your yard. Do NOT use other fruit tree leaves if you can avoid it, because you don’t want to let any fungus or disease overwinter in the food forest.
  • Divide plants that are big enough to multiply and share (i.e. comfrey, berries, perennial flowers, etc.)
  • Harvest any remaining herbs (dry them, make tinctures, give away, or make an herbal broth for cooking). Some herbs can actually be frozen in olive oil (using ice cube trays) for use over the winter.
  • Plant cover crops for the winter in any lanes or open spaces.
  • Plant new trees in the orchard and food forest once leaves have dropped. Fall is perfect for planting!

In the Shed

  • Empty and store flower pots that have run their course. Wash and allow to dry, so you can start fresh in the springtime
  • Clean and oil all tools
  • Empty gas from machines that are finished for the season. Consider adding a fuel injector cleaner the last time you use them, so everything is ready for storage.
  • Add mouse traps. TIP: You can also soak cotton balls or fabric in water with peppermint essential oil and put them in the corners to deter mice.

In the Chicken Coop for October

  • Feed extra protein (meal worms, black oiled sunflower seeds, bugs, etc.) to help them with molting season.
  • Add a small amount of corn to their diet to help with caloric intake before winter.
  • Purchase suet blocks (>5% protein) as you see them on sale for winter prep.
  • Clean and sterilize your coop and get ready for winterizing (have extra straw on hand for the winter months).
  • Make plans for water freezing over the winter (more next month). Add probiotics to your water to get birds healthy for winter. You can use a mixture of honey, apple cider vinegar, and garlic powder as one approach. I also rotate in BioLivestock, which is a blend of probiotics, beneficial microbes, and bio-fermented organic acids.
  • Add garden and flower bed cuttings to their run for them to “go through” and eat bugs and seeds before composting them.
  • Feed pumpkin and squash to chickens! It helps boost their immune systems and can be a preventative for worms. NOTE: Pumpkin seeds are NOT a proven treatment for worms, but a great as part of your preventative maintenance regime.
October Gardening To-Do List

Around the House

  • Clean out gutters on eavestroughs
  • Check caulk around windows and doors
  • Check / change light bulbs around the yard
  • Chop leaves as they fall by mowing them up. Never rake and put them to the road, because you are literally sending nutrients away from your yard.
  • Prune dead branches and chop for burning
  • Power wash sidewalks, sides of house, etc
  • Drain and store hoses if the weather starts freezing
  • Change air filters on HVAC and check pilot lights on your heater before turning everything on. It’s also smart to vacuum out all ductwork / register vents and add a few drops of essential oils to them to keep things fresh.
  • Fall clean out of the garage and shed
  • Put up any winter window treatments (shrink film on thin windows)
  • Check batteries on carbon monoxide detectors (replace every three years) and check batteries on smoke detectors.
  • Chimney maintenance and fire place testing
cut back spent perennials

Perennial Flower Beds in October

  • Cut back spent plants, but leave as much as you can for winter interest, especially if there are seed heads. I recommend pruning back fully in the spring, because many butterflies and beneficial insects have already laid eggs and are in a chrysalis form on your plants now, and they will not hatch until spring.
  • Plant spring bulbs. Rule of thumb… buy 2-3x as much as you THINK you want, because you’ll always want more.
  • Remove and compost faded annuals. Don’t throw them away – definitely compost them!
  • Divide large perennials and multiply in your garden OR share with friends.
  • Store tender bulbs like cannas, elephant ears, and dahlias.
  • Cover all soil with either compost, chopped leaves from your yard, or wood chips. NEVER leave your soil exposed to the winter elements.

Ideas for Kids

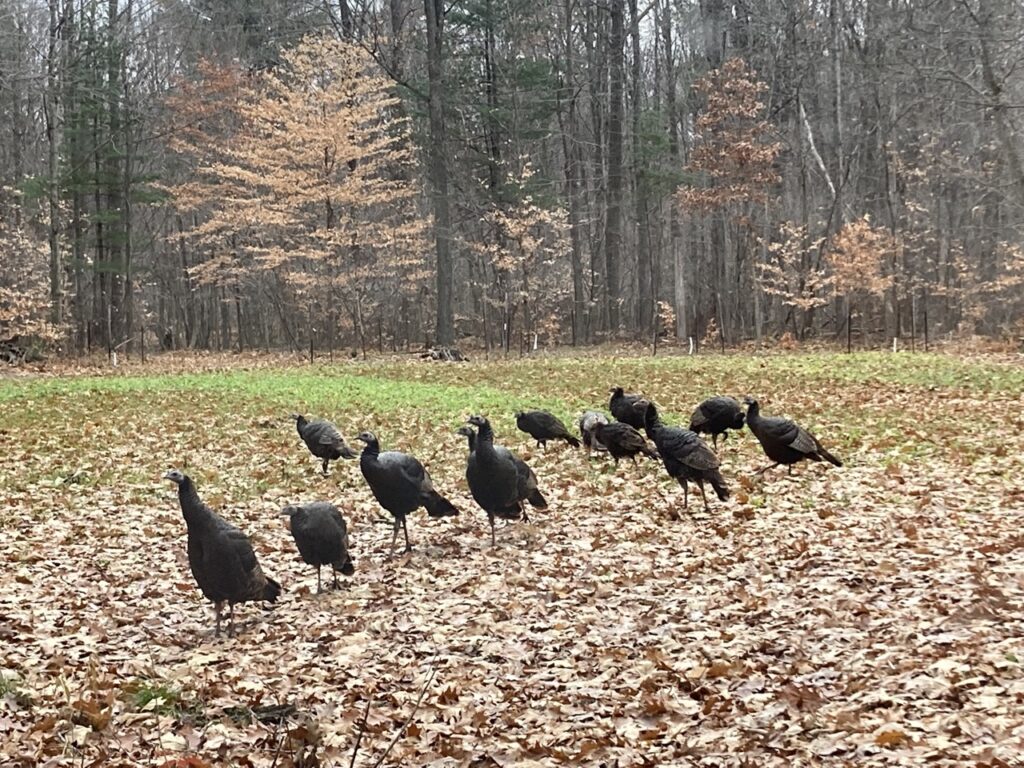
fall turkeys
Turkeys out foraging their fall meals
  • Make a fort with sticks and branches and then cover in leaves
  • Have at least a few times where you rake piles of leaves and let the kids jump and play
  • Make fall bird feeders and put them around the yard.  Click here for the class on this in Patreon.
  • Use peanut butter and spread on the trunks of trees, then press birdseed into it to attract woodpeckers
  • Fall nature walks are a must
  • Take the kids to a greenhouse this fall. Many local nurseries offer free fall activities for kids, pumpkin patches, etc.
  • Buy each kid a tree / shrub to plant in the yard or food forest. Help them pick it out and let them know it’s “their tree”.


How to Plant a Fruit Tree or Berry Bush

Easy Instructions for Successful Fruit Tree Planting

how to plant a fruit tree
  1. Prep the site:  Make sure utilities have been clearly marked by calling 8-1-1 before you dig.
  2. Gather materials:  You will need cardboard or contractor paper for weed suppression, compost, wood chip mulch, shovel, water.
  3. Digging the hole – Remove the plant carefully from the pot and set it next to the hole.  When digging, the initial hole should be nearly twice as big as the root ball itself.  Put most of the dirt you are removing in a wheelbarrow or the pot it came in.  You will be filling the hole back up with the native dirt.
    • Placing the plant – Set the root ball in the hole.  The top of the root ball should be 2-3” higher than the soil line.
      • Do NOT let the root ball go lower than the soil level. Remember, the plant will settle into the hole.  Backfill the hole with the native soil. 
      • Do NOT put fertilizer or compost into the hole.  Doing so will cause the roots of the plant to want to stay inside the hole instead of venturing out and establishing a wider root system.  Amendments should always be applied to the top of the soil.
  4. Weed suppression barrier – Use contractor paper or cardboard around the tree (whether in a circle or in a row) to kill the grass and suppress weeds.  If you are using cardboard, be sure to remove any staples or tape.   This area should be several feet on each side of the tree in order to protect the roots and help decomposition.
  5. Compost – Apply a 1” layer of compost to the top of the soil.  Keep all top dressing away from the trunk / stem of the plant.  The width of the ring should be twice the width of the canopy of the plant.
    • Soft stem plants:  Use a compost that is plant and bacteria based.
    • Hard stemmed bushes / trees:  Use a mushroom or fungal based compost when possible.
  6. Mulch – Use a good mulch or wood chips as your top dressing (4-5” deep).
    • Wood chips:  Better for woody stemmed and /or mature plants.  The benefit is that it takes longer to break down and provides a cleaner look.  Drawback is that for annual vegetables it can tie up nitrogen when it initially breaks down. 
    • Straw or grass clippings:  Better for annual flowers and annual vegetables.  Benefit is that it breaks down faster and helps heal the soil quickly.  Drawback is that is needs to be reapplied multiple times a year.
    • NOTE:  You can layer your mulch (leaves, grass clippings, straw, and wood chips on top).  Do not mulch deeper than 6” at a time.
  7. Watering – For your first watering, consider using a probiotic spray (https://www.scdprobiotics.com/products/scd-bio-ag-soil-amendment?sca_ref=1290056.jX6cET8IFB).
    • After the initial watering, use the finger / soil test to determine when the plant needs to be watered.  In general, most plants like to dry out between watering.
      • Finger test:  Put your finger into the soil at the base of the tree down to the biggest knuckle.  If the soil is moist, do not water.  If it is dry, then consider watering.
    • Plants like to be watered less frequently with a deeper watering.  Do not water the trunk of the tree, always water about 12” from the trunk (or at the drip line of the canopy).  Watering the trunk can cause root rot.  If you are using drip irrigation, a sprinkler, or bubbler, make sure they are not spraying the wood or branches of the tree.
    • After the first year, with annual mulch application, you should rarely need to water.  Once established, let the tree roots do their job and only water during drought times or when the trees look overly stressed.

REMINDER:  Fertilization in subtropic and tropical climates is best done in February, June, and September on fruit trees and berry bushes.  In cooler climates, it should be done in March / April (just before flowers emerge) and again in June just before fruit set. After the first year, fertilization is best applied as a quality compost or manure.  Chemical fertilizers are unnecessary and do not help the soil in the long run.

For additional benefit you can also apply a compost tea or late spring foliar spray during the same months listed above

Subscribe

* indicates required


August Gardening To-Do List fo Zones 9-11

August gardening to do list

What to do on your property in August

It’s the peak of the summer heat and most of our annual veggie gardens are still “asleep” for the summer (with the exception of a few beans, okra, and summer pumpkins).  Most of us have legumes (like Sunn Hemp) planted as cover crops, and they will be ready to chop and turn into the soil in the middle of the month.   

Right now, our food forests are in full swing and popping with abundance!  Mango season is wrapping up soon (for many), but Avocado season is just getting started.  With the rain this year, the avocados are really pushing a lot of fruit, so get ready.  Not to mention, many other fruit trees and berry bushes are in peak season this month (tropical cherries, pitangatuba, acerola, peanut butter fruit, carambola, pineapples, bananas, etc).   

The main thing to keep in mind this month is to keep an eye out for fungal issues, which can happen overnight in subtropical climates.  And remember, in warmer zones… July and August are (and should be) a bit slower, so be sure to take it easy and stay hydrated!  This is like “winter” for those in the North.  haha!

Before you continue, remember, this list is tailored for warm temperate and subtropical climate growing zones, but if you are looking for cold temperate lists…  Click here for USDA Zones 3-8.

In the Garden

  • Things to plant by seed:  squash, zucchini, pumpkins, corn, beans, eggplant, watermelon, tomatoes, and more pumpkins.
  • Harvest:  Okra, tropical spinaches (longevity, Okinawa, Brazilian, and Suriname).   You can also use leaves from cranberry hibiscus, South Sea Salad, and Aunti Lilli’s South Sea hibiscus for salads. Butterfly pea flowers are in full bloom and can be used in salads or tea.
  • Summer Tea:  Jamaican sorrel (Roselle) calyxes can be used for tea (later in the month).  You can also use leaves from olives, Moringa, Spanish needle, Cranberry Hibiscus, and Lemon Balm for refreshing summer teas and tisanes.  Enjoy these teas over ice and add organic raw honey from a local bee keeper.
  • Mulch:  Keep bare soil covered completely to prevent water evaporation and protect microorganisms.  Add a little more compost and wood chips around fruit trees and berry bushes.  Add another layer of straw around garden veggies. 
  • Sunn Hemp:  This is the month to chop and drop your sunn hemp.  It can be buried for faster decomposition or left on top of the soil to break down.  Cattle and horses can eat it BEFORE the flowers bloom, but it should not be fed to livestock once flowering has started.

It’s time to start making tinctures and drying herbs.

In the Greenhouse

  • Start taking cuttings: elderberry, Sugarcane, Barbados cherry, fig, etc.
  • Plant trees / shrubs by seed: Jaboticaba, miracle fruit, loquat, mimosa, moringa, etc.
  • Clean and sterilize the plastic pots used this winter / spring
  • Set mouse traps to control critters
  • Hang fly trap to control aphids, flies, and other pests

In the Food Forest

  • Harvest berries that are ripe: elderberry, dwarf ever-bearing mulberry, muscadine and souther home grapes, and olives. Finish harvesting mangos and early avocados.
  • Mulch: Apply mulch / wood-chips around the base of fruit trees. Keep the wood chips away from the base of the tree, because if they touch the trunk it can cause rot or bacterial issues. Wood chips will encourage mycorrhizal activity and strengthen the root system.
  • Avocados: Keep mulching and adding light compost around the base of avocados. Chop and Drop things like moringa, pigeon pea, and Mexican sunflower to create biomass at the base.
  • Mangoes: Prune (via tipping the terminal branches) a few weeks after they are finished fruiting. This will increase your chances of fruit set next year.
  • Chop & Drop: Time to harvest a round of moringa, legumes, and pigeon pea for chop-and-drop. Doing this now will ensure another harvest before winter months.
  • Herbs around fruit trees:  Start harvesting herbs to dry and make tinctures.
  • Harvest elderberries:  If you are making elderberry tinctures, teas, or wine – now is your time to harvest. Whatever you do not harvest, the birds will take care of for you. It is also a great time to harvest elderberry canes for cuttings and propagation.
  • Watch for fungal issues on leaves and apply organic neem spray as needed. This time of year with heat and humidity, fungal issues can pop-up overnight. Trees that are the most susceptible: sugar apple, sour sop, June plum, kratom, ginger, and coffee.
  • Continue planting fruit trees and berry bushes during the rainy season. For a tutorial on how to plant, click here…
  • PLANT CLUMPING BAMBOO!! Rainy season is a great time to plant these as forage, fodder, barriers, hedges, statement pieces, or medicinal / culinary purposes. Use LOT of wood-chip mulch at their base, because they love fungal dominated soil.
  • Install a banana circle
  • Hold off on fertilizing until next month. Use this month to allow the plants to grow during the last of the rainy season.
  • Pastures: Plant wildflower seeds (in small batches) to make use of the last of the rainy season. Plant Timothy grass in pastures for cattle and livestock. Use 2-4lbs per acre if you are mixing into an established pasture. Timothy grass is high fiber and has great energy content (lower protein). It is drought tolerant and has a lower moisture content.

Reminder: Elderberry must be cooked before eating.

In the Shed

  • After heavy spring and summer use, give power tools a quick check (oil, air filters, and clean off exteriors).
  • Check mouse traps and keep animal feed in sealed containers.
  • Give cutting tools a good cleaning (using rubbing alcohol) and oil afterwards to prevent rust.
  • Sweep and clean out cluttered areas. Spend time working in the shade.

In the Chicken Coop

  • Chickens:  Some of the early spring chickens will start laying soon. Once the first egg has appeared, switch chickens over to a layer feed and/or provide supplemental calcium.
  • Harvest comfrey and feed to chickens, horses, goats, and cattle.
  • Quail:  Mix apple cider vinegar and honey with their water once a week. Pick fresh flowers and grass seed heads to put inside their coop and nesting area. This is a great time to provide supplemental protein using meal worms and small crickets.
  • Deworm: Use 1 tablespoon of Basic H in a 5 gallon waterer (1tsp per gal) for chickens. Add 1.5 cups to a 100gal waterer basin for cattle and horses. Available in bulk (much cheeper for farm use) This should be their only water source for two days.
  • Coop clean out: On a sunny day with a breeze, clean out the coop in the morning. Use Basic H organic cleaner and spray everything out. Leave the coop open all day to dry it out with good airflow. Clean out all waterers and feeders using a bleach solution.
  • Add wood ash to the dustbath to help prevent and treat lice and mites.
  • CLICK HERE for extra tips on keeping chickens cool during hot summer months.
Chickens eating a ground cover of wheatgrass, radish, and clover.

Around the House

  • Keep South and West facing shades closed during the day time in order to block out the hot sun.
  • Open up the windows on cooler nights to help air out the house and let in fresh air.
  • Replace your HVAC filters
  • Check batteries in smoke alarms and carbon monoxide detectors
  • Wash windows (inside and out). Use a product like “Invisible Glass” to avoid streaks.
  • Apply UV protectant to your recreational vehicles (boats, car interiors, RV’s, decals, etc.
  • Spray tire shine and protectant on vehicle and trailer tires to prevent sun damage
  • Give houseplants a good fertilization and shower to clean off leaves
Add kid-friendly elements, hobbit holes, and fairies to the perennial flower bed.

In the Perennial Flower Beds

  • Dead-heading: Cut back spent flowers in order to get a second bloom. Spent flower heads can be fed to chickens or composted.
  • Cut back any spent annual flowers and start planting new cosmos, zinnias, etc. Plant a little at a time to prolong your blooming season.
  • Take cuttings of cassava, Mexican Sunflower, chaya, etc.
  • Add extra wood chips to areas that are in full sun in order to protect soil health and microbial activity
  • Bring cut flowers indoors and share with neighbors, especially those who are shut-ins or elderly
  • Find / create garden activities that involve kids.
  • Annuals: If you want annual cut flowers (cosmos, zinnia, sunflower, celosa, etc for Thanksgiving, starting planting a few seeds per week over the next month. If you do this, then you’ll have lots of fresh flowers this fall.
Kids picking flowers at the Blue River Forest Experience in Overland Park, KS. This organization hosts after school nature activities and summer camps.

If this list was helpful to you, consider sharing it on social media or sending to friends who may benefit from it as well.

We’ll see you in the garden!

August Gardening To-Do List for Zones 3-8

August gardening to do list

What to do on your Property in August – Cold Temperate Climates

It’s the peak of the summer heat and this is the time of year that our gardens are feeling it the most.  However, there are still plenty of things to be doing on your property this month. 

By this time of the summer, we are harvesting tomatoes, peppers, and all sorts of treats from the garden.  The food forest is beginning to pop and many folks are checking plums, pears, and apples every day.   Chickens and ducks are beginning to ebb and flow a bit on their laying cycles, so it’s important to keep up with an adequate supply of protein and fresh greens.   

So wherever your are gardening this month, be sure to stay organized, hydrated, and take time to rest.  Make sure your gardening experience remains a time of respite and rejuvenation – take time for YOU!

Remember, this list is tailored for cold temperate climate growing zones, but if you are looking for warm temperate or sub-tropical growing zone lists CLICK HERE.

In the Garden

  • Things to plant by seed:  beets, carrots, radishes, and turnips.
  • Fall greens:  In order to stagger your harvest times later in the fall, consider planting smaller amounts of fall greens (salad mixes, kale, etc.) every other week this month.  The same can be done with beets and radishes.
  • Brassicas:   Plant broccoli, cabbage, and cauliflower by seed or transplants for fall harvesting.  Keep them well-watered (1″ per week) as they get established and mulch with straw around the base to cover the soil and prevent water evaporation.
  • Harvest:  tomatoes, eggplants, peppers, and other night shades.  Prop up plants as needed to provide support.  
  • Mulch:  Keep bare soil covered completely to prevent water evaporation and protect microorganisms.  Add a little more compost and wood chips around fruit trees and berry bushes.  Add another layer of straw around garden veggies.  
  • Compost application:  Add fresh organic compost to strawberry patch (thin them while you apply compost).  You can also add compost to bramble canes (blackberries and raspberries) to improve next years harvest.

It’s time to start making tinctures and drying herbs.

In the Greenhouse

  • We are finished with the “greenhouse” season, but if you have a shade cloth, you can actually open up all the windows now and put the shade cloth over the top. This will allow you to start micro-greens and other later season veggie starts. If using a shade cloth, use the opened greenhouse for your indoor tropical plants to give them a season outdoors. Just be sure to pay attention to your watering!
  • Clean and sterilize the plastic pots used this winter / spring
  • Set mouse traps to control critters
  • Hang fly trap to control aphids, flies, and other pests

In the Food Forest

  • Harvest: berries that are ripe: goji, elderberry, blackberry, raspberry, etc.
  • Mulch: Apply mulch / wood-chips around the base of fruit trees. Keep the wood chips away from the base of the tree, because if they touch the trunk it can cause rot or bacterial issues. Wood chips will encourage mycorrhizal activity and strengthen the root system.
  • Herbs around fruit trees:  Start harvesting herbs to dry and make tinctures, harvest fruit as they are ripe and remove those that fall to the ground. Fallen fruit calls in the pests… So feed to chickens or add to the compost pile.
  • Harvest elderberries:  If you are making elderberry tinctures, teas, or wine – now is your time to harvest. Whatever you do not harvest, the birds will take care of for you. It is also a great time to harvest elderberry canes for cuttings and propagation.
  • Watch for fungal issues on leaves and apply organic neem spray as needed.
  • Plant late summer ground covers in any “bare spots” around the forest. Consider things like daikon radish or crimson clover. Water the first 10-12 days until established.
  • Wait to plant new fruit trees and berry bushes until next month, when the heat dials down a few notches.

Reminder: Elderberry must be cooked before eating.

In the Shed

  • After heavy spring and summer use, give power tools a quick check (oil, air filters, and clean off exteriors).
  • Check mouse traps and keep animal feed in sealed containers.
  • Give cutting tools a good cleaning (using rubbing alcohol) and oil afterwards to prevent rust.

In the Chicken Coop

  • Chickens:  Some of the early spring chickens will start laying soon. Once the first egg has appeared, switch chickens over to a layer feed and/or provide supplemental calcium.
  • Harvest comfrey and feed to chickens, horses, goats, and cattle.
  • Quail:  Mix apple cider vinegar and honey with their water once a week. Pick fresh flowers and grass seed heads to put inside their coop and nesting area. This is a great time to provide supplemental protein using meal worms and small crickets.
  • Deworm: Use 1 tablespoon of Basic H in a 5 gallon waterer (1tsp per gal) for chickens (NOTE: Use the original formula of Basic H, which comes in a 5 gallon bucket OR 30 gallon drum). Add 1.5 cups to a 100gal waterer basin for cattle and horses. Available in bulk (much cheeper for farm use) This should be their only water source for two days.
  • Coop clean out: On a sunny day with a breeze, clean out the coop in the morning. Use Basic H organic cleaner and spray everything out. Leave the coop open all day to dry it out with good airflow. Clean out all waterers and feeders using a bleach solution.
  • Add wood ash to the dustbath to help prevent and treat lice and mites.
  • CLICK HERE for extra tips on keeping chickens cool during hot summer months.
Chickens eating a ground cover of wheatgrass, radish, and clover.

Around the House

  • Keep South and West facing shades closed during the day time in order to block out the hot sun.
  • Open up the windows on cooler nights to help air out the house and let in fresh air.
  • Replace your HVAC filters
  • Check batteries in smoke alarms and carbon monoxide detectors
  • Wash windows (inside and out). Use a product like “Invisible Glass” to avoid streaks.
  • Clean outdoor windows and doors (I use Basic H for this)
  • Apply UV protectant to your recreational vehicles (boats, car interiors, RV’s, decals, etc.
  • Spray tire shine and protectant on vehicle and trailer tires to prevent sun damage
  • Give houseplants a good fertilization and shower to clean off leaves
Add kid-friendly elements, hobbit holes, and fairies to the perennial flower bed.

In the Perennial Flower Beds

  • Dead-heading: Cut back spent flowers in order to get a second bloom. Spent flower heads can be fed to chickens or composted.
  • Plant seeds of larkspur, holly hocks, and poppies for next year
  • Add extra wood chips to areas that are in full sun in order to protect soil health and microbial activity
  • Bring cut flowers indoors and share with neighbors, especially those who are shut-ins or elderly
  • Find / create garden activities that involve kids.
Kids picking flowers at the Blue River Forest Experience in Overland Park, KS. This organization hosts after school nature activities and summer camps.

We hope this list was helpful for you! Enjoy some much needed time outdoors and we’ll see you in the garden.

PLEASE SHARE THIS ARTICLE WITH THOSE WHO WOULD FIND IT HELPFUL!

June Gardening To-Do List for USDA Zones 9-11

June gardening calendar

What to do on your property in June?

What should I be doing in my garden in the month of June if I live in a subtropical climate (Zones 9-11)?  This is the list for you! 

Looking for a list for USDA Zones 3-8, click here.

The rainy season has begun, especially in Florida, so it’s time to shift from annual vegetable gardening to a focus on the food forest.  In essence, put your gardens to “bed” by using a cover crop like annual clover OR sunn hemp to help repair nitrogen and add biomass.  Instead, focus now on fruit trees, berry bushes, and nut trees!  This is a fantastic time to add some new tropical spinaches and edible hibiscus to your collection too!
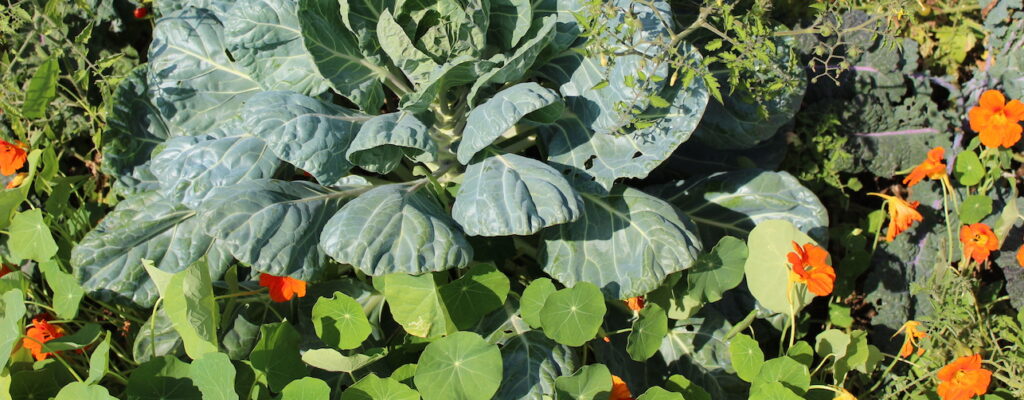
June companion plants
Collards, Red Russian Kale, and Jewel Mix Nasturtiums

In the Garden

  • Summers in Subtropics:  Remember, this is the season that is like winter for most of the country.  Our best growing time for traditional garden veggies is essentially wrapping up.  Although it “can be done”, it’s likely better to focus on the food forest than the annual vegetables during the hot summer months.  Plant your sunn hemp in your annual garden beds and let them grow until August, at which time you can till it under to add nitrogen and biomass to your soil.  Then you’ll be ready for September vegetable season again.
  • Planting:  Summer peas, okra, and sweet potato.  You can also try and plant Seminole pumpkins now, but it’s a risk.   It is also still a good time to plant  ginger and turmeric – but I would not wait until the end of the month.   Get them in the ground as fast as you can.
  • Harvesting:  This month, you can harvest the pumpkins and squash from this winter, green beans, and the last bit of the cucumbers.  It’s also prime time for tropical greens!  This last week, I was harvesting the Dwarf Everbearing Mulberry and making jams and syrups to can for later.  I also tried a new pepper this year from “Seed the Stars” called a Dew Drop Pepper, and had wildly great results with them.  Most of those were canned up this week, but they are still yielding like crazy.  In fact, I have also used seeds from Seed the Stars for growing Seminole Pumpkins, Everglade Tomatoes, and butterfly pea as well.  

  • Tropical spinaches:  Some favorites (especially in Florida) are:  longevity spinach, Okinawa spinach, Suriname spinach, and Brazilian spinach.   These are high producers all summer long!

  • Tomatoes:   Most of the larger tomatoes are finishing up for the summer in the hot climates, so if you are wondering why they look so sad… that’s totally normal.  The best (if not the only) tomato that does well in the summer in warmer climates is the Everglade tomato.  It’s a gorgeous little cherry tomato that will fruit most of the summer and is very disease resistant.  It’s excellent on salads, canned in salsa, or eaten fresh.  As for your other tomatoes… let them go and focus on other things.  

  • Plant Cover Crops:  One of the best cover crops in hot climates is called Sunn Hemp.  It’s in the legume family (as opposed to the other hemp) and not only repairs nitrogen in the soil, but is also a massive biomass accumulator.  If you plant it now, it will be 6-9′ tall before August, at which time it can be chopped and dropped or even buried and composted in place in the garden.  For a FREE growing guide on Sunn Hemp, email [email protected] 
  • Managing powdery mildew:  In warmer tropical climates, this is the time of year when powdery mildew really starts getting wild.  When you see the initial signs, spray immediately with neem spray (buy 100% need on Amazon and then dilute with water and some Basic H to emulsify).  Spray in the early morning well before the heat of the day, preferably on an overcast day.   Follow up in 2-3 days with a probiotic spray like BioAg by SCD Probiotics.  Repeat the following week, if necessary.   If this doesn’t help, it’s actually better to remove and burn the plants so it doesn’t spread.  Remember, the spores will stay active in your soil, so it’s important to catch it early and remove / burn the spent plants.
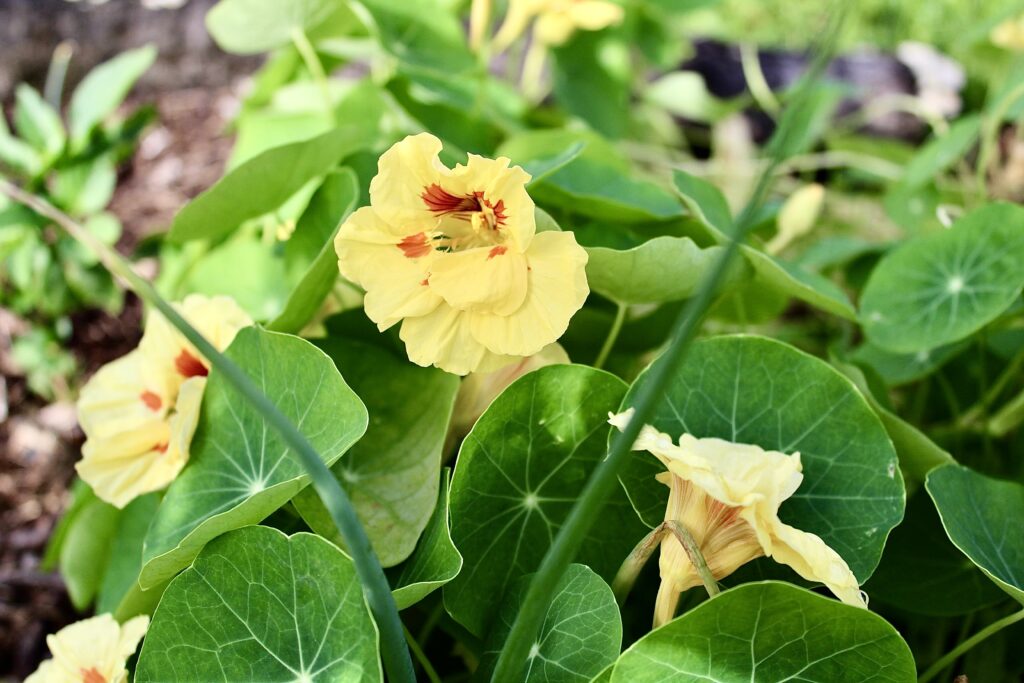
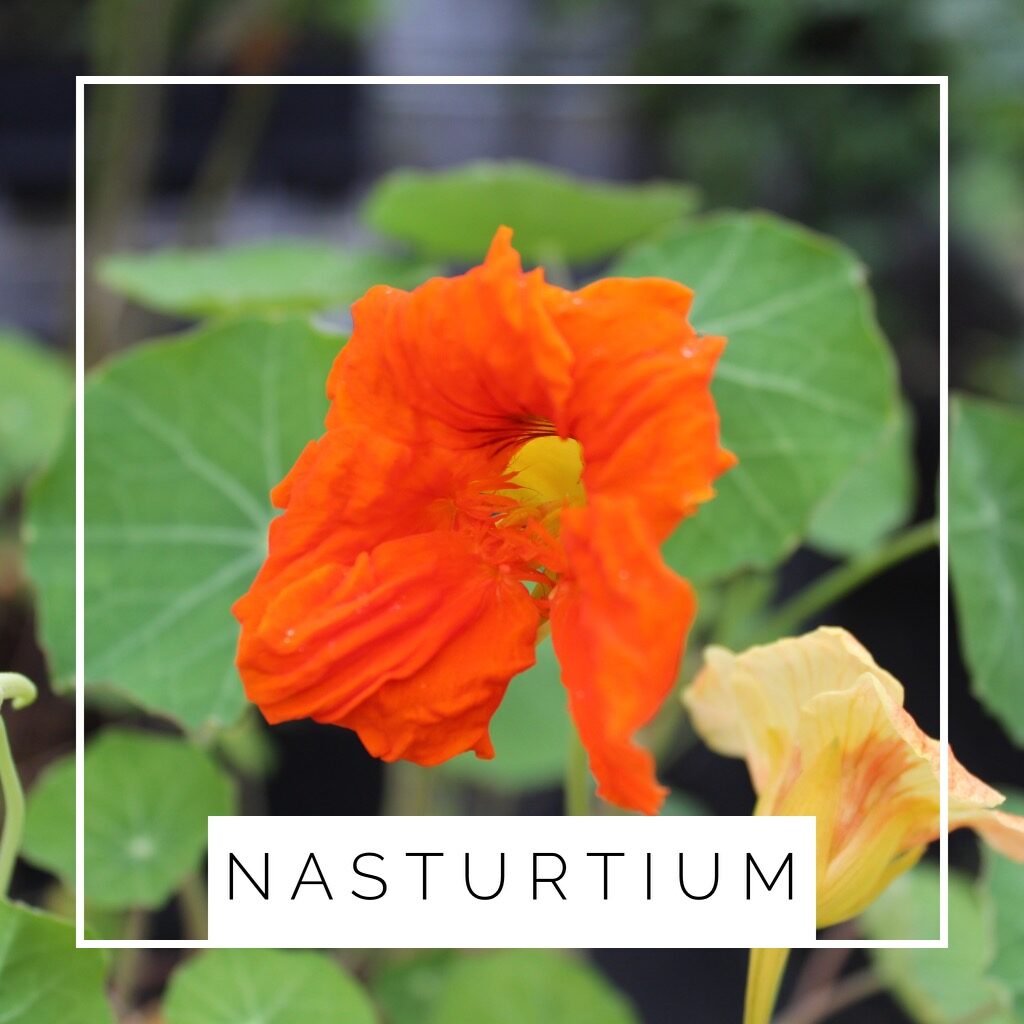
Plant nasturtiums

GARDEN TIP

Plant nasturtiums around the garden and in the food forest. They are a two-fold insectary plant. First, they will attract the good insect and pollinators, especially the braconid wasps (which defend against the bad guys). Secondly, they are an insect trap for aphids, so if you see your nasturtiums covered…. consider them a sacrificial crop to protect your veggies. In hot climates, they appreciate part shade in summer months and sun in the winter.

In the Greenhouse

  • We are essentially finished with the “Greenhouse” season, but if you have a shade cloth, you can actually open up all the windows now and put the shade cloth over the top. This will allow you to start micro-greens and other tropical plants (like Vanilla beans and orchids). If using a shade cloth, you can also use the opened greenhouse for your indoor plants to give them a season outside. Just be sure to pay attention to your watering schedule.
  • Clean and sterilize the plastic pots used this winter / spring. Stack and store them.
  • Set mouse traps to control critters.
  • Hang fly trap to control aphids, flies, and other pests.
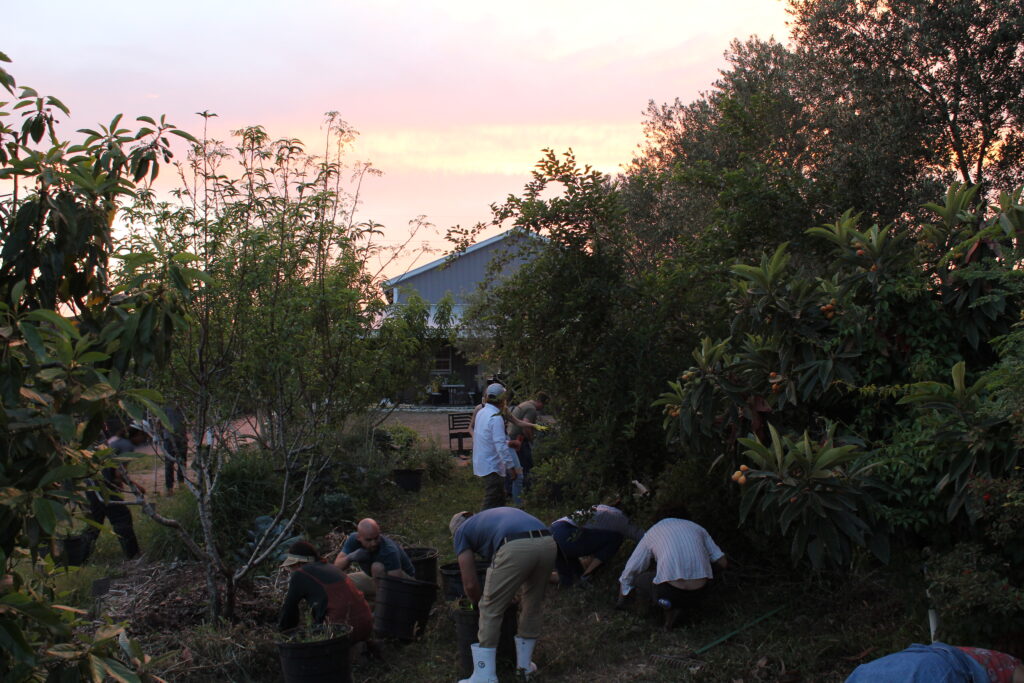
A Natural Farm
Spring 2021 Permaculture Design Course students serving in the food forest at A Natural Farm in Howey-in-the-Hills, FL

In the Food Forest

  • Get a plan: Summer is an ideal time for planting in the food forest, because rainy season will make sure everything is well taken care of for you. Consider getting a private property consultation with us to help you design your yard. We will tell you where to plant, what specific varieties, how to plant them appropriately, and give a guide on how to maintain your food forest. Click here to read about our new property consultation types! We also offer drive thru consultations now, which are ideal for follow-up visits from folks who already have an existing plan in place.
  • Plant fruit trees and berry bushes: This month, think about planting avocados (there are so many great varieties), mangos, strawberry trees, tropical cherries, guava, and other tropical trees. This will allow them to have 7 months to “root in” and establish themselves before it gets cold. Summer is a perfect time to start that food forest… just make sure you have a plan first.
  • Compost and wood chips! In places like Florida, the rule of thumb is to fertilize (especially via compost or manure) every March, (early) June, and September. This month, it’s highly encouraged to refresh your wood chips as well, which helps prevent soil sterilization during the hot sunny months. Some species (like Avocado, Citrus, and Mango) can have some compost this month, but organic fertilizers should wait until September when fruit are NOT on the branches. For a FREE planting guide for new fruit trees or how to layer mulch around existing trees, click here.
  • Important Fertilization Tips: Only fertilize at the beginning of this month using compost, bone meal, kelp, or composted manure (like black kow). Do NOT use chemical or synthetic fertilizers under any circumstances and absolutely STOP fertilizing your yard for the summer. Adding nitrogen heavy and synthetic fertilizers are known to highly increase the risk of toxic algae blooms. So, please do your part and only fertilize this month using whole ingredients, like those listed above. Do NOT fertilize the second half of the month – no exceptions. Though it might be “permissible” for your trees, it has a much more damaging effect on our local ecosystems – so compost ASAP or wait until September.
  • Ground cherry seedlings (or Cape Cod Gooseberry) can go into the ground now.  Plant them around the base of fruit trees to provide shade for the root systems, but allow enough light to get through to produce a harvest.  These will often self-seed, so plant in an area where you are ok with them spreading.  The taste of these berries is incredible, you will not regret planting them! Not to mention, they are packed with vitamin-C.
  • Herbs around fruit trees:  Woody and smelly herbs are great at two things:  keeping pests away (deer and bad bugs) and attracting native bees for pollination.  Wait, I lied… three things.  They are also a great ground cover under the young fruit trees.  Plant yarrow, bronze fennel, dill, oregano, thyme, chives, or garlic chives in clusters around the base of each fruit tree.  Let them spread and grow wild.
  • Harvest elderberry flowers:  If you are making elderflower tinctures, teas, or wine – now is your time to harvest!  Make the good stuff when flowers are at their peak.
  • Apply late spring foliar spray, if you have not done so already. It’s also a good time to try and get some elderberry cuttings for propagation.
  • Do NOT prune fruit trees! Never prune during the warmer months… wait until they go dormant. While the plant is sleeping, the sap slows down and the weather is often drier, which helps prevent bacterial and fungal infections.
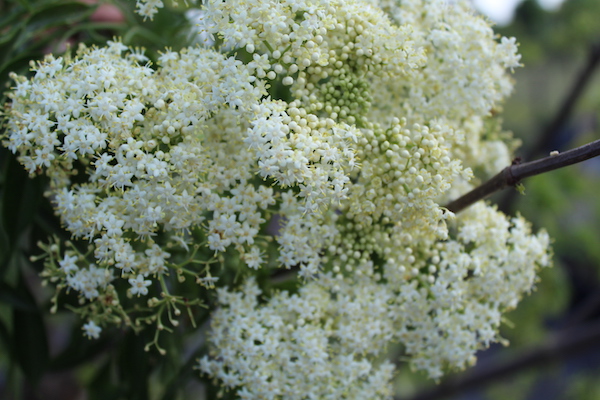
Elderflower blossoms in Central Florida

Enjoy Flowers in bloom

Though this isn’t exactly the best time to plant native perennials, it’s a great time to enjoy the ones you started earlier. If you decide to plant anything this time of year, remember to check their water needs and mulch heavily. Never water until the soil has had the chance to try out for a day. If in doubt, finger check the soil down to your big knuckle.

In the Shed

  • Now that your tools are up and running, give them a check over before the summer months hit. 1 – Check oil levels. 2 – Check air filters. 3 – Add a bit of Seafoam to the gas to help clean things out a bit. Reoil your metal tools to prevent rust.
  • Make sure all outdoor tools and equipment are covered when not in use. In places like the South Eastern US, we are entering the rainy season and moisture is hard on equipment. If you cannot store them in a shed, make sure they are covered with a tarp when not in use.
  • Set mouse traps and keep any animal feed sealed and contained.
  • Make a tool cleaning bucket: Fill bucket with sharp play sand. Add oil motor oil, cheep cooking oils, etc until the sand is “damp”. Stab shovels, hoes, pitch forks in and out a few times to clean off dirt and give the metal a nice oiling to keep them from rusting after each use. Garden spades and trowels can be kept in the sand bucket when not in use. Obviously, do NOT put pruners or tools with gears in the sand.

In the Chicken Coop & Barn

  • Chickens:  Many folks who bought/hatched spring chickens are now free ranging their birds. They are not laying yet, so do NOT give them calcium.  Stay on an organic grower feed until the first eggs arrive.  My preference is a high protein feed with lots of seed varieties.   Personally, prefer to mix and ferment my own feed. Here’s my recipe.
  • Quail:  It’s starting to get hot, to be sure to keep their water filled at all times.  It helps (once a week) to add a tsp of apple cider vinegar to their waterer.  It will keep them healthy and active.  As you weed the garden, you can also give them an occasional worms and weeds for additional goodness in their diet.  Their cooing and songs will be as nice of a reward as the healthy eggs they will produce.
  • Deworm: Use 1 tablespoon of Basic H in a 5 gallon waterer (1 tsp per gal) for chickens. Add 1.5 cups to a 100gal waterer basin for cattle and horses. Available in bulk (much cheeper for farm use) This should be their only water source for two days.
  • Disinfect: Use Basic H to clean coops, animal areas, waterers, feeders, etc. This is a great time to power wash the barn, shed, and garage as well.
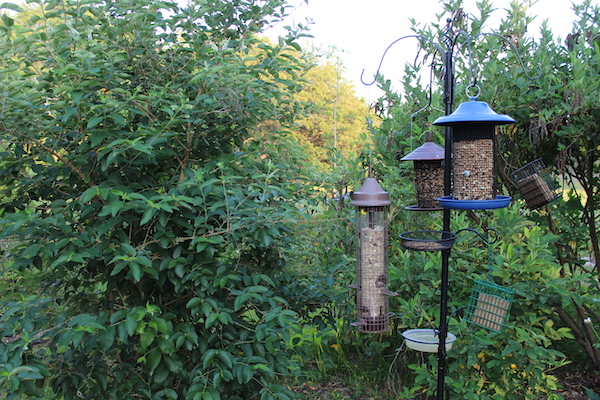
Feeders and seed in my yard are always from Wild Birds Unlimited, because I believe strongly in their quality and their support of local education and school connections.

Around the House

  • Put out summer bird seed and feeders. This is an excellent way to help with insect control around the garden. For more information on bird seed selections and food forest benefits, watch this IGTV video.
  • Keep South and West facing shades closed during the day time in order to block out the hot sun.
  • Open up the windows (on cooler nights) to help air out the house and let in fresh air.
  • Replace your AC air filters and clean out the vents with a shop vac.
  • Power wash cement, walkways, sides of house, shutters, wood decks, and outdoor furniture.
  • Clean outdoor windows and doors (I use Basic H for this).
  • Apply UV protectant to your recreational vehicles (boats, car interiors, RV’s, decals, etc.)
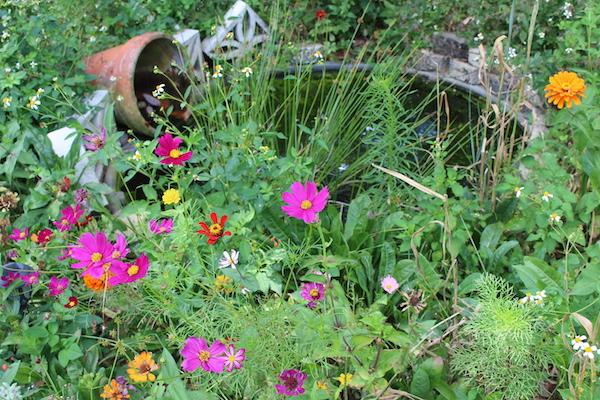
In the Perennial Flower Beds

  • Transplanting:  Now is NOT the time to transplant, unless you see rain in the forecast for the next week.
  • Compost! Now is the last chance to compost your perennial wildflowers before fall, so if you want to increase your summer blooms then go ahead and do that now. It’s also a great time to water using an organic fish emulsion / sea kelp blend. Your potted plants will REALLY appreciate this.
  • Cut back mums:  Yeah, go to town. Cut them back quite a bit.  Leave only about 1/3 of the plant.  You do NOT want this to develop buds yet, so if you see them forming again – give it a hair cut.

Ideas for Kids

  1. Take a food forest tour: Visit places like A Natural Farm, Momma G Farms, Bamboo Leaf Tea, or the Reid Farm. Bring the kids for an amazing hands on experience.
  2. Visit a botanical garden: Some of our favorites include Bok Tower and the Harry P. Leu Gardens.
  3. Make Butterfly Pea Flower tea! Google it… because it’s a magical color changing experience that tastes like Kool Aid. Seeds are available on Etsy from a company called “Seed the Stars”.
  4. Plant a sweet almond bush. This is (by far) one of the best smelling pollinating plants in all of Florida. Though it’s not native here, it’s a butterfly hit and performs very well in our climate. The almond smelling flowers produce year round, and the large bush needs NO winter protection.

Keep Learning and Growing

As you continue to spend time in the garden and food forest, consider subscribing to a new podcast or Youtube Channel to help you keep learning. If you are interested in digital classes, MP3’s, videos, and PDF’s, you might consider joining us on Patreon. We now have a FREE 7-day trial to see if it’s a good fit for you. But at the end of the day – just keep learning and growing on the go!

NOTE: If you are interested in having an in-person or digital consultation for your property, we are now offering these at discounted prices.

Looking for a list for USDA Zones 3-8, click here.

June Gardening To-Do List for USDA Zones 3-8

June gardening calendar

June Gardening To-Do List

What should I be doing on my property in the month of June if I live in USDA Zones 3-8? Have you ever wondered what other organic regenerative gardeners are doing right now in their yards or on their properties?   (Looking for USDA Zones 9-11, click here)  Well, here’s a little list to give you a jump-start for what you be doing in your midwest garden in June.  

In the Garden

  • Plant more:  Kale, lettuce, cucumbers, summer/winter squash  Staggering your plantings will help diversify harvest times and ensure a healthier crop. If you have extra space, plug in some more annual flower seeds like sunflower, cosmos, zinnia, or nasturtium. 
  • To Plant:  Corn, cucumbers, beans, squash, pumpkins
  • Tomatoes: Plant another round of them to diversify harvest throughout the season.  In the midwest, where we often have hard clay soil, you can actually increase your root systems for greater water intake by following these easy steps.  First, pinch off the bottom layers of leaves, only leaving 2 – 3 sets on the top of the seedling.  Second, plant the seedling all the way up to the top of the plant leaving only the remaining leaves above the ground.  Because tomatoes will grow roots from the hairs on the stem, the entire stem under the soil will produce roots.  This should only be done with seedlings up to 6-8″ tall.  Lastly, be sure to give it a good watering from your rain barrel when you finish.
  • Plant extra bean seedlings everywhere you can.  Yes, everywhere you can.  The bush beans are excellent right off the plant (raw), can be cooked, and some can be dried.  The best part, in my humble opinion, is that the green beans are nitrogen fixers and help repair the soil.
Plant nasturtiums

TIP

Plant nasturtiums around the garden and in the food forest. They are a two-fold insectary plant. First, they will attract the good insect and pollinators, especially the braconid wasps (which defend against the bad guys). Secondly, they are an insect trap for aphids, so if you see your nasturtiums covered…. consider them a sacrificial crop to protect your veggies.

In the Greenhouse

  • We are essentially finished with the “Greenhouse” season, but if you have a shade cloth, you can actually open up all the windows now and put the shade cloth over the top. This will allow you to start micro-greens and other later season veggie starts. If using a shade cloth, you can also use the opened greenhouse for your indoor tropical plants to give them a season outdoors. Just be sure to pay attention to your watering!
  • Clean and sterilize the plastic pots used this winter / spring
  • Set mouse traps to control critters
  • Hang fly trap to control aphids, flies, and other pests
  • Fertilizing: It’s crucial to give your gardens and food forest what they need! Focus on nitrogen this month. Consider bonemeal or blood meal applications in both the veggie garden and food forest. It’s often best to fertilize right before a rain in order to water it in nicely.

In the Food Forest

  • Ground Cherry seedlings can go into the ground.  Plant them around the base of trees to provide shade for the root systems, but allow enough light to get through to produce a harvest.  These will often self-seed, so plant in an area where you are ok with them spreading.  However, the taste of these berries is incredible, you will not regret planting them.
  • Herbs around fruit trees:  Woody and smelly herbs are great at two things:  keeping pests away (deer and bad bugs) and attracting native bees for pollination.  Wait, I lied… three things.  They are also a great ground cover under the young fruit trees.  Plant yarrow, bronze fennel, dill, oregano, thyme, chives, or garlic chives in clusters around the base of each fruit tree.  Let them spread and grow wild.
  • Harvest elderberry flowers:  If you are making elderflower tinctures, teas, or wine – now is your time to harvest!  Make the good stuff when flowers are at their peak.
  • Apply late spring foliar spray, if you have not done so already.
What Can You Plant Between Snows?

Enjoy your spring pollinating bulbs that you planted this winter.

If you forgot… here’s an article of when you could plant this this coming winter.

In the Shed

  • Now that your tools are up and running, give them a check over before the summer months hit. 1 – Check oil levels. 2 – Check air filters. 3 – Add a bit of Seafoam to the gas to help clean things out a bit.
  • Set mouse traps and keep any animal feed sealed and contained.
  • Make a tool cleaning bucket: Fill bucket with sharp play sand. Add oil motor oil, cheep cooking oils, etc until the sand is “damp”. Stab shovels, hoes, pitch forks in and out a few times to clean off dirt and give the metal a nice oiling to keep them from rusting after each use. Garden spades and trowels can be kept in the sand bucket.

In the Chicken Coop

  • Chickens:  Many folks who bought the spring chickens are now free ranging their birds. They are not laying yet, so do NOT give calcium.  Stay on a great grower feed until the first eggs arrive.  My preference is a high protein feed with lots of seed varieties.   Personally, prefer to mix and ferment my own feed. Here’s my recipe.
  • Quail:  It’s starting to get hot, to be sure to keep their water filled at all times.  It helps (once a week) to add a tsp of apple cider vinegar to their waterer.  It will keep them healthy and active.  As you weed the garden, you can also give them an occasional worm for additional protein in their diet.  Their cooing and songs will be as nice of a reward as the healthy eggs they will produce.
  • Deworming: Use 1 tablespoon of Basic H in a 5 gallon waterer (1tsp per gal) for chickens. Add 1.5 cups to a 100gal waterer basin for cattle and horses. Available in bulk (much cheeper for farm use) This should be their only water source for two days.

Around the House

  • Keep South and West facing shades closed during the day time in order to block out the hot sun.
  • Open up the windows on cooler nights to help air out the house and let in fresh air.
  • Replace your AC air filters and clean out the vents with a shop vac.
  • Power wash cement, walkways, sides of house, shutters, wood decks, and outdoor furniture.
  • Clean outdoor windows and doors (I use Basic H for this)
  • Apply UV protectant to your recreational vehicles (boats, car interiors, RV’s, decals, etc.

In the Perennial Flower Beds

  • Transplanting:  It’s the chance to move perennials for a few months.  Once the Midwest summers get hot, it’s really a challenge to transplant your perennials without over stressing them too much.  Now is a GREAT time to transplant coneflowers, yarrow, black-eyed Susans, penstemons, etc.
  • Share plants that you are dividing and trade with friends.
  • Cut back mums:  Yeah, go to town. Cut them back quite a bit.  Leave only about 1/3 of the plant.  You do NOT want this to develop buds yet, so if you see them forming again – give it a hair cut.

Keep Learning and Growing!

During these hot summer days, it’s also a great time to keep learning and growing. Consider finding a new Podcast or even join us on Patreon for lots of classes, PDF files, and other documents to help you grow on the go. We are also offering a FREE 7-day trial on Patreon, so you can see if the content there is a good fit for you and your learning style.

LOOKING FOR THE JUNE LIST FOR WARMER CLIMATES? CLICK HERE

How to Use Wood Ash from the Campfire | Kris Edler

wood ashes in the garden

Growing up, I have countless memories of cooking around the campfire.  My brother and I would spend hours at a time burning brush, cooking our dinners, and having s’mores after dark.  Even as a young adult, I would light a campfire in my Kansas City yard and see how many days I could keep it going, and how many meals I could cook over it during that time.  As a little known fact, I still have the same stones around my campfire that I used as a kid… I have brought them with me everywhere over the years.  Many of those rocks were from “rock hounding” adventures with my Aunt Barb and Uncle Del.

However, every so often, it’s time to clean out the fire pit and find a creative use for the ashes produced.  In permaculture, one of the keys learned from my PDC leader, Geoff Lawton, is that “the problem is often the solution.”  So, I asked myself… I could I use wood ash from the campfire creatively?  How could I give those nutrients back to my environment in a useful way?

img_7678When looking around a permaculture property, there are many uses for wood ash which can be a great source of nutrients for your soil.   However, it’s important to know that with wood ash, your kindergarten teacher was right in saying, “A little dab will do ya.”  Use only a small amount and increase after a few weeks to make sure your soil pH says in the safe zone.  The reason for this is that ashes are extremely alkaline on the pH scale.

Wood Ash is Highly Alkaline

pH for vegetables
best pH for vegetable garden

Because wood ash is a high pH (often 9-13), we have to carefully consider what to do with ashes in our garden.  Optimal soils for most vegetable gardens have a pH of 6.0-7.2, so adding something like wood ashes can have a drastic effect on pH and do so very quickly.  However, using it appropriately can really help nature walk out it’s course of keeping your soil in balance.

Wood ashes are naturally occurring in nature and are a great way for nature to “reset” an environment.  For example, in the Great Plains, the Kiowa Nations would often do controlled burns in order to reset and manage the land.  In California, as devastating as wild fires can be to homes, it’s actually natures way of resetting the damaged landscape and ridding it of invasive annuals that we have brought to the area.  In upstate Washington, the fires clear out understory and add nutrients back to the soil to feed the remaining old growth forests.  This being said, though fire can be a source of destruction, it’s also a source of life in certain circumstances.

Nutrients in Wood Ash

Potassium and potash are two of the prime nutrients are available from wood ash.  The burning process makes them readily available for absorption by your plants.  In fact, potash is so soluble that if it gets wet between the burning process and the time you spread it on your plants, much of the nutrient value will have leeched into the nearby soil.

How to Use Wood Ash in the Garden

There are countless ways to use wood ashes in your garden and around your property, but understanding the soil make-up of your area is the first step before application.  You can easily find out the average pH by purchasing a test kit from a  local garden center.  You can buy kits to test it instantly (lower accuracy) or purchase a kit online that will test it overnight to get a better reading.  Either way, once you know your starting point, you can adjust your pH using organic compounds, like wood ash, to get into the optimal range.  Remember, start by adding only a small amount and give the soil a few weeks to adjust before adding more.  It’s also important to note that various parts of the property could have very different pH readings.

So, now let’s get to it:  How to use wood ashes from the campfire…

1.  Use it in the compost pile

This is especially useful if you are composting a lot of fruit (i.e. citrus) waste, because fruit (being acidic) can really lower the pH of your pile, making it a wet / slimy mess.  You can bring it back into balance by sprinkling a shovel full of ashes over the top.  Always make sure your ashes are completely cool before using.

pH for trees and bushes

2.  Sprinkle them around berry bushes and fruit trees which prefer alkaline soil or extra potassium.

I generally use them first around apple trees, currants, gooseberries, strawberries, raspberries, blackberries, etc.  They will enjoy the extra sprinkle a few times a year, especially in the early spring or late fall.  Do NOT use around blueberries, pineapple, grapes, olive, or jaboticaba – these all prefer acidic soil.

3.  Sprinkle on plants to deter pests

This application will only require a small amount of ashes to create a fine dusting.  If you do not have ducks to control snails and slugs, then wood ashes can be a great deterrent.  Carrots and turnips can also be susceptible to the flies and larvae, which can be deterred by the ashes as well.

4.  Light use in the vegetable garden

Often root crops like carrots, turnips, and beets will appreciate a sprinkle of ashes in the springtime worked into the soil.  Just a light dusting is more than enough.  I often use my wood ashes a few weeks before planting and then let it rain a few times before planting seeds.  Other plants that love the extra potash are beans, peas, and legumes.  Just remember, when using ashes in the garden, always test your soil first, so you stay in the optimal zone (6.0-7.2 pH) for growing veggies.
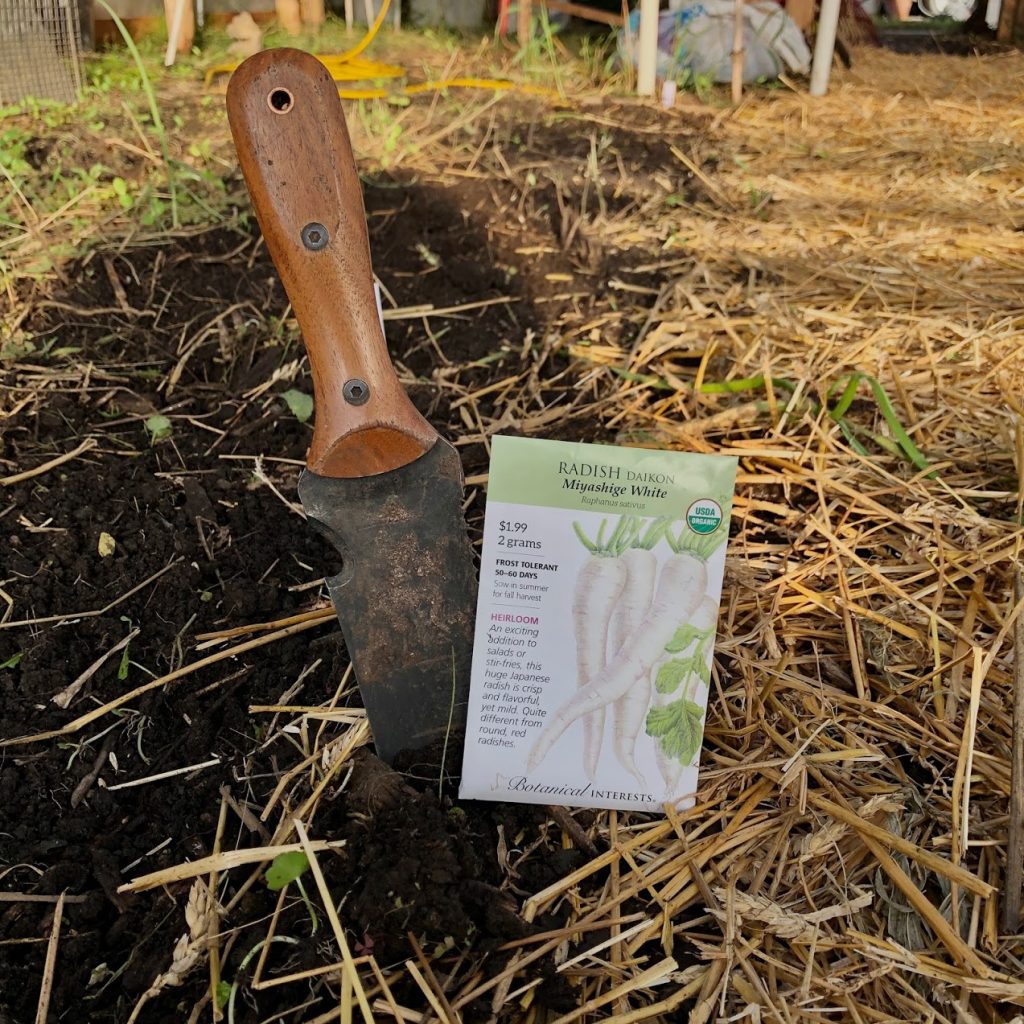
5.  Use them your lawn instead of lime
Wood ashes are a great substitute for adding lime to your lawn.  The easiest way to spread the ashes is to do so just before a good rain, so it soaks into the ground quickly.  This helps with the solubility and also prevents the dust from being tracked indoors or getting on your shoes.  I often use my grass seed spreader and put it on the lowest setting and broadcast the ashes that way.  Doing it by hand or with a shovel can often create piles in the grass which will over alkalize an area.

6.  Indoors to control odors or absorb moisture

Keeping a small bowl of wood ashes in a closet or cabinet will not only absorb odors, but it will also help absorb moisture and control mold.  Making a bowl with wood ash is great for keeping boats and campers fresh as well.

7.  Dust baths for poultry and fowl

One of the WORST homesteading tips I have ever seen is to use Diatomaceous Earth in it’s DRY form with animals.  These microscopic crustaceans are like mini razor blades that will do permanent damage to the lungs of your animals.   So instead of using DE… consider adding wood ashes to your chickens dust-bath.  The alkaline ashes will kill the dust mites, ticks, and fleas, etc and you don’t have to worry about the respiratory health of the animals.  Not to mention, ashes will also help control odors!

8.  Add to ponds and lakes to help control algae blooms

Add about one table spoon of ashes per 1000 gallons of water.  The ashes will not “kill” the algae, but it will slow it down and make it more manageable.

9.  Cleaning… yes… cleaning!

Wood ash can really help polish up brass and metal.  Making a paste and scrubbing down your silver might sound counter-productive – but trust me on this one!  You can also use wood ash in the garage and workshop as a way to clean up oil, gas, or chemical spills.

Sooooooo….

Now that you have a few good uses for those ashes, go outside, make a campfire and have a s’more (or three).  Permaculture is a judgement free zone… so let’s just promise to not star counting marshmallows.  Just make sure the ashes are cool before spreading.

Remember, the problem is often the solution.  Happy gardening.