March Gardening To-Do List (Growing Zones 3-8)

Here’s a list of what you should do in your garden in March, if you live in the Midwest (specifically in USDA zones 3-8). Granted, weather isn’t exactly a science… well it is… it’s just not an exact science. Just keep a close watch on your weather and plan your planting accordingly. If you are not sure what your growing zone is (or how to use it), watch this tutorial video. If you are in a warmer climate, don’t worry, you can CLICK HERE for the Zone 9-11 March To-Do List.

Without further delay, ladies and gentlemen, here is your completely arbitrary March Gardening To-Do List!

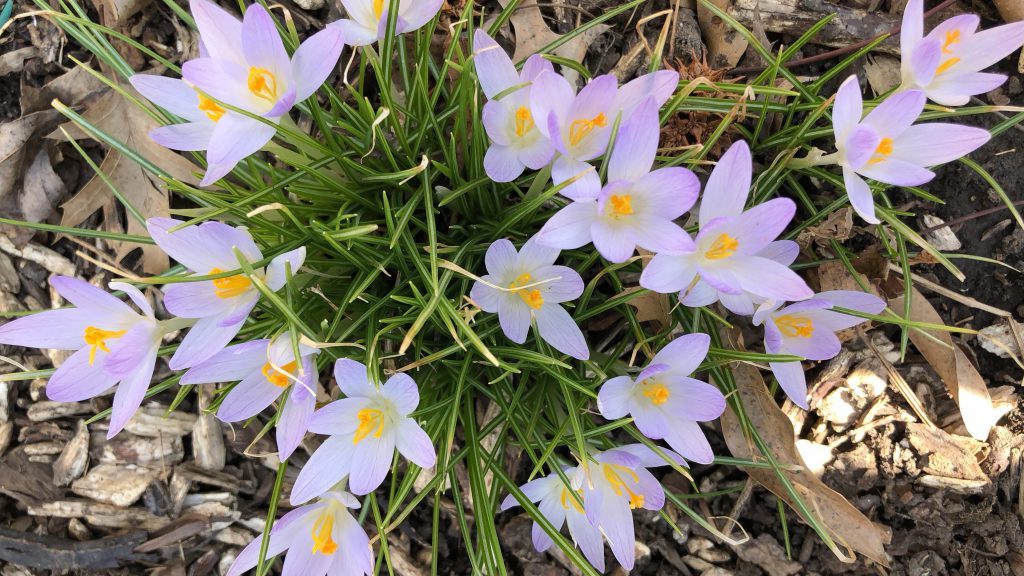
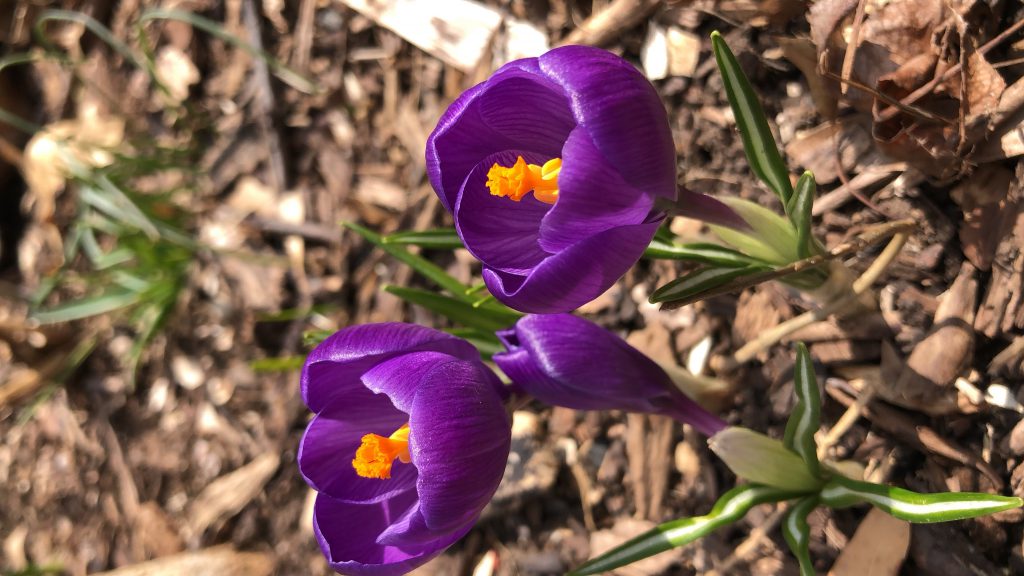
crocus bulbs in bloom
Crocus in the spring garden

In the Garden

  • Take soil tests and send to your local extension office. Take samples from each area of your yard and make sure to get the detailed report. The most important part for me is not the NPK… it’s the amount of organic matter! Generally speaking if you have a higher percentage of organic material in your soil, the rest of the soil health will follow suit.
  • Make minor amendments before the spring rains (add bone meal, blood meal, etc.).
  • Spread chicken poop and hay from the nesting boxes on the compost pile and get it working before it’s warm.
  • Start planting some frost friendly veggies (radish, Swiss chard, cabbage, broccoli, some lettuces, etc.)  We recommend direct sowing a little every week, so that way your harvest is staggered.  It also helps to insure a diversified crop and give extra insurance that if one round dies… another one will do just fine!

In the Greenhouse

  • Plant seed trays: tomatoes, peppers, eggplant, kale, broccoli, cabbage, etc. Start perennial seeds for food forest planting: goji berries, gooseberries, trees from seed, etc.
  • Add black 5-gallon buckets of water (with lids) for radiant heat source, if you do not have a heated greenhouse.
  • TIP: Always plants more than what you think you’ll need. The worst case scenario is that you have some to share with neighbors, friends, or gorilla plant in a local park.

In the Food Forest

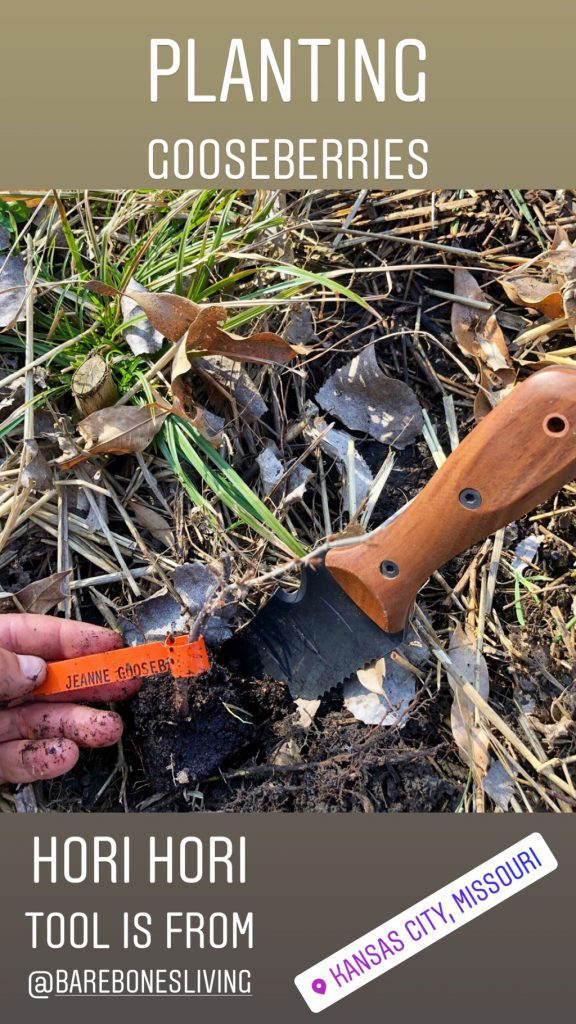
This hori hori tool, from Barebones Living is one of my new favorite gardening tools.
  • Break up any large sticks and twigs. They will decompose much faster if they are in direct contact with the soil.
  • Remove leaf cover from the soil and use as a mulch around the base of trees / bushes (cover the sticks). You can chop it up a bit with the mower if the leaves are still crispy.
  • Plant alley crops between rows and plantings. In our area I often use a blend of red clover, white dutch, yellow closer, and crimson clover. I plant this between the rows.
  • Plant living mulches around the base of the trees (turnips, bocking 14 comfrey root, berries, herb roots, etc.).
  • Feed native wild birds before nesting season starts in order to encourage them to live in your area. They are fantastic bug control and leave behind little bits of birdie poo.
  • Hang wild bird houses and bat houses before nesting season begins.
  • Set out orange halves and grape jelly to attract early migrating orioles.
  • Last chance to prune apple trees (before buds open)!
  • Spray your spring foliar spray on every perennial in the food forest! Get our recipe here.
  • Add fresh mulch to trees and shrubs (up to 5″ thick). Remember to always keep the mulch away from the trunks of the trees.
  • Get a permaculture consultation to help you come up with a game plan for your overall property, garden, and food forest. PermacultureFX now offers digital consultations (at a reduced rate)! Virtual design services are a great way to start your food forest with the best chances for growing success. We’ll tell you what to plant, where to plant, how to get it in the ground, and even how to harvest and maintain your food forest. Travel is an option for those who prefer in-person services.

In the Shed

  • Sharpen mower blades and all cutting tools.
  • Oil any metal that rusted over the winter. Remove tarnish with steel wool. Ax heads should be treated with bees wax.
  • Check for broken pots from winter cold.
  • Set a few extra mouse traps in the shed, greenhouse, and garage.
  • Start up the mower, weed whipper, and other tools for the first time. If you have difficulty starting them, you can always use a bit of Sea Foam to get things moving. Use two ounces per gallon of gas. It will work wonders!

In the Chicken Coop

  • Remove winter bedding, if you used the deep bedding method.
  • Deep clean…deep clean…deep clean! We use Shaklee’s Basic H2, because it’s organic and will also take care of mites, lice, etc.
  • Lower fat content (corn) and increase protein sources. If you are doing a mealworm farm, it’s a great time to give the girls an extra boost!
  • Feed extra omega-3’s. Get some feeder fish (minnows) from a local pet store and put them in a shallow pan. Watch your chooks go nuts for them!
  • Use honey, garlic, and ACV in their water once per week to give them an extra immune boost before the springtime. I also add a product for livestock by SCD Probiotics based out of KCMO.

Around the House

  • Clean out the gutters from any winter debris.
  • Remove winter window treatments and wash windows (inside and out).
  • Power-wash the sides of the house, cement, and garage doors. We use Basic H2 for this as well, because it organically takes care of mold and mildew easily.
  • Oil doors and hinges (interior and exterior).
  • Prune any trees around the yard before leaf buds begin to open.
  • Get hoses ready to bring outside.

In the Perennial Flower Beds

  • Finish cutting back any dead growth from last year.
  • Trim back winter ferns and greens (holly, lenten roses, etc.)
  • Remove leaves or debris from the top of bulb areas, leaving only compost or wood chips. The debris should be composted and added back to the beds later.
  • Start planning mulch and compost deliveries now. Look for sales or companies to bring it to you in bulk.
  • You can also plant cold season annual flowers at this time as well. Snap dragons, violas, pansies, and calendulas do great this time of year.
  • Spring sow any native wildflowers. One of my favorite Midwest companies for this is Prairie Moon Nursery (online), because they do seed mixes geared toward your specific sun exposure and soil type.

  • IMPORTANT TIP: Never use mulch that has been colored or dyed (red or black). Let’s just use our heads on why that’s a bad idea.

June Gardening To-Do List for USDA Zones 3-8

june garden calendar

June Gardening To-Do List

What should I be doing on my property in the month of June if I live in USDA Zones 3-8? Have you ever wondered what other organic urban gardeners are doing right now in their yards or on their properties?   (Looking for USDA Zones 9-11, click here)  Well, here’s a little list to give you a jump-start for what you be doing in your midwest garden in June.  

In the Garden

  • Plant more:  Kale, lettuce, cucumbers, summer/winter squash  Plant another round of them, if you have room in your gardens.  These are also great to plug into open spaced in your flower beds.
  • To Plant:  Corn, cucumbers, beans, squash, pumpkins
  • Tomatoes: Plant another round of them to diversify harvest throughout the season.  In the midwest, where we often have hard clay soil, you can actually increase your root systems for greater water intake by following these easy steps.  First, pinch off the bottom layers of leaves, only leaving 2 – 3 sets on the top of the seedling.  Second, plant the seedling all the way up to the top of the plant leaving only the remaining leaves above the ground.  Because tomatoes will grow roots from the hairs on the stem, the entire stem under the soil will produce roots.  This should only be done with seedlings up to 6-8″ tall.  Lastly, be sure to give it a good watering from your rain barrel when you finish.
  • Plant extra bean seedlings everywhere you can.  Yes, everywhere you can.  The bush beans are excellent right off the plant (raw), can be cooked, and some can be dried.  The best part, in my humble opinion, is that the green beans are nitrogen fixers and help repair the soil.
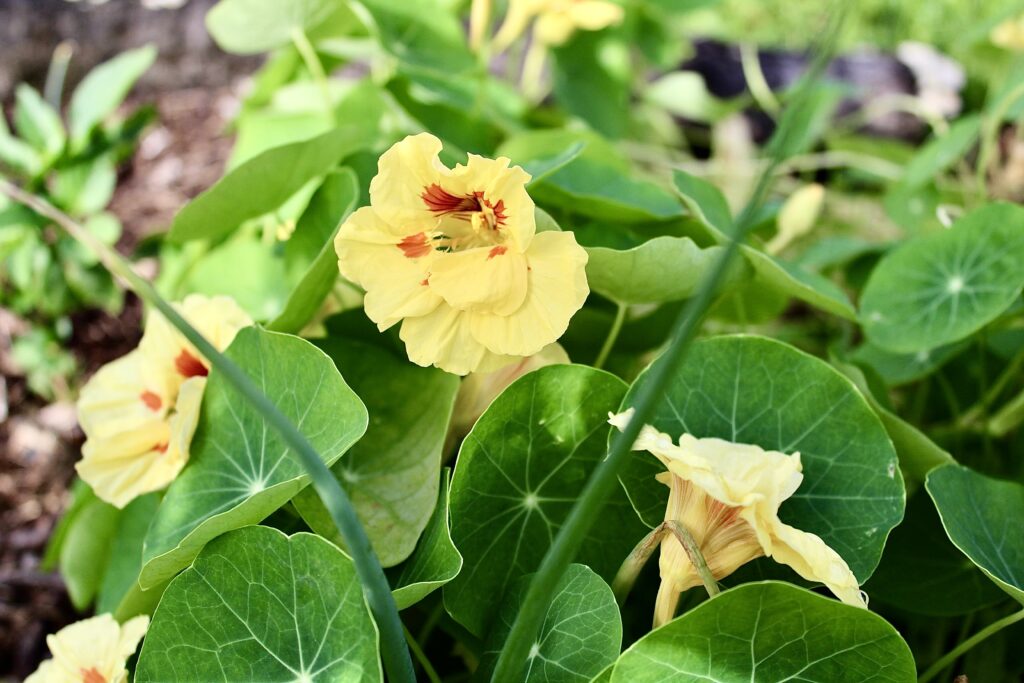
Plant nasturtiums

TIP

Plant nasturtiums around the garden and in the food forest. They are a two-fold insectary plant. First, they will attract the good insect and pollinators, especially the braconid wasps (which defend against the bad guys). Secondly, they are an insect trap for aphids, so if you see your nasturtiums covered…. consider them a sacrificial crop to protect your veggies.

In the Greenhouse

  • We are essentially finished with the “Greenhouse” season, but if you have a shade cloth, you can actually open up all the windows now and put the shade cloth over the top. This will allow you to start micro-greens and other later season veggie starts. If using a shade cloth, you can also use the opened greenhouse for your indoor tropical plants to give them a season outdoors. Just be sure to pay attention to your watering!
  • Clean and sterilize the plastic pots used this winter / spring
  • Set mouse traps to control critters
  • Hang fly trap to control aphids, flies, and other pests
  • Fertilizing: It’s crucial

In the Food Forest

  • Ground Cherry seedlings can go into the ground.  Plant them around the base of trees to provide shade for the root systems, but allow enough light to get through to produce a harvest.  These will often self-seed, so plant in an area where you are ok with them spreading.  However, the taste of these berries is incredible, you will not regret planting them.
  • Herbs around fruit trees:  Woody and smelly herbs are great at two things:  keeping pests away (deer and bad bugs) and attracting native bees for pollination.  Wait, I lied… three things.  They are also a great ground cover under the young fruit trees.  Plant yarrow, bronze fennel, dill, oregano, thyme, chives, or garlic chives in clusters around the base of each fruit tree.  Let them spread and grow wild.
  • Harvest elderberry flowers:  If you are making elderflower tinctures, teas, or wine – now is your time to harvest!  Make the good stuff when flowers are at their peak.
  • Apply late spring foliar spray, if you have not done so already.
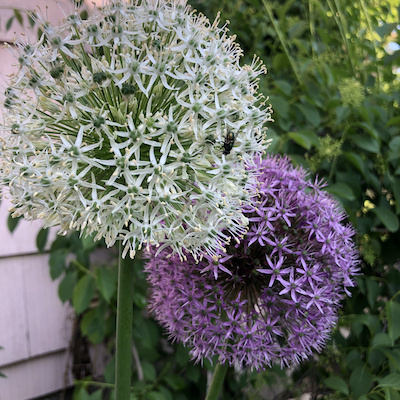
What Can You Plant Between Snows?

Enjoy your spring pollinating bulbs that you planted this winter.

If you forgot… here’s an article of when you could plant this this coming winter.

In the Shed

  • Now that your tools are up and running, give them a check over before the summer months hit. 1 – Check oil levels. 2 – Check air filters. 3 – Add a bit of Seafoam to the gas to help clean things out a bit.
  • Set mouse traps and keep any animal feed sealed and contained.
  • Make a tool cleaning bucket: Fill bucket with sharp play sand. Add oil motor oil, cheep cooking oils, etc until the sand is “damp”. Stab shovels, hoes, pitch forks in and out a few times to clean off dirt and give the metal a nice oiling to keep them from rusting after each use. Garden spades and trowels can be kept in the sand bucket.

In the Chicken Coop

  • Chickens:  Many folks who bought the spring chickens are now free ranging their birds. They are not laying yet, so do NOT give calcium.  Stay on a great grower feed until the first eggs arrive.  My preference is a high protein feed with lots of seed varieties.   Personally, prefer to mix and ferment my own feed. Here’s my recipe.
  • Quail:  It’s starting to get hot, to be sure to keep their water filled at all times.  It helps (once a week) to add a tsp of apple cider vinegar to their waterer.  It will keep them healthy and active.  As you weed the garden, you can also give them an occasional worm for additional protein in their diet.  Their cooing and songs will be as nice of a reward as the healthy eggs they will produce.
  • Deworming: Use 1 tablespoon of Basic H in a 5 gallon waterer (1tsp per gal) for chickens. Add 1.5 cups to a 100gal waterer basin for cattle and horses. Available in bulk (much cheeper for farm use) This should be their only water source for two days.

Around the House

  • Keep South and West facing shades closed during the day time in order to block out the hot sun.
  • Open up the windows on cooler nights to help air out the house and let in fresh air.
  • Replace your AC air filters and clean out the vents with a shop vac.
  • Power wash cement, walkways, sides of house, shutters, wood decks, and outdoor furniture.
  • Clean outdoor windows and doors (I use Basic H for this)
  • Apply UV protectant to your recreational vehicles (boats, car interiors, RV’s, decals, etc.

In the Perennial Flower Beds

  • Transplanting:  It’s the chance to move perennials for a few months.  Once the Midwest summers get hot, it’s really a challenge to transplant your perennials without over stressing them too much.  Now is a GREAT time to transplant coneflowers, yarrow, black-eyed Susans, penstemons, etc.
  • Share plants that you are dividing and trade with friends.
  • Cut back mums:  Yeah, go to town. Cut them back quite a bit.  Leave only about 1/3 of the plant.  You do NOT want this to develop buds yet, so if you see them forming again – give it a hair cut.

Comment Below and let us know what YOU are doing this month in your garden.  

Be sure to let us know your city / state so we know your growing region.  Check back soon for items to do next week… bookmark this page for referencing this month and keep checking back.  We’ll keep you updated on a weekly basis.

LOOKING FOR THE JUNE LIST FOR WARMER CLIMATES? CLICK HERE

How to Create a Food Forest in the Midwest – Part 1

Why a Food Forest?

In a culture that encourages us to have more money, bigger toys, larger savings, new cloths, and an endless supply of technological gadgets, we should be stepping back and asking, “why?”  Do we really need one more gadget?  Do we need another nick-knack?  Do we need the latest cell phone or computer?  Do we actually need the new shirt or pair of shoes or could we just simply wear the ones we already have?  We have been trained by a consumer-based culture that more is better.

The reality is that most of these items we are collecting have a short shelf-life.  Even our savings accounts, retirement funds, and inheritances we will fade in a relatively short time.  Maybe they will last a few years, a few decades, or if we are are extremely wealthy they might last a generation or two.  In the context of a century… our stuff will be gone in a heartbeat.  But, what if we could pass on a legacy that would last 50-100 years or more?  What if our legacy could provide food, shelter, and play areas for your children or grandchildren?  What if our legacy provide pollination for wildlife, shelter for birds and animals, and purified the air?  What if we could leave a legacy that actually provided a source of LIFE?

In my humble opinion, one of the most practical ways to accomplish a legacy of this caliber is to plant a midwest food forest.  In permaculture, we use this phrase to describe a forest of edible and restorative plants working in harmony with one another.

Food Forest Design

What is a Food Forest?

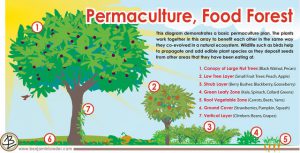
Generally speaking, every forest is jam packed with edible fruit trees, nuts, berries, and fungi.  Over hundreds of years, natural succession helps establish these systems and create a healthy and balanced growing environment.  Using permaculture, we are essentially designing a system that works in tandem with nature to speed up the process.  Instead of productive abundance taking 100 years to be established, we can design it to take only a handful of years.  A food forest uses intelligent design to restore and remediate land that would otherwise take centuries to return to a normal state.  Instead of working against nature to maintain a mono crop, perfectly green lawn, or a patterned landscape of tropical annuals, we use perennial species that will last foe year.  This is especially useful in areas that have suburban forests, because in most cities our forested areas are only 50-70 years old (at best).  Historically speaking, many wooded areas were harvested between 1940-1975 for lumber and then either naturally regrew or were replanted.  Even the city land behind my house in Kansas City, MO is a fairly young forest and only has a handful of old growth oak trees that are older than 100 years.

Food forest summary

A note on removal of invasive species:

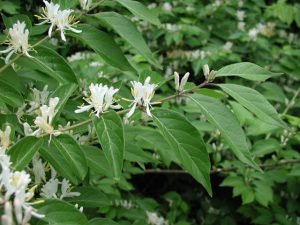
Most of the forests in the Midwestern city areas are in similar shape and are nearly all facing the invasive honeysuckle bush invasion.  Amur honeysuckle, or Lonicera maackii, was introduced to gardens in New York in the late 1800’s and by 1924 was already labeled as “weedy species”.  Since then, it has spread throughout the east coast and midwest and it’s shrub-like structure shades out low growing species in younger forests.  It’s red berries are generally ingested by bird species and the seed spread in their stool to other areas.  Removing this species is often the first step for Midwesterners starting a food forest.

Once the invasive species has been removed, the land is ready for replanting and reforestation.

Invasive Amur Honeysuckle

How to Plant the Food Forest – Part 1

1 – Land Preparation:  In our recent project, we had a great deal of invasive honeysuckle to remove, which was obviously very time consuming.  Digging it up is the most effective way, but you can also use a chain saw and cut it off at the ground. When you cut it, you will have to use chemicals to kill the root or it will simply grow back.  Obviously, I prefer NOT using herbicides, but there are some natural alternatives that contain orange oil, agricultural grade vinegar (15-30%), and epsom salts.

It’s imperative to properly rid the area of the invasive species, because skipping this step will allow the old species to return and choke out all of your design work. When removing undergrowth species, I prefer to do it in early spring so it’s warm enough to work and you don’t have to worry about ticks or fighting through the leaf growth.  If you are fortunate enough to have goats, they will take care of the leaves and branches, but you’ll still need to dig out the root or it will grow back quickly.

The second step in preparing the land is to examine your soil and structure.  This is your time to consider amendments.  You can bring in compost from a local company, collect fallen leaves from your fall clean-up, add bone or blood meal, or sulphur for acid loving areas.  Before adding anything to the soil itself, make sure you are testing and observing your site.  Get to know the land you are working with and begin with the end in mind.  Know the type of soil your plants will prefer, so you can create the right environment for them.

midwest food forest
Cleared plot for a newly planted food forest in Kansas City, MO

2 – Plan out your design:  For every project, I generally need about 10-15 hours of preparation and research before I even begin planting.  Winter months are a great time to do this, because we often are not outside as much.  Research species according to your soil type (acidity, organic matter, etc.) and carefully consider how much water will be retained in that area.  Factor in sun exposure both in it’s current state, but also imagine the area once the plants have reached their mature sizes.  How might this change your design?

Once I have the basic questions answered, I can then start looking at individual species and seeing what looks good together on paper.  I will go through 3-5 different designs and purposely make myself change out some of the species in order to think outside of the box.  Here are a few factors to consider:

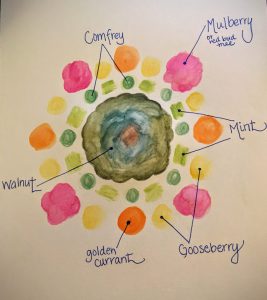
  • What is my top story tree?  Will it produce nut or fruit? Will that impact my soil acidity over time?  How tall will my center piece trees get?  Will that impact my shade?
  • Do my understory trees or shrubs have compatible soil requirements?
  • How it my spacing? What will this look like in 3 years?  In 10 years?
  • Do I have at least 4 layers in my food forest?
  • Have I including at least one nitrogen fixing plant in my system (legume, locust tree, clover, etc.)?
  • Is there multi-seasonal interest for the eye?  For nature?
  • Have I considered season-long pollination?
  • Do the plants that I have selected require a male and female plant for fruiting?
  • Do my colors and leaf textures work well together?

Finalizing Your Midwest Food Forest Design

Once you have created a few different drawings of your layout, I would recommend sitting on it for a few days and then coming back to it later.  Run the ideas by a friend and get their feedback.  When I was initially planning my layout, I incorporated too many alkaline loving plants next to my blue berries, which do best with slightly acidic soils.  I was so focused on the fruit and berries that I liked, and the way they would look together, that I missed a pretty big piece of the puzzle.  The result would have been an environment where likely neither would have thrived, so I was relieved to have the insight from another permaculture eye.
Before planting, plant on spending at least 10 hours of researching and planning out your design.  As you plan, research various species, their growing zones, and read the reviews of others online.  Often plants will say they will work in certain zones, but after a few years of consumer reviews, they change the rating on the species.  For this reason, I tend to stay away from varieties that have not been tested in my region or ones that I am unable to find adequate reviews.

Personally, I like to order plants from places with one zone colder climate, so I know they can take the various types of weather we experience in the Midwest (KCMO).

The second part of this article will be available next week, including a few options in planting species for a wood-edge (sun/shade) area with clay soil structure.  In the upcoming article you’ll learn how to amend the soil, perform bio-remediation for areas that may have had pollutants, and how to space the plants appropriately.  The next article will include pictures of a newly planted food forest and close up pictures of the various species used in it’s design.

Permaculture Test Site and Case Study | The Daniel Academy

permaculture test site

The Daniel Academy (TDA), a pre-kindergarten through 12th grade private school in South Kansas City, is an active permaculture test site and case study.  This site began using permaculture design methods to transition their existing commercial landscape around 2010, and has been on a fast-track course to pioneering the use of permaculture in midwest education.

Permaculture at The Daniel Academy

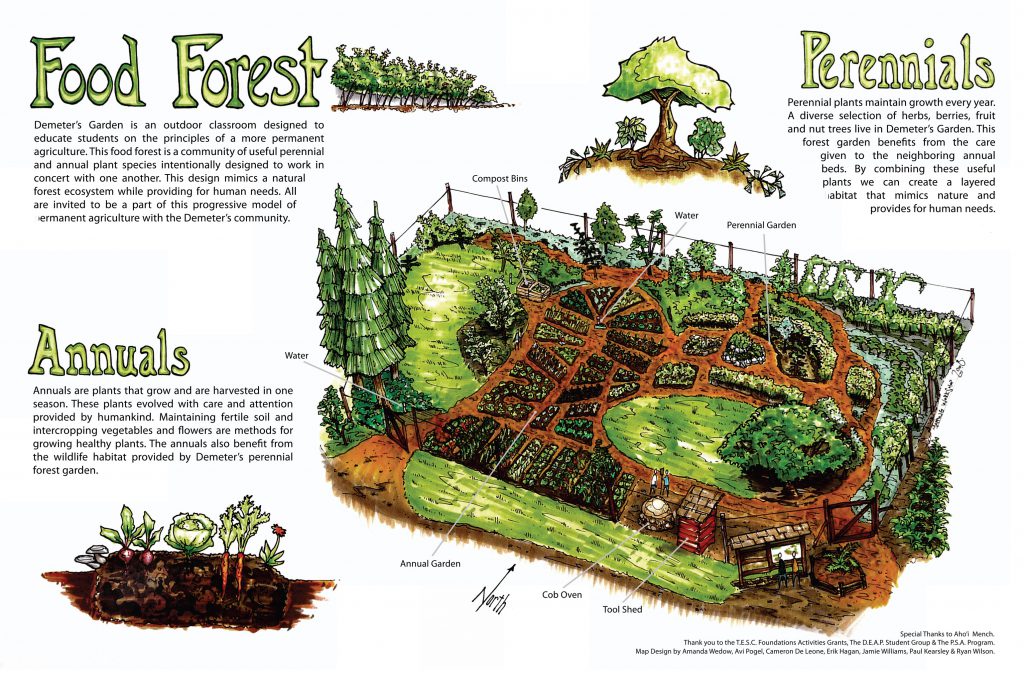
ji garden 2As a permaculture test site, TDA has been hosting yearly gardening courses for 7-12th grade students, and in 2016 hosted its first Permaculture Design Certification Course (PDC).  As a test site, there are several models of permaculture related designs taking place on one property.  Each of these has a direct connection to the students, classrooms, and families that the school serves.

The downloadable document below gives an example of a permaculture design project focused on the educational sphere.  This design was developed by Kris Edler in 2014 and presented to the school for adaptation and implementation.  It gives a historical summary of the 18.5 acre property, a current site analysis, and a few project ideas to launch them into 3, 5, and 20 year planning.  The project proposal includes everything from the use of late spring foliar spray methods to long-term building proposals and capital investments.

Download the FREE PDC Proposal Below

This permaculture test site and case study is a great way to find out what works in Kansas City with our extreme weather fluctuations, as well as provide inspiration for other local projects.  For those interested in implementing permaculture into education, it serves as an excellent case study to use for adaptation in your own systems.  Finally, the document below is one possible approach to how to do a permaculture design project for your own PDC.  If you know of other test sites for permaculture in Kansas City, or would like your own site to be featured our website, please email permaculturekc@gmail.com


CLICK HERE TO DOWNLOAD The Daniel Academy Permaculture Design Proposal