Five Things Every Organic Gardener Needs on Hand

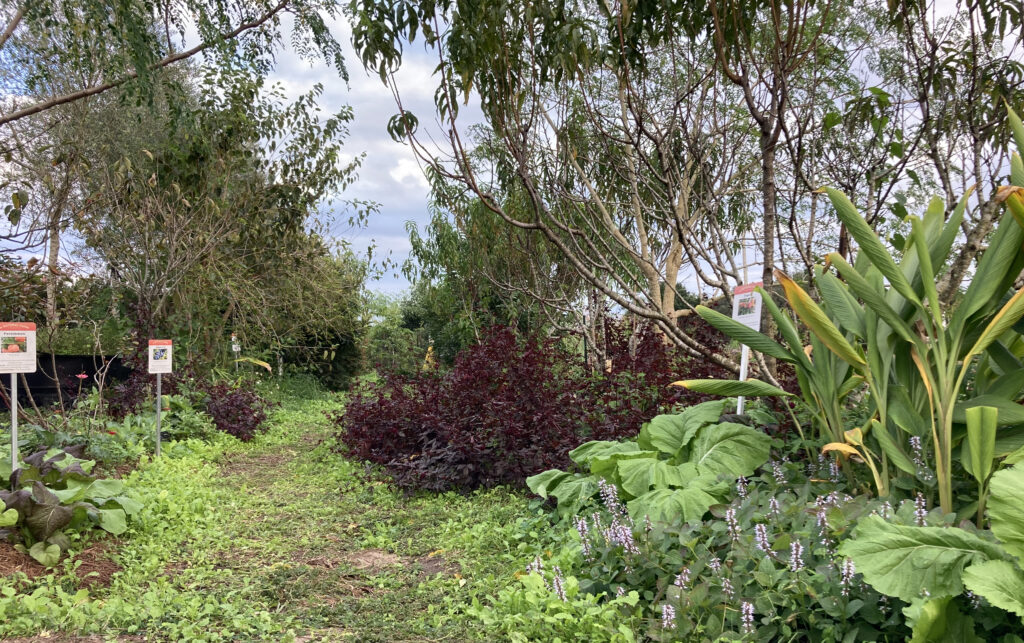
Over the last 20 years, I have found that nearly every garden problem can be solved with a handful of solutions. Of course, there are countless nuances to the various problems, but often times, the solutions are the same. Whether in my own home garden, at other USDA certified organic nurseries, or on the dozens of permaculture sites I have designed, I have found that there are five solutions that every organic gardener needs to have on hand at all times. So, here are the five things that every organic farmer needs on hand:

Food Forest Garden

1 – Organic compost

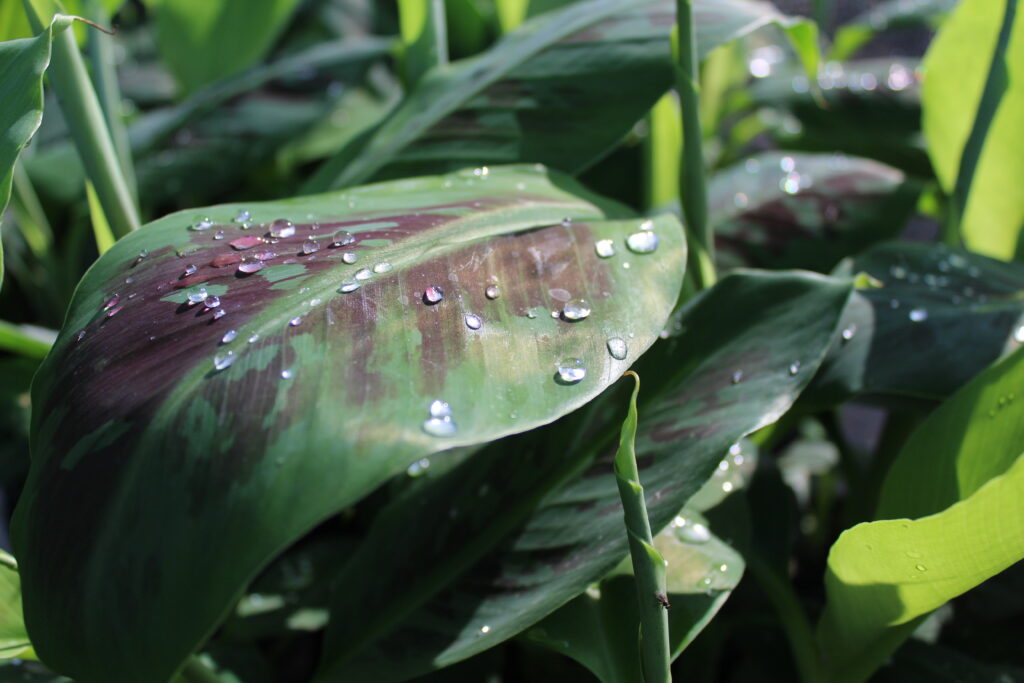
Instead of wasting money on expensive fertilizers and soil amendments, every gardener needs a good compost pile going at all times. Healthy plants will be more resistant to disease, fungal infections, and bacterial issues. Compost not only helps increase overall plant health, but also builds soil structure. If you are fortunate enough to have an organic compost source locally, then absolutely support them by purchasing their product as well. For many families, a compost pile can be too much work and not enough return. So for many homes, a worm composting unit (like those from Uncle Jim’s Worms) are the best solution to get compost and compost tea. In cold climates, a 1″ layer of organic fertilizer can be applied in April, June, and August. In subtropical and warmer climates, it can be applied in February, June, and September.

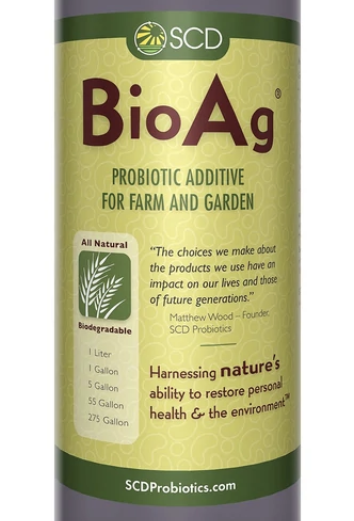
2 – Soil and Plant Probiotics

Ideally, we are all brewing batches of indigenous micro organisms, but since that isn’t possible for many home gardeners, there are amazing products to help soil microbes. Probio is (by far) my favorite soil probiotic. I use this monthly in my watering can, as a foliar spray (using a backpack sprayer), and even as a compost pile activator. On the organic farms I am connected with, this product is often the secret weapon for plant and soil health. It often works so well that it curtails future problems with fungal and bacterial issues before they even start. Having this product on hand is a must. CLICK HERE for order info.

Basic H – Plant Based Surfactant

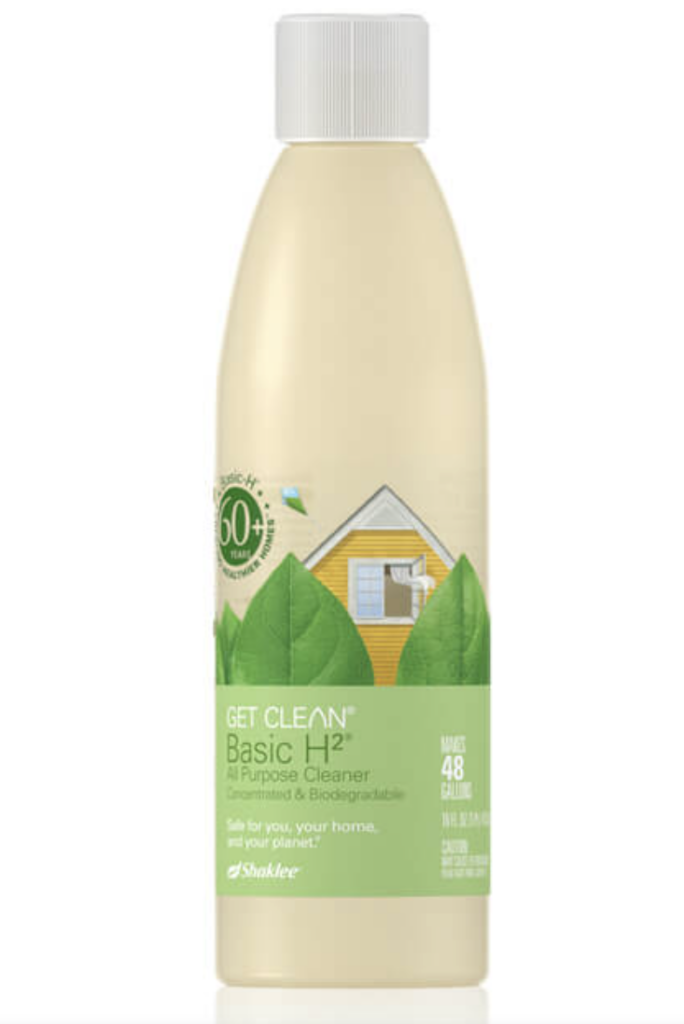
3 – Soap Alternatives (must be plant based)

An organic plant-based surfactant is a god-send in the garden and food forest. Personally, I use Basic H, and we also use this at several certified organic farms we are connected with. This is used to wash off pests, aphids, and bugs….but also to clean pots, trays, and farm equipment.

is also great for treating fungal and bacterial issues and used to emulsify neem and/or fish emulsions before application. Permaculture guru, Joel Salatin even uses this for deworming cattle and livestock (and I now do the same). Do NOT use non-organic options or even scented castile soaps, because they will remove the natural waxy coating on the plant leaves and can actually damage soil health.

4 – Neem Oil

Neem is an organic plant extract used to treat fungal issues like sooty mold, powdery mildew, etc. It is also a great insect repellant and used to kill things like aphids. Neem also has a short activity period, so it’s not going to affect bees and butterflies (unless you spray them directly). It’s a much safer insecticide than anything else I have ever seen or used. Not to mention, in humid climates, it helps control our many fungal and bacterial issues. When purchasing, be sure to get 100% pure neem and then dilute it yourself. The premixed stuff in a spray bottle is a rip off.

5 – Kelp and Fish Emulsion

These two are both light fertilizers that also contain living enzymes that build the soil. They are both non-burning, organic compounds that not only fertilize the plant, but also help the uptake of minerals. They can often be added to water as a root drench, but also used as a foliar spray multiple times during the growing season. Chemical and synthetic fertilizers bought in the store (even most organic options) use salt as a carrier mechanism for the nitrogen. Some organic fertilizers “hide” it with things like soy protein hydrosolate, which is up to 40% MSG. So stick with organic compounds like compost, fish emulsion, kelp, bone / blood meal to build your top soil and microbial health.

How to Build a Banana Circle

how to build a banana circle

One of the most common inquiries that I received while working at a food forest nursery and educational center in Central Florida was how to build a banana circle. Banana circles have benefits on multiple levels, both for the environment and for the human community.

First, they utilize companion planting so that the growth habits of the various species included benefit that of the others. In essence, they work together symbiotically by providing nitrogen, biomass, shade for other species in the circle, etc. Secondly, banana circles are beneficial because they provide stationary composting scenarios that do not require turning. Lastly, a banana circle provides a way to readily utilize grey water runoff from a house or a well. This is extremely beneficial in both rainforest and (sub)tropical climates because it lessens “open water”. This not only decreases the potential for disease and bacteria, but also eliminates the breeding ground for malaria-causing mosquitoes.

If you are in a tropical or subtropical climate, learning how to grow a banana circle is not only an excellent regenerative agricultural practice, but also a way to bring natural beauty to areas that are often more difficult to design around. So, here are is an easy-to-follow diagram with simple steps for building a banana circle.

Diagram of How to Building Build a Banana Circle

how to build a banana circle

Simple Steps to Building a Banana Circle

  1. Dig your hole. A small banana circle should be a bowl-shaped hole that is 1-2 yards in diameter and about 3 feet deep in the center. A larger circle can be 2-2.5 yards in diameter and 3-3.5 feet deep in the center. It is better to have multiple circles this size than to try and make a pit larger than the sizes listed. Otherwise, the organic matter may not decompose quickly enough and it will be harder to harvest crops around the circle.
  2. Pile the dirt around the outside edge of the hole in the shape of a donut. This circular swale is where you will plant most of your trees. Under the “donut” of soil, you can also bury logs to make huglekultur swales for increased fertility and water retention.
  3. Fill the pit with mulch and compost. Use kitchen scraps, small sticks, yard clippings, leaves, cardboard, newspaper, etc. Material can continue to be added to this pile as often as needed. Install drainage from existing grey water systems to empty into the pit. Otherwise, if you install pipes or trenches later, you will risk disturbing the plants once they are established.
  4. Plant around the outside of the circle using the diagram above. If you are doing a larger circle, plant no more than 4 banana plants (at 12, 3, 6, and 9 o’clock) around the circle. This will allow them adequate space to spread out. Beans (not pictured above) can be planted anywhere in the system to fill in space and provide nitrogen for the other plants. Climbing beans can be used on the bananas once they have reached a mature height. In the earlier phases it is best to use bush beans. If you are in the US, I have purchased organic plants for banana circles from A Natural Farm and Educational Center.
  5. Don’t over plant. Plant quantities for a large (2-3 yard diameter) circle: 4 Banana, 2 papaya, 2 sugar cane, 2 taro, 10-12 sweet potato slips).
  6. Water. Water the center and harvest the edges.

Banana Circle Maintenance

  1. Spring (after danger of frost): Cut off dead banana leaves and chop and drop any spent plants and throw them into the center of the circle.
  2. Add moisture to the center of the pit during the dry season. Water ONLY in the center of the pit. Do NOT water the mound or edges of the swale.
  3. Keep adding organic matter to the compost pile in the center.
  4. Plant sweet potatoes farther away from larger plants, for ease of harvest. Add in bush beans in any gaps that you find.
  5. Mulch on the outside using wood chips to create a path and accessible area for harvesting.
  6. Consider a late spring foliar spray for papayas to prevent “black spot”.
  7. Harvest sweet potatoes in the autumn OR once leaves have died back. Be careful to not disturb the tree roots nearby.
  8. Consider additional plants: Blackberry, raspberry, ginger, turmeric, and katuk can also be planted nearby or in the shaded areas.
  9. Consider a linear pattern: The same plants in the diagram and the additional ones listed above can be used in a line as well as in a circle. The key is to make sure they all have access to the mulch pit (in this case trench line)
  10. Consider pond or wetland areas: These plants can also be planted along pond or water edges in other contexts. Papaya, however, will do better is a well drained (higher up) place in the system).
banana circle
Grand Nain Banana. One of many varieties available from A Natural Farm. They ship anywhere in the continental United States and grow their plants using organic farming practices. Many of the varieties they provide are USDA certified organic.

Banana Circles as a Gray Water Run-off Catchment System

In many tribal communities, the water well is a place of social interaction as much as it meets a practical need. Adding a banana circle to this area helps create a sense of beauty, but is also extremely practical. In many tribal systems, the people will either burn or throw out plant material instead of using it in a composting system. However, changing this simple component can help build their soil, provide food, and bring new strategies of sanitization and disease prevention.

On an ecological level, as the soil improves around these composting circles, the people can then begin to introduce chickens, which will further improve soil quality. The compost will feed the chickens and they will add their own biomass to the system via their droppings. Though it may take a few years to dramatically improve soil quality, the lasting impact of these systems is profound. Utilizing waste water and compostable material is ideal in creating micro-ecosystems that can help restore abundant soil health.

Just to reiterate, standing water (especially in humid climates) can foster disease and bacteria when left untreated. By funneling the run-off water and planting a banana circle, we are not only utilizing the excess water, but also purifying it before it attracts disease and mosquitoes.

The compost pit in the center creates a place for mycelial mass to thrive, which helps destroy many disease causing bacteria. Furthermore, the fungal networks will also act as a way to break down organic matter and fertilize the soil. Palm fronds (specifically) are especially beneficial in this type of a composting system. Essentially, they release phosphate which boosts the networks of mycelium in the soil.

Keep in mind, however, that bananas and mycelium alone can only handle minor pollutants (like grey water, kitchen water, run-off, etc.). Do NOT use this system as a way to use black water.

What additional insight can you provide for others regarding banana circles?

What specific varieties have worked well for you?

Leave your tips in the comments below and tag @permaculturefx on social media so we can share your banana circle posts to further educate others.

Sign-up for our mailing list OR get a permaculture consultation for your property.

Three Ways to Improve Garden Soil | Matthew Capps

Wood chips for Garden Beds

Three Ways to Improve Garden Soil

One of the main ideals of Permaculture is to catch and store energy in whichever form it takes. Most people spend heaps of cash importing what they need and disposing of their waste, when if they only examined their system a little, they would discover that what they pay the trash collector to take away is actually a valuable resource if harnessed and stored correctly. This is problem of biological waste is often an opportunity to improve garden soil.  The ideal system is one in which no “waste” is produced; every byproduct of every element is captured and channeled to some other purpose.  In essence, we capture the waste (aka. sink) of one system in order to feed another.  Of course, this is physically impossible per Newton’s laws of thermodynamics, but for the practical purposes of everyday life, we can actually come quite close. So, let’s just get real – how do you find cheep and easy ways to improve your garden soil?


1 – Kitchen Compost

This is probably the best understood method for recycling resources, but surprisingly few people actually do it. If we are honest, the few that do compost, never actually get to use what they create because it’s in a forgotten corner of the yard.  Whether from fear of the smells and sights of rotting vegetables or merely the inconvenience of gathering scraps and toting them to the compost pile, most people miss out on this simple and productive system. It does take a bit more work, but for a serious gardener it is more than worth it as piles of fertile earth become available.

You can compost vegetable and fruit scraps, eggshells and coffee grounds (in moderation), however meats, dairy and fats should be avoided as they will stink and attract pests.  Unless, of course, you are using the Berkley Method of Composting, but that’s another article.

Where heat and moisture are concerned, the microorganisms that make compost have a goldilocks zone: warm and moist. Accordingly, if you live in a cold climate it is best to have the compost in the sun where the microorganisms can benefit from the heat, but if you live in a hot climate, you may want to put your compost in partial shade as too much heat will hamper the process or cause it to go anaerobic.  If you live in a dry climate, you will also need to watch the moisture; a dry compost will not only kill microorganisms, but if overheated may actually catch on fire.

Compost should be turned regularly to provide oxygen for the microorganisms. This provides the perfect chance to check for moisture and heat. Also, compost should maintain about a 1:2 ratio of brown (leaves, twigs, dried stalks) to green (veggies, fruit, chicken manure), the term ‘brown’ referring to those materials higher in carbon and ‘green’ those higher in nitrogen. A healthy compost needs both. If properly maintained, this ratio should be enough to neutralize any odors coming of your compost. For a chart of compost items on the carbon/nitrogen continuum you can go to homecompostingmadeeasy.com.

A “cheater” alternative, if you just can’t bring yourself to hassle with composting, is to take your kitchen scraps to a corner of the garden and just bury them a foot deep with your shovel. Boom.

Wood chips for Garden Beds

2 – Fallen Wood

One source of biomass and organic matter that is almost completely forgotten is fallen wood. After a windstorm when the trees shed their weak and dying limbs, people regularly bundle them up and set them on the street corner to be carried away. A treasure trove of sticks and logs can be easily harvested by a pickup truck or even a regular vehicle if you don’t mind vacuuming afterwards. When compiled, this wood can be used for hugelkultur swales, mushroom growing, or wood chips if you’re willing to rent a chipper.  It can also be burned for wood ash, which is really useful for the home orchards.  Apply wood ash around your apple trees and blueberry bushes.  You can also use the finer wood ash in your chicken dust baths, instead of diatomaceous earth.  DT is a highly controversial substance with livestock, because research is showing that the powder can get into the lungs of the animals (birds) causing respiratory problems.  If none of these options are viable, you can store the wood to burn in the winter, heating your house and providing nutrient rich ash for your compost.  You can even use the wood ashes, once they are cooled down to help alkalize the soil and add potassium (potash) to the soil.


3 – Weeds, Leaves and Grass Clippings

Last of all are weeds, leaves and grass clippings. These are the waste products that homeowners spend hours pulling, raking, bagging, and shipping off to a dump where they will do no good. Weeds and grass can be used as feed for chickens or goats; once dried they also make good scratch’n thatch to neutralize the odor of chicken manure and keep disease at bay.  However, in the chicken coop, dandelion greens, plantains, and clover don’t last long at all!  My girls devour it!

Leaves too can be used as mulch or mown over and put in the compost. Fortunately for the permaculturist, leaves are like fallen wood in that no one seems to want them. Bags and bags can be found by every driveway during the fall. By collecting them you can capture the biomass that it would have taken your trees 10 years to generate. My permaculture teacher, Kris Edler, shared in our PDC about how he will collect dozens of bags from his neighbors trees to add to his gardens and compost piles in the winter.  By spring time, most of it has decomposed and is forming a rich layer of organic matter on the top of the garden beds.  It is important to run it over with a lawn mower if applying to flower beds, to help the decomposition process.

Grass Clippings on Garden Beds

A note on grass clippings:  It is dangerous, however, to take bagged grass clippings from people you do not know, as these are often covered in chemicals from their former owner.  They could have pesticides, herbicides, or other toxins that you may not welcome in your organic garden.

To use toxin-free grass clippings, you can add them around the open soil of flower pots to add instant nitrogen and help prevent water evaporation.  These clippings go great at the base of tomato plants or the garden veggies, though I would not put them around the base of squash, because their stem does better when slightly dry.  You can also dump a load into your chicken coop and allow the birds to forage through for weeds, bugs, and seed heads.  There are so many things to do with great clippings around the yard, so don’t bag them up and send them away – save them for yourself to improve garden soil.

Catching and reusing energy is essential to a sustainable future, but with so much going to waste in our own neighborhoods, it only takes one good neighbor to make a difference for many. Building your permaculture property and organic garden can make a huge difference in the community, when it’s done well and with careful planning.  Geoff Lawton says, “We should have 10 hours planning before the first hour of labor.”

We can talk and study about permaculture all day, but until we take these small, practical steps, nothing really matters.  By taking a few steps we improve our neighborhoods, one yard at a time.  Each of these three simple methods are great ways to use biomass to improve garden soil.

If you enjoyed this article, comment below with your own tips and tag a friend on social media.  Thanks for the SHARE!