Learning to make your own fermented chicken feed can help you save money and have healthier birds. By soaking your chicken feed in water, the seeds will expand, releasing locked up nutrients, and will also deliver important probiotics to your flock. In turn, your birds will be healthier, happier, and your wallet just a little fuller.
Basic Chicken Feed Recipe
Ingredients are measured by “parts”
Mix the feed using a unit of measurement that suits your particular situation by changing the size of the unit of measurement. For example, one part (in the recipe below) could mean “a coffee can full”, “a scoop full”, “one cup full”, “one bucket full”, etc. In essence, this recipe will make 12 parts total. So, if your unit for measuring is one cup, you’ll be adding 2 cups of cracked corn, 1 cup of oats, 1/2 cup of kelp, etc…. which will then give you 12 cups of dry feed when the recipe is complete. If you use a 1 gallon scoop for your unit, you will get 12 gallons of mixed dry feed.
Here is the basic chicken feed recipe:
- 2 cracked corn
- 1 oats
- 1/2 kelp meal
- 1 barley
- 2 milo
- 2 wheat
- 1 alfalfa (pellets)
- 1.5 split peas
- 1/2 flax (ground or whole)
NOTE: It’s important to use organic / non-GMO ingredients when possible.
NOTE 2: Use 1/4 part aragonite for layers as a calcium supplement

How to Ferment Chicken Feed
How to ferment your feed
- Use the chicken feed recipe above OR your own whole grain feed mix. Fermenting feed does not work well with pelletized food, because when soaked it makes a mush that some chickens may avoid. In addition, non-organic foods may also contain added antibiotics or chemicals that may change the fermentation process.
- Fill a five gallon bucket 1/2 full of feed.
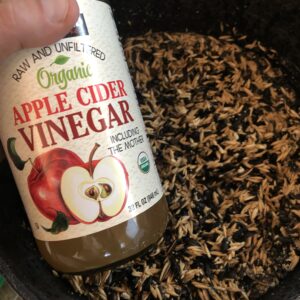
- Add 1/3 cup of apple cider vinegar OR 2 tablespoons of BioLivestock (by SCD probiotics) to start the fermentation process.
- Add enough water so that the bucket is 2/3 full. Your feed will expand, so be sure to allow room for this. You may need to modify this quantity based on your feed type.
- Keep 2” of water on top of the feed at all times. This will help prevent mold from growing on your feed. Whenever you see mold, the ferment will need to be discarded.
- Let it sit for 3-4 days to get the ferment going. You’ll smell the ferment (slightly sour) as it becomes ready. You should never see mold growing or smell a rotten smell in the bucket. You may choose to lightly set a lid or board on top of the bucket (do not press sealed) in order to keep critters out.
- Feed your chickens the fermented feed (within 5 days) using a pan or tray and make sure to add more water to the ferment so the seeds are covered at all times.
- Use a scoop from a previously fermented bucket to start a new bucket of feed, similar to a kombucha scoby. Once the ferment is started, you will not need to add more of the apple cider vinegar or BioLivestock, unless it’s a completely new fermented bucket.
- The general rule is that if you feed a scoop of fermented feed, add a new scoop to the bucket, so you don’t have to start from scratch each time. Think of it like a sour dough starter for chickens.
Soaking and fermenting your own feed is a much healthier choice for your flock. It delivers powerful probiotics in a way that is bioavailable to birds, and also expands the food using water so that you use less feed. This nutrient dense way of feeding your flock will not only increase their overall health and well-being, but also give you healthier eggs for you and your family. Enjoy!

One Reply to “How to Make Fermented Chicken Feed”
Comments are closed.