
September Gardening To-Do List for Zones 9-11

September Garden Calendar

The last days of summer have arrived…

Summer is coming to a close and we are also nearing the end of the rainy season in many southern states (late September).  Though temps are still high, we are now officially in annual vegetable gardening season.  As most of the US is finishing their vegetable gardens, we are just getting started in the warmer climates!   So, if you want to plant those tomatoes, pepper, eggplants, and squash – the season is now upon us!  Needless to say, there are plenty of things to keep us southerns folks busy in the garden and around the homestead.

Please note, this specific list is catered to those living in USDA Zones 9-11, so if you are looking for Zones 3-8 – click here.  

Without further adieu, here is your September Gardening To-Do List!

September Gardening To-Do List

In the Garden

  • Things to plant by seed:  beats, brussels, collards, eggplant, kale, lettuces (and greens like arugula, minzuna, etc), peppers, Swiss chard, tomatoes, and one last round of tropical spinaches.  Plus, you can start planting beans a little at a time this month!  We also recommend continuing to plant a few squash, pumpkins, carrots, and cucumber seeds each week.   We suggest staggering your planting this month, so all your cucumbers aren’t ripe at once.  Typically, this is our strategy with most varieties of annual veggies.
  • Onions:  Start planting bunching onions
  • Pumpkins:  Keep plantings through the second week of the month.
  • Tropical greens:   Harvest and enjoy your tropical spinaches (longevity, Okinawa, Surinam, Brazilian, etc.) all month long!  Start looking for flowers to dry so you can save seed for next year.  
  • Brassicas:   Wait until the last week of the month for most cabbage, cauliflower, broccoli, etc.  
  • Fertilize:  This is a great month to apply compost to the garden and food forest!  Composted manure is our favorite for the garden and mushroom compost in the food forest.  Other great amendments for this month include:  azomite (minerals), fish emulsion, blood meal, kelp, folic acid, and epsom salts (which is actually magnesium).  
Spicy Turmeric Flower

Turmeric and Ginger are all in flower this month! These are fun little surprises that often hide at the base of the plants. Be sure to pay attention!

In the Greenhouse

  • Time to start planning to remove shade cloth (end of the month). Check to see if any greenhouse windows or plastic needs to be ordered before winter months.
  • Keep air flowing! September is still pretty wet in many parts of the south, so be sure to encourage proper airflow to prevent mold and mildew.
  • Check mouse traps regularly, because animals will start looking for their fall homes soon.
  • Start fall propagations of fruit trees and berry bushes from cuttings. It’s a great time to propagate mulberries, elderberry, sweet almond shrub, African blue basil, start avocado and mango seeds, etc.
jaboticaba fruit

Jaboticaba are producing a nice fall harvest in many areas this month! It’s also a great time to save those seeds and start planting new plants that can be overwintered in a greenhouse or indoors.

In the Food Forest

  • Harvest: enjoy the last of the mangoes and start preparing for sugar apple, atemoya, and chermoya! Avocado season has also officially begun! Look for guava, more tropical cherries, and java plums later this month. Strawberry trees, acerola, and goji are in high production right now – so get out there and enjoy!  Many folks are having a 3-4th round of fruit on their Jaboticaba this month too (one of my favorites).
  • Fertilization: Use mushroom compost as much as possible. 1-2″ deep at the base of the trees (away from the trunk) and then cover with wood chip mulch. Always make sure your compost is “cool” before applying. If it’s hot to the touch when you receive it… let it sit for a few weeks to cool off before applying to your fruit trees. Always water thoroughly immediately after applying compost.   Other amending suggestions:  azomite, rock dust, and epsom salt.
  • Avos and Mangoes: The first part of September is the last opportune time to plant new avocado, strawberry trees and mangoes if you are in Central Florida. Otherwise, they may not have time to root in properly before winter months. Anything uber tropical planted after this month are a risk. But most tother things (plum, peaches, etc.) are still fine to plant.
  • Berries: This is an ideal time to plant tropical berries and cherries like strawberry guava, Barbados cherry, pitangatuba, Cherry of the Rio, etc.
  • Stone fruit: It’s best to WAIT to plant peach, pear, plum, nectarine trees until fall or winter dormancy. Technically you can plant them now, but it’s not really ideal.
  • Plant late summer grounds cover, like buckwheat or a light seeding of chicory, to create biomass coming into fall.
florida pasture maintenance for september

In the Shed

  • Keep tools oiled. This time of year is often hot and humid… the perfect recipe for rusty tools.
  • Check mouse traps and keep animal feed in sealed containers. Give the feed shed a nice cleaning to prevent critters from finding their “fall homes” in areas you don’t want them.
  • Look for estate sales for garden tools. Many of the new (plastic) ones are junk! The best tools are the old wooden handled tools that are available at estate sales. Instead of buying new, consider up-cycling.

In the Chicken Coop

  • Chickens:  Spring chickens have finally started laying eggs! They should be given plenty of fresh greens and can now have supplemental calcium. For calcium supplements, you can use crushed oyster shells or aragonite.
  • Quail:  It’s time to start helping the quail get ready for winter months. Extra protein, bug treats, dried grass heads, etc. are always a boost to their health. TIP: Dry flower petals and grasses to add to their nesting areas to help simulate their native habitats in the prairie.
  • Plant fall foraging areas using a native wildlife seed mix. Plant a mix specifically for chickens. We like the Happy Hen Mix from Hancock Seed Co.
chickens and mealworms

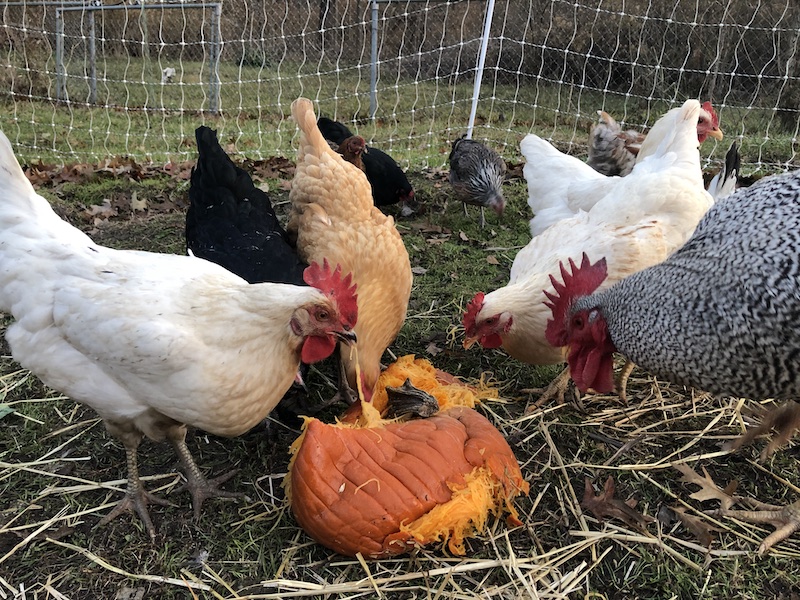
Offer mealworms, beetles, and other insects as a healthy protein treat to help boost the health of your flock as they go into the fall season. This helps prepare their bodies for fall molting (that is right around the corner).

Around the House

  • Run dehumifiers to keep the indoor humidity between 45-60%. This is the ideal range for health and to prevent mold, fungus, and bacterial growth.
  • Replace your HVAC filters
  • Clean outdoor windows and doors (I use Basic H for this)
  • Apply UV protectant to your recreational vehicles (boats, car interiors, RV’s, decals, etc. Put moisture collecting crystals (like DampRid) in the cupboards of RV’s to prevent mold in storage.
  • Spray tire shine and protectant on vehicle and trailer tires to prevent sun damage
  • Fertilize house plants at regular strength until the end of the month, then taper off in late October. Do not fertilize house plants in the winter months… allow them to go “dormant” as well.
garden ideas

In the Perennial Flower Beds

  • Dead-heading: Cut back spent flowers in order to get a final bloom. Spent flower heads can be fed to chickens or composted.
  • Fertilize: Use compost to fertilize annual flower beds at the beginning of the month. Then toward the end of the month, use a fish emulsion / sea kelp foliar spray (like that from GS Plant Food) on flowers, fruit trees, and berries.
  • Plant annual flowers for fall color: sunflowers, zinnia, cosmos, celosia, broom corn, etc.
  • Plant fall flowers like chrysanthemums for autumn color. They can actually be grown in the ground as well and will come back every year in most regions. It’s also a great time to plant wild flower seeds en-mass. Companies like American Meadows and Hancock Seeds have some great wildflower mix selections.
  • Bring cut flowers indoors and share with neighbors, especially those who are shut-ins or elderly
turks cap hibiscus flower
Edible flowers from Turk’s Cap Hibiscus

Family & Kids

  • Make gnome or fairy houses with kids as a late summer / early fall project.
  • Get plenty of time in the water (lakes, streams, ponds) because it’s going to start cooling off soon.
  • Start scoping out some local apple orchards, pumpkin patches, and corner mazes.

Enjoy the final days of summer and we’ll see you in the Garden!

Click here to receive this list in your inbox every month. 

Thanks for sharing this article with those who may find it helpful (like people within your gardening groups).

September Gardening To-Do List for Zones 3-8

September Garden Calendar

The last days of summer have arrived…

Summer is coming to a close and the evenings are just starting to have the smell of fall in the air.  This week, when talking with my family in Michigan, they said the maples leaves are starting to change already.  Coffee shops have started selling the pumpkin spice lattes again and gnomes and fall candles are on the end-caps of every home goods store.  Even though it’s not officially fall just yet, many of us are ready for fall campfires, autumn hikes, and the harvest season.  In the garden, many regions are still in peak production and harvest time.  So, needless to say, there are plenty of things to keep us all busy in the garden and around the homestead.

Please note, this specific list is catered to those living in USDA Zones 3-8, so if you are looking for Zones 9-11 – click here.  

Without further adieu, here is your September Gardening To-Do List!

September Gardening To-Do List

In the Garden

  • Things to plant by seed:  beets, carrots, radishes, and turnips. 
  • Garlic:  Order / purchase garlic for next year.  Start planting garlic cloves at the end of this month (or when cooler nights begin).
  • Pumpkins:  Begin to cut them and bring them indoors as soon as they are fully orange.   If you are a seed saver, be sure to collect seeds from the best and most robust plants of the season.
  • Fall greens:  In order to stagger your harvest times later in the fall, consider planting smaller amounts of fall greens (salad mixes, kale, etc.) every other week.  The same can be done with beets and radishes.
  • Brassicas:   Plant broccoli, cabbage, and cauliflower by seed or transplants.  Keep them well-watered (1″ per week) as they get established and mulch with straw around the base to cover the soil and prevent water evaporation.
  • Tomatoes:  It’s important this month to start removing the smaller tomatoes in order to allow the medium and larger ones to ripen before the frost.  
  • Harvest:  tomatoes, eggplants, peppers, and other night shades.  
  • Mulch:  Keep bare soil covered completely to prevent water evaporation and protect microorganisms.  Add a little more compost and wood chips around fruit trees and berry bushes.  Add another layer of straw around garden veggies.   Always collect your yard waste (leaves and grass) to apply to garden beds!
sunchokes

Jerusalem artichokes / Sunchokes are beginning to bloom! The leaves can also be used as forage for cattle, horses, goats, and (chopped) for chickens.  Alternatively, you can chop-and-drop them for biomass around the base of fruit trees.  Roots can be left in the ground or harvested after the first frost.

In the Greenhouse

  • Start organizing things now, before it gets cold. If you are planting in the ground in your hoop house or poly-tunnel, be sure to start applying lots of organic matter (like straw) in order to build a nice biomass before going into the winter months.
  • Check mouse traps regularly, because animals will start looking for their fall homes soon.
  • Watch your temperatures closely! Open windows in the greenhouses as needed.
  • Bring tropical plants in the greenhouse if it gets below 50 degrees at night. Start washing them off and preparing them for the winter relocation.

In the Food Forest

  • Harvest: apples, pears, fall berries, and any remaining stone fruit. Goji berries and raspberries are in their peak production, so be sure to harvest now and start preserving for the cooler months.
  • Mulch: Apply mulch / wood-chips around the base of fruit trees. Keep the wood chips away from the base of the tree, because if they touch the trunk it can cause rot or bacterial issues. Wood chips will encourage mycorrhizal activity and strengthen the root system.
  • Herbs around fruit trees:  Finish harvesting herbs to dry and make tinctures because they are at their peak right now! Start hanging them around the house and preparing to store them for the winter months. TIP: Use those little “silica packets” in the bottom of your glass jars to absorb moisture while in storage.
  • Fallen fruit: Remember to harvest fruit as they ripen and remove those that fall to the ground. Fallen fruit attract pests, so feed them to chickens or add to the compost pile immediately. Don’t let them sit.
  • Harvest elderberries:  If you are making elderberry tinctures, teas, or wine – now is your time to harvest. Whatever you do not harvest, the birds will take care of for you. It is also a great time to harvest elderberry canes for cuttings and propagation.
  • Plant late summer ground covers in any “bare spots” around the forest. Here are some of of our favorites – CLICK HERE.
  • Wait to plant new fruit trees and berry bushes until the end of the month (or early next month), when the heat dials down a few notches.
florida pasture maintenance for september

In the Shed

  • Start getting winter wood stove supplies ready to prepare for the coming winter. Check woodpiles to ensure they are stacked properly.
  • Give power tools a quick check after heavy summer use,  (oil, air filters, and clean off exteriors).
  • Check mouse traps and keep animal feed in sealed containers. Give the feed shed a nice cleaning to prevent critters from finding their “fall homes” in areas you don’t want them.
  • Give cutting tools a good cleaning (using rubbing alcohol) and oil afterwards to prevent rust.

In the Chicken Coop

  • Chickens:  Spring chickens have finally started laying eggs! They should be given plenty of fresh greens and can now have supplemental calcium. For calcium supplements, you can use crushed oyster shells or aragonite.
  • Quail:  It’s time to start helping the quail get ready for winter months. Extra protein, bug treats, dried grass heads, etc. are always a boost to their health. TIP: Dry flower petals and grasses to add to their nesting areas to help simulate their native habitats in the prairie.
  • Plant fall foraging areas using a native wildlife seed mix.
chickens and mealworms

Offer mealworms, beetles, and other insects as a healthy protein treat to help boost the health of your flock as they go into the fall season. This helps prepare their bodies for fall molting (that is right around the corner).

Around the House

  • Plant fall grass or ground covers. One of our favorite is a grass blend (that doesn’t need to be mowed) called ECOgrass by Prairie Moon Nursery. Check them out! Their wildflower mixes are also pretty incredible and can be fall planted as well.
  • Open up the windows on cooler nights to help air out the house and let in fresh air.
  • Replace your HVAC filters
  • Clean outdoor windows and doors (I use Basic H for this)
  • Apply UV protectant to your recreational vehicles (boats, car interiors, RV’s, decals, etc. Put moisture collecting crystals (like DampRid) in the cupboards of RV’s to prevent mold in storage.
  • Spray tire shine and protectant on vehicle and trailer tires to prevent sun damage
  • Fertilize house plants at regular strength until the end of the month, then taper off in October. Do not fertilize house plants in the winter months… allow them to go “dormant” as well.
garden ideas

In the Perennial Flower Beds

  • Dead-heading: Cut back spent flowers in order to get a final bloom. Spent flower heads can be fed to chickens or composted.
  • Plant fall flowers like chrysanthemums for autumn color. They can actually be grown in the ground as well and will come back every year in most regions.
  • Add extra wood chips to areas that are in full sun in order to protect soil health and microbial activity
  • Bring cut flowers indoors and share with neighbors, especially those who are shut-ins or elderly. Save seeds from spent blooms for next year.

Family & Kids

  • Make gnome or fairy houses with kids as a late summer / early fall project.
  • Get plenty of time in the water (lakes, streams, ponds) because it’s going to start cooling off soon.
  • Start scoping out some local apple orchards, pumpkin patches, and corner mazes.

Enjoy the final days of summer and we’ll see you in the Garden!


Click here to receive this list in your inbox every month

July Gardening To-Do List for USDA Zones 9-11

The summer fun is in full swing and we are likely all enjoying the opportunity for daily harvesting. There is such joy and satisfaction in being able to walk into your backyard and grab a snack on the go. The flavor of a sun-ripened sweet tomato right off the vine and a fresh piece of fruit from one of the trees. This is the taste of summer! For me, I remember being in the garden with my mom when I was a child, and she would always hand my brother and I some fresh green beans. There is something about fresh beans (still warm from the sunshine) that will always remind me of my childhood. I was fortunate as a child to have a parents who enjoyed the outdoors. My brother and I grew up climbing trees, foraging in the woods, hunting and fishing, and building forts near the berry patches. As the years have gone by, I have found myself looking back on those years as critical times of the establishment of wonder and imagination in my life. There is something about the garden and food forest that invites us inward and beckons us to be a part of it. To not just eat – but see, hear, experience and dream a little. The garden, for me anyway, is a place that I feel safe in, provided for, and celebrated.

This month, as you go about your July Gardening To-Do List, take time to imagine and appreciate. Take space for yourself and create a safe space to invite others. The food forest can be both a flower for one and a garden for all.

NOTE: This list is geared toward USDA Growing Zones 9-11. If you are looking for the July Gardening List for Zones 3-8, click here.

July Gardening To-Do List
Yellow Star Cherry (Aka Pitangatuba) tastes like a citrus pineapple and is very soft and juicy! They often fruit in the first year from planting, so it’s a great source of instant gratification for a tropical food forest.

July Garden Calendar for USDA Zones 9-11

In the Garden & Greenhouse

  • Building soil in the vegetable garden: For the most part in zones 9-11, our annual vegetable season has come or is coming to an end. It’s the time when we shift from annual production toward production in the food forest. Som for annual beds, this is a great time for a cover crop (like Sunn Hemp, Cow Peas, etc.) or to cover it with straw and let it compost in place.
  • To plant: Cassava cuttings, sweet potatoes, okra, chaya, tropical spinaches (like Longevity, Okinawa, Brazilian, Suriname, or Jewels of Opar).
  • To harvest: Tomatoes, peppers, eggplants, okra…and as many tropical greens as you can! It’s also a great time of year to pick sweet potato leaves and saute them for supper. Add some salt, pepper, garlic, and cheese and tuck in!
  • Compost: Turn pile 1-2x per week.
    • NOTE: For most people an outdoor compost pile doesn’t really generate a lot. However, using a worm bin (like the ones from Uncle Jim’s Worm Farm), can provide worm tea which creates way more bang for your buck. For most families, composting worms are going to give you a better result.
  • Open the Greenhouse: This time of year the green house often needs to be open 24/7 so it does’t become an oven. You can also cover it with a shade cloth to help stop the heat. Generally speaking, most plants are outside at this point and enjoying the summer rains and sunshine. This makes it a great time of year for you to clean it out and get ready for fall. by mid-August, you’ll be ready to use it as a shade house to start seeds for the fall gardening season.
Foxglove in bloom

In the Food Forest

  • Apply Summer Compost or soil amendments
    • Compost (mushroom based for food forest and manure based for veggie garden). This is literally the single best thing you can add in the food forest this month!
    • Recommended Amendments: Azomite, Epsom salts, chelated iron, hummus, chop and drop from nitrogen fixing plants.
    • Probiotics spray every other week. I use BioAg for this.
    • FREE 11-minute talk on probiotics for the yard, click here.
  • Plant new fruit trees and berry bushes. Here is a step-by-step process (with diagram) of how to plant a fruit tree or berry bush. Some of the info may surprise you. Remember, trees often take 3-5 years to reach a significant level of production. The best time to plant a fruit tree was 10 years ago, but the second best time is today. This is an ideal month to plant Avocado, mango, sugar apple, clumping bamboo, yellow star cherry, cherry of the rio grande, etc. It’s NOT ideal for stone fruit (plum, peach, nectarines), but can still be done if you prune them before planting.
  • Remove suckers from the base of fruit trees. These are likely a root stock coming back, and will essentially “suck” the nutrients from the top of the tree, so keep them cut / pinched off.
  • Chop and Drop!!! This is the prime time to chop and drop those soil building plants, because they still have the rest of the summer to grow again and provide a few more cycles. Remember, in order to truly get the nitrogen fixing and soil building benefits – you have to chop them down (and better yet to bury them under wood chips).
  • Banana TIP: If you are growing bananas in zones 8b and 9a (where frosts are likely in the winter), stop watering and fertilizing bananas that do not already have a flower. Wait until late winter to resume watering and feeding, as this will help you avoid having a partially formed rack that just gets killed in a frost. If the flower has already started, continue watering and feeding as usual. If you are in a generally frost free area – carry on as usual.
  • Get a plan and design This is a great month to plan and plant! The summer rains make food forest establishment easy. So, if you are interested in an in-person or virtual consultation, CLICK HERE.
New worm bin set up with some red wigglers. My favorite part about this system isn’t even the worm castings – it’s the worm tea that can be used weekly on plants!

In the Shed

  • Set mouse / rat traps. We have really liked these bucket traps from Amazon
  • Oil hand tools: Keep hand tools oiled and clean after every use. A cheep olive oil wipe down will work wonders to help prevent rust, but you can also use a gun or motor oil as well.
  • Use the Rainy Days: When you have occasional rainy days, consider taking an hour to clean and organize in your shed or garage. Make a “donate” pile to bring to a local community garden if you find you have a surplus that could find a new home.
Salvia in my mom’s summer garden. There are so many varieties and colors with this plant and it always gives summer visual interest to the butterfly garden.

Livestock

  • Water rotations: In nature, animals don’t drink out of the purified tap. Sometimes their water is from a rain puddle, but other times from a stream or pond. To help mimic this and give their immune system a boost, try doing something different every time you refill their water.
    • Apple Cider Vinegar: 1 tsp per gallon
    • Honey: 1 TBSP per gallon
    • BioIivestock Probiotic: Dilution rate on bottle depending on species
    • Herbs: Add fresh oregano, thyme, rosemary, etc to their water to make a “tea”
    • Rainwater
  • Deworming Cattle / Horses: 1-1.5 cups of Basic H per 100 gallon watering container OR 1TBSP per gallon for chickens, goats, lamb.
  • Keep Chickens Cool in Extreme Heat: click the link for some creative ideas to help keep chickens cool in the hot summer months.
  • Check herd health daily: My friend Fred always says, “A good farmer is ‘out-standing’ in his field. Literally.” As a general rule of thumb you should have eyes on every animals, every day. Some animals may need morning and evening check in times, but it’s important to be attentive, especially if any animals have recently given birth.
Comfrey (Bocking 14) can be planted on pasture edges or around fruit trees. It’s an excellent mineral mining crop and can be used as animal fodder and forage as well. It’s a suitable replacement for supplemental minerals and calcium for many farm animals.

In the Pasture

  • Plant: Not an ideal month for pasture planting… just let things grow and fill in.
  • Rotate Animals: Move animals as often as you can possibly manage. High intensity rotational grazing is optimal for soil and pasture health. If you are doing multiple animals: cows first, followed by sheep or goats, chickens last, and then give the pasture a break.
  • Pasture Edges: Plant support species on the pasture or food plot edges. Consider animal forage plants like Moringa and Mexican sunflower.

Around the House and Perennial Beds

  • Deadheading: Remove as many of the dead flowers as you can. This will promote more vigorous summer blooms. You may, however, want to let a few go to seed in order to save seeds for propagation next spring.
  • Fertilize flower beds: This time of year you can easily use bagged grass clippings in the annual beds to help fertilize and create mulch. If you are seeking to amend your soil, consider bone meal and azomite this time of year as your best options.
  • Annual Flowers: Plant some pops of color around the garden. Use as many native wildflowers and perennials as possible, because the vast majority of annuals do NOT provide nectar for bees and butterflies. However, using them sparingly can still give lasting bursts of color. Some annual flowers (nasturtiums, marigolds, calendula, etc.) are also edible and medicinal and can even be used as vegetable companion plants.
  • Air out the house: On a cool morning or early evening, consider opening up the windows to air out the house. This is also a great time to change your HVAC filters indoors from extended summer AC use.
  • Power-wash lawn furniture on hot summer day. When it’s too hot to be in the garden, get a power washer to clean off the porches, deck, patio, and the furniture. Many of them allow you to add a bit of soap (like Basic H) to the washer for added cleaning power.
Photo from a recent hike in the Daniel Boone National Forest in Beattyville, KY

Kids & Family Ideas

  • Visit a local hiking trail: Look up some hiking trails in your area and go out on a day adventure. Pack a lunch with you, bring extra water, and be sure to bring your camera and a foraging bag (if responsible foraging is permitted).
  • Wild Bird Feeding
    • Suet cakes for woodpeckers should be around the edges of the garden, because they will also help control caterpillars.
    • Safflower Seed: great for cardinals but also not a favorite of squirrels.
    • Water and birdbaths will help attract even more birds than the feeders themselves on hot summer days.
    • Hummingbird feeders: Never use dyed red nectar…this is completely unnecessary and not good for the birds. Also, remember that sugar water ferments quickly, so hummingbird feeders need to be changed every 3 or 4 days. If you cannot remember to change the nectar water, please take down your feeders because fermented water is a number one killer of hummingbirds.
  • Walking Sticks: Find and decorate walking sticks together. You can tie string around them and collect feathers, paint them, etc. Even as an adult, a good walking stick is a must when putting chickens up for the night.
  • Outdoor picnics: Plant at least one meal a week that is outside in nature. Maybe this week it’s grilling on the patio, but then next week might be a blanket in the grass with charcuterie boards. Perhaps sandwiches from your childhood while laying in a hammock, or a summer salad on the front porch as you wave at the neighbors passing by.

See you in the Garden

As always, thanks for taking time to join on the gardening and permaculture journey. Be sure to check out the continual flow of content available via our social media channels. Remember, PermacultureFX also does virtual consulting (using Facetime, zoom, satellite images, etc.). We’d love to help you get a plan for your property and help you create abundance and wonder.

If this article was helpful, consider sharing on social media (or with your garden groups) to help set others up to win on their property. Happy Summer – and I’ll see you in the garden!

– Kristofer Edler


farm consultant, permaculture, florida permaculture, permaculture designer

July Gardening To-Do List (USDA Zones 3-8)

The summer fun is in full swing and we are likely all enjoying the opportunity for daily harvesting. There is such joy and satisfaction in being able to walk into your backyard and grab a snack on the go. The flavor of a sun-ripened sweet tomato right off the vine, a little bit of sweet bell pepper, a few remaining peas, or a fresh piece of fruit from the tree. This is the taste of summer! For me, I remember being in the garden with my mom when I was a child, and she would always hand my brother and I some fresh green beans. There is something about fresh beans (still warm from the sunshine) that will always remind me of my childhood. I was fortunate as a child to have a parents who enjoyed the outdoors. My brother and I grew up climbing trees, foraging in the woods, hunting and fishing, and building forts near the berry patches. As the years have gone by, I have found myself looking back on those years as critical times of the establishment of wonder and imagination in my life. There is something about the garden and food forest that invites us inward and beckons us to be a part of it. To not just eat – but see, hear, experience and dream a little. The garden, for me anyway, is a place that I feel safe in, provided for, and celebrated.

This month, as you go about your July Garden Calendar and To-Do List, take time to imagine, appreciate, and remember. Take space for yourself and create a safe space to invite others. The food forest can be both a flower for one and a garden for all.

NOTE: This list is geared toward USDA Growing Zones 3-8. If you are looking for the July Gardening List for Zones 9-11, click here.

July Garden Calendar
COSMOS TIP: Deadhead spent flowers to promote more midsummer blooms.

July Garden Calendar for USDA Zones 3-8

In the Garden & Greenhouse

  • Building soil in the vegetable garden: Remember, we are what we eat, so stay away from both chemical and synthetic fertilizers. Our top choice to “fertilize” is always to apply compost (regular for veggies and mushroom based for fruit trees and berry bushes). If you do not have access to organic compost, then my second choice is usually a rotation of worm tea, bone meal, azomite, fish emulsion, kelp, or other “whole ingredient” fertilizers, which help build the soil and not just give a temporary result. Unfortunately, even some name brand organic fertilizers are hiding things like MSG under the name “soy protein hydrolysate”. So, use wisdom when picking out the best fertilizers for you and your family.
  • To plant: Get ready for planting fall garden veggies later this month. Think potatoes, broccoli, and other brassicas. Consider starting some in trays mid to late month.
  • To harvest: Tomatoes, peppers, eggplants, beans, carrots, zucchini, squash, lettuce, and mixed greens
  • Compost: Turn pile 1-2x per week.
    • NOTE: For most people an outdoor compost pile doesn’t really generate a lot. However, using a worm bin (like the ones from Uncle Jim’s Worm Farm), can provide worm tea which creates way more bang for your buck. For most families, composting worms are going to give you a better result.
Foxglove in bloom

In the Food Forest

  • Apply Summer Compost or soil amendments
  • Plant new fruit trees and berry bushes. Here is a step-by-step process (with diagram) of how to plant a fruit tree or berry bush. Some of the info may surprise you. Remember, trees often take 3-5 years to reach a significant level of production. The best time to plant a fruit tree was 10 years ago, but the second best time is today.
  • Remove suckers from the base of fruit trees. These are likely a root stock coming back, and will essentially “suck” the nutrients from the top of the tree, so keep them cut / pinched off.
New worm bin set up with some red wigglers. My favorite part about this system isn’t even the worm castings – it’s the worm tea that can be used weekly on plants!

In the Shed

  • Set mouse / rat traps. We have really liked these bucket traps from Amazon
  • Oil hand tools: Keep hand tools oiled and clean after every use. A cheep olive oil wipe down will work wonders to help prevent rust, but you can also use a gun or motor oil as well.
  • Use the Rainy Days: When you have occasional rainy days, consider taking an hour to clean and organize in your shed or garage. Make a “donate” pile to bring to a local community garden if you find you have a surplus that could find a new home.
July Garden Calendar
Salvia in my mom’s summer garden in Michigan. There are so many varieties and colors with this plant and it always gives summer visual interest to the butterfly garden.

Livestock

  • Water rotations: In nature, animals don’t drink out of the purified tap. Sometimes their water is from a rain puddle, but other times from a stream or pond. To help mimic this and give their immune system a boost, try doing something different every time you refill their water.
    • Apple Cider Vinegar: 1 tsp per gallon
    • Honey: 1 TBSP per gallon
    • BioIivestock Probiotic: Dilution rate on bottle depending on species
    • Herbs: Add fresh oregano, thyme, rosemary, etc to their water to make a “tea”
    • Rainwater
  • Deworming Cattle / Horses: 1-1.5 cups of Basic H per 100 gallon watering container OR 1TBSP per gallon for chickens, goats, lamb.
  • Keep Chickens Cool in Extreme Heat: click the link for some creative ideas to help keep chickens cool in the hot summer months.
  • Check herd health daily: My friend Fred always says, “A good farmer is ‘out-standing’ in his field. Literally.” As a general rule of thumb you should have eyes on every animals, every day. Some animals may need morning and evening check in times, but it’s important to be attentive, especially if any animals have recently given birth.
July Gardening Calendar
Comfrey (Bocking 14) can be planted on pasture edges or around fruit trees. It’s an excellent mineral mining crop and can be used as animal fodder and forage as well. It’s a suitable replacement for supplemental minerals and calcium for many farm animals.

In the Pasture

  • Plant: Keep pastures irrigated, plant Sunn hemp for deer forage or nitrogen fixing cover crops.
  • Pasture Edge: Plant support species on the pasture or food plot edges. Consider edible berry bushes (currants, gooseberries, lingonberry, elderberry, mulberry, or paw paw trees. Other plants like comfrey, vetch, and clover can be planted on the edges to help fix nitrogen into the soil and provide additional pollination.

Around the House and Perennial Beds

  • Deadheading: Remove as many of the dead flowers as you can. This will promote more vigorous summer blooms. You may, however, want to let a few go to seed in order to save seeds for propagation next spring.
  • Fertilize flower beds: This time of year you can easily use bagged grass clippings in the annual beds to help fertilize and create mulch. If you are seeking to amend your soil, consider bone meal and azomite this time of year as your best options.
  • Spring bulb care: Cut back any of the “dead” from the spring bulbs to clean up the flower beds. If they are still green, leave them along because they are storing up their energy reserves for next years blooms.
  • Annual Flowers: Plant some pops of color around the garden. Use as many native wildflowers and perennials as possible, because the vast majority of annuals do NOT provide nectar for bees and butterflies. However, using them sparingly can still give lasting bursts of color. Some annual flowers (nasturtiums, marigolds, calendula, etc.) are also edible and medicinal and can even be used as vegetable companion plants.
  • Air out the house: On a cool morning or early evening, consider opening up the windows to air out the house. This is also a great time to change your HVAC filters indoors from extended summer AC use.
  • Power-wash lawn furniture on hot summer day. When it’s too hot to be in the garden, get a power washer to clean off the porches, deck, patio, and the furniture. Many of them allow you to add a bit of soap (like Basic H) to the washer for added cleaning power.
July Gardening To-Do List
Photo from a recent hike in the Daniel Boone National Forest in Beattyville, KY

Kids & Family Ideas

  • Visit a local hiking trail: Look up some hiking trails in your area and go out on a day adventure. Pack a lunch with you, bring extra water, and be sure to bring your camera and a foraging bag (if responsible foraging is permitted).
  • Wild Bird Feeding
    • Suet cakes for woodpeckers should be around the edges of the garden, because they will also help control caterpillars.
    • Safflower Seed: great for cardinals but also not a favorite of squirrels.
    • Water and birdbaths will help attract even more birds than the feeders themselves on hot summer days.
    • Hummingbird feeders: Never use dyed red nectar…this is completely unnecessary and not good for the birds. Also, remember that sugar water ferments quickly, so hummingbird feeders need to be changed every 3 or 4 days. If you cannot remember to change the nectar water, please take down your feeders because fermented water is a number one killer of hummingbirds.
  • Walking Sticks: Find and decorate walking sticks together. You can tie string around them and collect feathers, paint them, etc. Even as an adult, a good walking stick is a must when putting chickens up for the night.
  • Outdoor picnics: Plant at least one meal a week that is outside in nature. Maybe this week it’s grilling on the patio, but then next week might be a blanket in the grass with charcuterie boards. Perhaps sandwiches from your childhood while laying in a hammock, or a summer salad on the front porch as you wave at the neighbors passing by.

Thanks for reading our July Garden Calendar and To-Do List

As always, thanks for taking time to join on the gardening and permaculture journey. Be sure to check out the continual flow of content available via our social media channels. Remember, PermacultureFX also does virtual consulting (using Facetime, Zoom, satellite images, etc.). We’d love to help you get a plan for your property and help you create abundance and wonder.

If this article was helpful, consider sharing on social media (or with your garden groups) to help set others up to win on their property.

Happy Summer, and I’ll see you in the garden!

– Kristofer Edler


farm consultant, permaculture, florida permaculture, permaculture designer

What Plants Should Be Protected in a Freeze

In subtropical regions where frost is likely during the winter months (USDA Zones 9-10 especially), it’s imperative to protect certain plants during a frost. The two most common questions are these:

1. What plants should be protected during a freeze?

2. How do I protect my plants during a freeze?


Knowing what plants to cover and how to do it will help ensure the success of your garden and food forest. Keep in mind that sometimes plants only need to be covered when they are younger (under 6′ tall) or newly planted. Once plants are more established, they are less likely to die back during a hard frost, and they can take a little more beating from the elements. However, until they are established, they need to be protected with a little extra care. So, which plants (in USDA Zones 9-10) should be protected during a cold snap?

Here is a list to help you determine what needs the extra protection with a few notes on each species.

Frost cloth from A Natural Farm with Christmas light underneath to keep new mango trees warm

What Plants Should Be Protected During a Freeze

  • African Blue Basil: Cover at 33 degrees. Will die back in a freeze, but do not remove damaged leaves. It will often rebound from the woody parts in the spring. Prune after possibility of frost has passed.
  • Atemoya: Needs protection from temps under 35. Much hardier once established.
  • Avocado: Needs protection from temps under 33 while young. Not necessary to protect until 28 degrees once they are established. May loose leaves, but will come back. Check the hardiness of your exact variety, as there is quite a difference in cold hardiness.
  • Banana: Protect base and truck. Leaves will die back below 32 degrees. Leaves should be left on the tree until after April 1. Clean up dead leaves after the danger of frost has passed.
  • Barbados Cherry (Acerola Cherry): Only protect younger plants (under 5′ tall). Hardy once established, but may loose leaves in a hard frost / freeze.
  • Bilimbi: Must protect from freeze below 33.
  • Canistel (egg fruit): Must protect below 32.
  • Cashew: Protect below 33 until established. Larger trees are often hardy down to 28.
  • Cassava: Leaves will die at 32 degrees. However, at that point, it’s generally time to dig up and harvest each plant. Save cuttings of the stems to propagate more later. Dried stems can be used up to three months later (even without water).
  • Cattleya guava (strawberry guava): Hardy down to 24 degrees. Cover at 32 to protect leaves. Usually will readily rebound after leave damage occurs.
  • Carambola / Star fruit: Needs protection from temps under 35. Much hardier once established.
  • Chaya: Cover younger plants below 32. However, once they are hardened off and established, they will come back from the older growth. Great to chop and drop after April 1.
  • Cherry of the Rio Grande: Cold hardy once established, but protect if under 3′ tall.
  • Citrus: Protect below 33
  • Coffee: Protect below 34
  • Custard Apple: Protect younger trees. These may defoliate for the winter, but leaves will come back fresh in the later spring. Hardy once established. Leaves tend to get powdery mildew when the turn brown, so be ready to spray with neem and basic H.
  • Dragonfruit: ones growing up the south side of trees are often more protected. Otherwise, cover below 33.
  • Guava: Cover young plants below 33. Hardy once established and will not need covering.
  • Hibiscus: For roselle and cranberry hibiscus, it’s better to save seed and regrow in the spring time. These are actually a self seeding annual / tender perennial. Prone to powdery mildew in cooler weather.
  • Ice cream Bean: Protect below 34.
  • Jaboticaba: Young plants need protection under 35 degrees, but older plants may be much more hardy.
  • Jackfruit: Protect trees under 10′ tall at 33 degrees or below. Normal to loose leaves in a frost.
  • Longan: Protect younger trees. Hardy once established. May defoliate, but leaves will return in the spring.
  • Lychee: Protect younger trees. Hardy once established. May defoliate, but leaves will return in the spring.
  • Mango: Protect trees under 10′ tall to the best of your ability. They are hardier once established, but cannot do temps under 28 very well.
  • Miracle Fruit: Often grown in a pot in the winter so it can be taken indoors to a sunny window. Then returned outside in the warmer months in part shade or full shade. Cannot tolerate under 35 degrees.
  • Moringa: Hardy once established. Leaves will drop for the winter, but will come back in the spring. Great time to prune and shape while dormant.
  • Nasturtium: Cover or save (and dry) seeds for replanting.
  • Nightshades: Tomatoes, peppers, eggplants, ashwagandha, etc.
  • Pandan: Leave planted in a pot where frost is likely. Then bring indoors under 40 degrees. They prefer full shade when outside and a sunny window when indoors.
  • Papaya: Protect under 33 degrees. Remember, it’s a fast growing and short lived tree anyway.
  • Pigeon Pea: Will get leaf damage at 32 degrees. If leaves get crunchy, just “chop and drop” them around the base of another fruit tree. Cut back 1/3 of bush only, and they usually rebound in the spring. They are a short lived tree anyway, and mostly grown as a living fertilizer and soil builder. Easily grown from seed in pots.
  • Soursop: Protect under 37 (Mountain Soursop is more hardy tho)
  • Star Cherry (Pitangatuba): Protect younger bushes. Hardy once established. Cover under 30 degrees.
  • Strawberry Tree: Protect younger trees. Hardy once established. Cover under 32 degrees. Will often loose leaves for the winter. Prune in early spring to remove dead and give desired shape.
  • Sugar Apple: Protect younger trees. These may defoliate for the winter, but leaves will come back fresh in the later spring. Hardy once established.
  • Sugar Cane: Protect under 30 if possible. Will come back from roots if it gets frozen a bit.
  • Surinam Cherry: Only protect younger plants (under 3′ tall). Hardy once established.
  • Toilet Paper Plant (Blue Spur): Cover at 33.
  • Tropical Spinaches: Best to take cuttings of these and replant in the spring. Not cold hardy. Recommended to take cuttings in early December and protect in pots over the winter (transplant April 1). Examples: longevity spinach, Okinawa spinach, Surinam spinach, Brazilian Sisso, Jewels of Opar, etc. CLICK HERE FOR 5 TROPICAL PLANTS TO TAKE CUTTINGS OF BEFORE A FREEZE
  • Vanilla Bean Orchid: Bring indoors under 37 degrees.
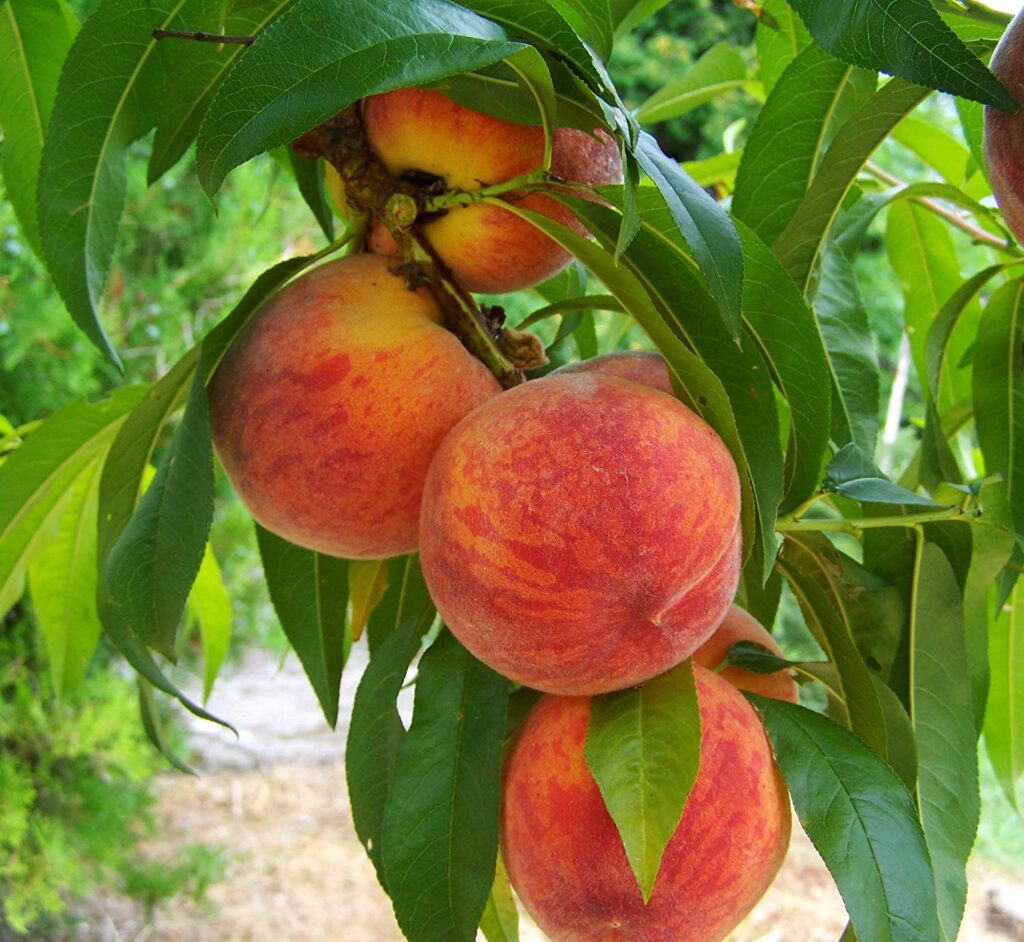
Tropic Beauty Peach
Tropic Beauty Peach – NO PROTECTION NEEDED

No Protection Needed

  • Apple
  • Apple Cactus (Peruvian)
  • Bay
  • Blackberry
  • Blueberry
  • Brassicas: kale, broccoli, cauliflower, cabbage, etc.
  • Elderberry
  • Fig
  • Ginger
  • Loquat (Un-pollinated blossoms may need some protection)
  • Mulberry (all varieties)
  • Nectarine
  • Olive
  • Peach (Tropic Beauty pictured above)
  • Pear
  • Persimmon
  • Plum
  • Pomegranate
  • Raspberry
  • Turks Cap Hibiscus
  • Turmeric

TIP: For online ordering of some of these plants, here is a great local place we recommend, who also ships nation-wide: https://www.anaturalfarm.com/live-plants

How to Protect Tropical Plants During a Freeze

There are several methods of protection that you can offer your tropical and cold sensitive plants during a freeze. Sometimes, layering these methods will help provide that extra bit of peace of mind.

  1. Bring younger potted plants indoors or against the house. The radiant heat from the house, concrete, and protection of a covered pool area is often enough to protect them. Some sensitive plants (like Vanilla Orchid) are better off being brought indoors for the night when frost is eminent.
  2. Cover younger plants and trees with frost cloth. This is one of the best methods for younger trees, plants that are in the ground, or if you are working on short notice. The wraps that go around individual trees are often more expensive, so frost cloth is cheeper when purchased in a longer roll.
  3. Turn on a sprinkler or misting system. The running water will help keep things moving and prevent the damage to the trees up to a certain point. Let it run all night over your food forest and into the morning until after the temps are above freezing.
  4. Start a campfire or two. The smoke and heat from the fire burning overnight can help keep the food forest warm. This does, however, require safety measures to be taken.
  5. Use old Christmas lights. Wrap sensitive trees with filament style lights, because the heat produced by the bulbs can protect the trees, especially when used under frost cloth.
  6. Spray the plants with probiotics the day before the freeze. Probiotic and microbial activity can help prevent frost damage on sensitive plants. There are some great scientific studies on this, for those who like this sort of thing. Click here for the probiotic we recommend.
  7. Mulch extra heavy with wood chips, leaves, or straw. The extra biomass is not only good for the soil, but the blanket will help protect the soil and root ball from the colder temps. The biomass will also give off radiant heat throughout the colder temperatures.
  8. Wrap small banana trunks with towels. Bananas are going to look “ugly” this time of year with a lot of dead material. Leave it on! This will serve as additional insulation until the spring arrives, and keep the plants protected.

What NOT To Do During the Cold Snap

A. Water well the few days before. It’s actually best to have LESS water in the plant leaves and stems. So do NOT water for a couple days before the frost. Let plants rest.

B. Use tarps or plastic to cover plants. The plastic does NOT breath enough and increases the humidity and formation of frost / ice crystals under the covering. In addition, the plactic will prevent plants from breathing and daytime heat will literally cook the plants, which can be more dangerous than the frost itself. Use a breathable material like an old bed sheet or frost cloth instead.

C. Leave the frost protection on the next day. Always remove the covering first thing in the morning, so the moisture can be released and the plants can slowly warm up in the morning sun. Leaving them covered can actually cause the plants to get “cooked” under the material.

D. Fertilize. Never fertilize in the weeks before or after a cold snap. Let your plants harden off and do not force new (sensitive) growth. Generally during the winter months, stop fertilization in general (only use light compost or foliar feeds).

Final Notes

If you have any further questions, feel free to reach out to us on social media or contact a local greenhouse. Get insight from other organic fruit tree and berry bush growers in your area, because they will have familiarity with your microclimate.

NOTE: We also offer several personal property consultation services. Check those out HERE.

Best of luck in the cold and we’ll see you in the garden.

Please share this post with others in your gardening network who might find this helpful.

What to Plant in Florida After a Freeze

It can certainly be disappointing to see our gardens get hit by a hard frost or a freeze… especially when we mulch nice and deep, covered our plant, or used sprinklers. It can be heart heartbreaking to see the brown and wilted carnage over the days following the frost. However, this is part of the natural cycle of nature and we (as gardeners) get to flow in harmony with that cycle of life and death. So don’t stand there frozen in the garden path – there is more to plant in Florida after a freeze.

The key to replanting in January and February is planting seeds that are going to be extra cold-hardy and fairly fast growing. So, don’t give up your winter garden yet, there is still time for a harvest over the next few months.

TIP: If you are in cold temperate climates, here are some things you can plant in the show


Preparing a Garden Bed After a Freeze

Before you start planting seeds, be sure to reset your system. Don’t leave rotting or dead plants laying around, because they can spread disease to other plants. It’s best to either bury the scraps back into the garden OR compost them to add back to the soil later. When you water your compost pile, consider adding some probiotics (CLICK HERE). However, in the food forest it’s especially important to leave the dead leaves where they are, because it will provide insulation in case of another freeze this winter. This is especially important on things like bananas. So clean up, but do so with patience and wisdom.

Next, consider adding more organic mulch to the garden beds. We prefer using a straw mulch because when it decomposes, it will create a nitrogen rich and bacterially-based soil structure, which vegetables prefer. Using wood chips on a vegetable garden can tie up nitrogen temporarily as they decompose, and also creates a fungal-based soil structure, which is more preferred by fruit trees and berry bushes. So be sure to use the right mulch in the right place.

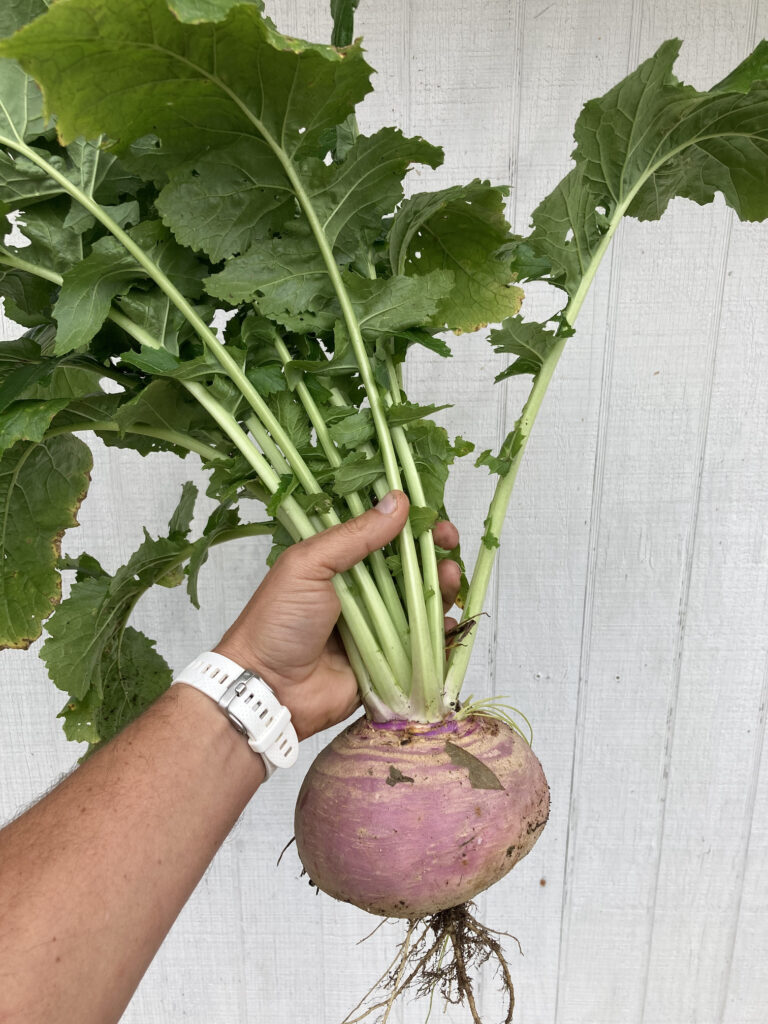
Purple top turnip (greens are edible too)

What to Plant in Florida After a Freeze

  • Onions
  • Beets
  • Radish
  • Carrots
  • Corn
  • Cucumbers
  • Winter peas
  • Sunflowers
  • Cosmos
  • Zinnia
  • Sweet potato slips
  • Squash
  • Gourds
  • Zucchini
  • Turnips
  • Watermelon
  • You can also keep doing many greens like arugula, lettuces, mustards, and komatsuna greens (or bok choi).
Daikon radish help till the soil, has edible roots, edible leaves and flowers, and is excellent livestock forage.

FRUIT TREES & BERRY BUSHES TO PLANT IN JANUARY – FEB

Some fruit trees and berry bushes actually do BETTER when they are planted while dormant. In fact, some of the following varieties will even grow in snowy winter climates, which makes them extra hardy. Here are some fruit trees to plant after a freeze (or anytime in the winter):

  • Peach
  • Plum
  • Nectarine
  • Pecan
  • Apple / Pear (but they don’t do well in Zones 9-11)
  • Loquat
  • Mulberry
  • Fig
  • Persimmon
  • Jujube
  • Grapes
  • Bamboo (clumping)
  • Olive
  • Elderberry
  • Blueberry
  • Thornless blackberry
  • Strawberry Guava
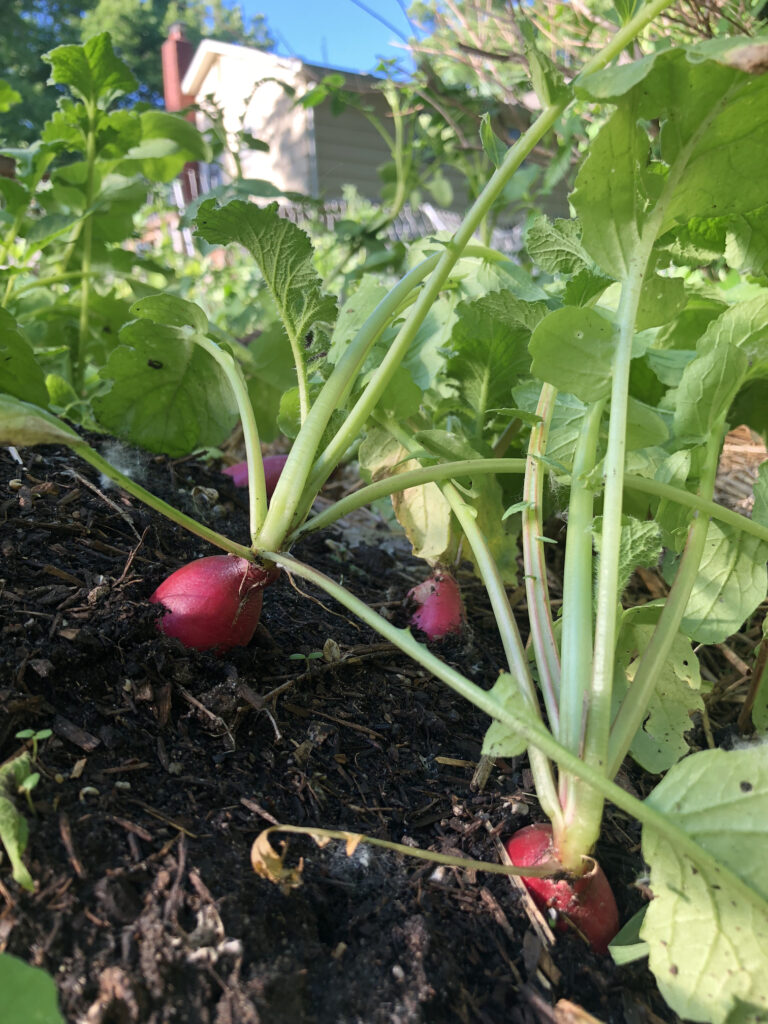
Breakfast Radishes

5 Tropical Plants to Take Cuttings of Before a Cold Snap

In USDA Growing Zones 9-11, cold snaps and frosts don’t happen very often, but when they do, it does require us to do a few more steps to prepare our gardens and food forests. Some plants, like newly planted trees, need extra protection and some plants are better off being brought indoors. For a list of what plants need protection and how to do it, CLICK HERE.

There are other plants, however, that it is important to take “insurance cuttings” of just in case they don’t survive. These cuttings can be easily planted in small pots and brought indoors to root, and then can be transplanted in the spring after the danger of frost has past.

Auntie Lillies South Sea Salad

Here are 5 Tropical Plants to Take Cuttings of Before a Cold Snap

  1. South Sea Salad
  2. Auntie Lilies South Sea Salad
  3. Longevity Spinach
  4. Okinawa Spinach
  5. Brazilian Spinach

TIP: If you are looking to order these plants, here is where I get mine: https://www.anaturalfarm.com/live-plants

Okinawa spinach
Okinawa spinach – Edible tropical spinach that love more shaded areas. Delicious in soups, stews, or scrambled eggs.

How to Propagate the Cuttings

First, take sterile pruners and cut a 6″ piece of each plant, removing all the leaves except one at the top. With your pruners, cut the top leave in half. This will stimulate growth hormones in the plant, but still allow a little bit for photosynthesis. This is a great time to take multiple cuttings, so you have more to plant or give away.

Second, plant the cutting in a four inch pot (1/2 of the stem below the soil), making sure that at least one leaf node is buried in the soil. Use a loose potting mix with excellent drainage.

Water the plant thoroughly and place in a shaded area outside OR a sunny window indoors. Allow soil to fully dry out between watering in order to force the plant the send out new roots.

Keep the plant protected for 30 days, occasionally misting the leaves. Only plant in the ground after the danger of frost (usually mid-march in most climates).

Roselle calyx drying for tea and center for seed saving

Plants to Save Seed From (that do not grow as well from cuttings)

A. Roselle (Jamaican) Sorrel

B. Cranberry Hibiscus

C. Cape Cod Gooseberry

D. Moringa

E. Royal Poinciana (in Zone 9)

A Few More Helpful Links for Tropical Gardening in the Winter

December Gardening To Do List

How to Know When to Cut Back Hibiscus

Dwarf Mango Options

3 Things to Do in the Garden Before the Holidays

For more information on our property consultation services or gift certificates, CLICK HERE

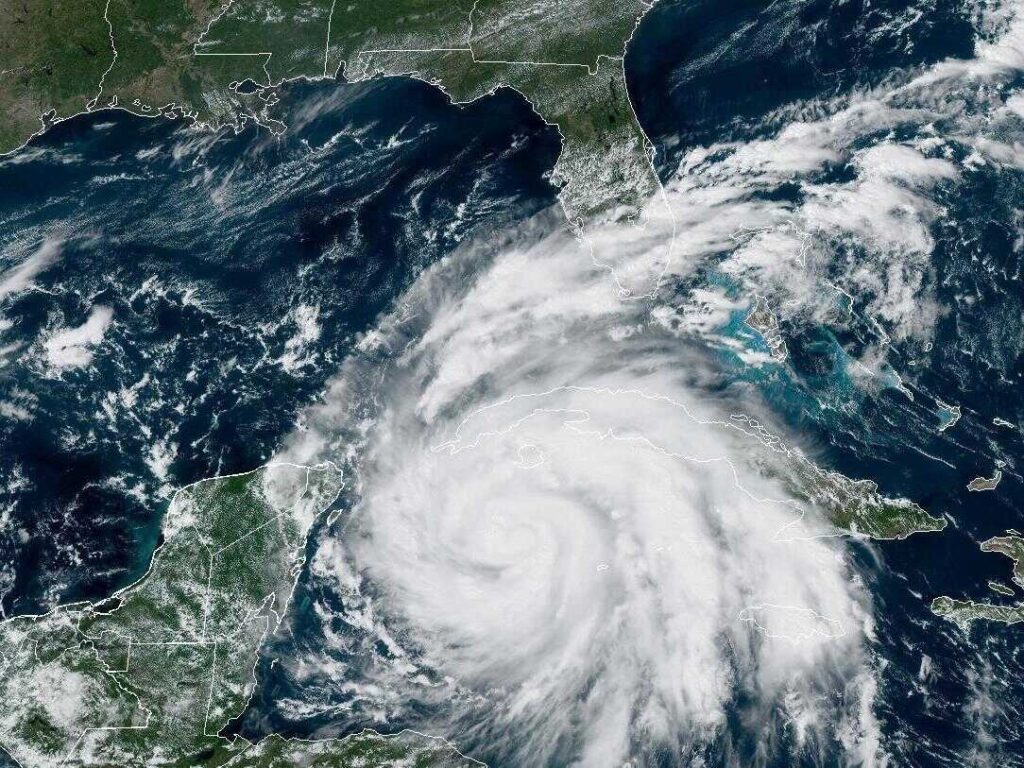
How to Prepare Your Garden for a Hurricane

Every climate zone offers unique beauty and wonder, but at the same time they each have their own challenges. Unfortunately, in many subtropical areas, hurricanes are one of the primary natural challenges that we face. While there are many things to do inside your home to prepare, there are also some practical things to do in the garden before a hurricane. So, whether you are new to food forest work or this all all “old hat” for you, perhaps this checklist will help you remember a few things as you prepare your garden and yard for a potential hurricane.

how to prepare your garden for a hurricane
  1. Remove hanging flower pots and take down wind chimes and hanging bird, feeders, and decorations. Walk through your yard a few days before and just start taking down anything that’s hanging. Once you think you have it all, come back after a few hours and walk through again to double check everything.
  2. Turn over bird baths and lay on the ground.
  3. Bring patio furniture and umbrellas into a garage or shed. If you don’t have an indoor place, secure them to poles or against the house. Tables should always be turned over.
  4. Secure kids play items. This includes removing trampoline covers and tops, or turning them over and putting bricks on top. Bring smaller plastic playhouses into the garage or secure in place.
  5. Select prune trees with large leaves. These large leaves are going to get ripped to shreds anyway, and would usually take down the tree – so prune before the wind hits. To give them their best chance, cut bananas back to one leaf. Or even cut papaya to the trunk. We recommend this with things like banana, papaya, canna lily, etc. 
    1. Banana pruning tutorial video – CLICK HERE
    2. Tropical spinach pruning tutorial video – CLICK HERE
  6. Harvest annual flowers, sunflowers, decorative plants, etc. Save seeds from varieties that have already bloomed like Jamaican sorrel, cranberry hibiscus, butterfly pea, etc.  Better to save seeds and have some to restart next year incase you need it as insurance.
  7. Use large T-post stakes to tie up younger fruit trees. Always use straps – never rope.  Rope will cut and damage the bark. These can be removed after the storm has passed to allow the tree trunk to strengthen naturally.
  8. Roll up awnings, close available window shutters, and move your car out from under tree branches or store vehicles in a garage.  RV’s can be strapped to the ground or to nearby trees to hold in place.
  9. Harvest fruit that is “close” to being ripe and bring indoors.  This should be done just before the storm, just in case the weather changes.   Many times the forecast will change even as the storm is coming in.
  10. Make sure your water catchment and drainage systems are ready. Be prepared to watch the water flow on your site so you can adjust later.  During the storm, look for problematic areas where you need to divert water flow at a later time through swales, French drains, etc.
  11. Prepare to have dogs and cats brought indoors.  Have some herbal or natural calming meds ready for dogs before the storm begins.  Calming aids should be given an hour before the storm arrives and then as prescribed there after. Play soft music or turn a TV on for the animals to help drown out the noise.
  12. Secure livestock and animals.  Bring appropriate animals inside barns or shelters when available.   Remember, animals like cows and horses are not necessarily native here. They are not built for this. Utilize dog crates and kennels for smaller animals (chickens, quail, ducks, etc.). This may need to be done the night before when animals are calm, and then they are kept inside the 24 hours prior to the storm. Dim lighting will help keep animals calmer.
  13. Don’t “panic buy” from the grocery store. Have enough of your weekly items, but don’t stock up and short someone else.   Fill a few extra jugs with water and freeze them. That way if the power goes out, you have the ice to keep things cool and water to melt and drink. 
  14. Check on your elderly neighbors, single parents, or shut-ins to see if they need help.  Do not assume that just because they have family that they are ok. Consider using phrases like, “What is something I can do for you this afternoon to help you prepare for the storm?” Or if it’s an elderly person, just let them know that you are bringing over a frozen meal for them the day before and afterwards. Bring them over some of the flowers you cut from the garden as a way to connect and then see how you can help them prepare. Text them during the storm again to check in on them. Be the change you want to see in the world around you.
  15. Have a good book, candles, and some extra snacks on hand.  Don’t spend the storm worrying. Have a nice cup of tea or glass of wine and enjoy the adventure. Stay calm and take pictures along the way. Tag @permacultureFX on social media with your storm prep pics so together we can help inspire others to prepare with wisdom.

We’ll see you in the garden again…after the storm!

How to Plant a Food Forest | Part 3 PICKING PLANTS

Once the soil has been prepared, you can begin selecting species and planting trees for your site. There are several options for this:

  1. Do online research to see which trees, bushes, and wildflowers are hardy in your area.
  2. Visit a locally owned greenhouse or nursery to see which ones may do well for you. Big box stores are something we recommend avoiding when it comes to fruit trees and berry bushes. They generally sell the same varieties nation wide (which means they may not work in your area) and their quality often suffers. Find a local nursery and build a relationship with one that you respect their growing methods (hopefully organic).
  3. Find quality online growers (I have often used the www.foodforestnursery.com)  You can use permaculturefx10 for a little discount as well. 
  4. Get a permaculture consultation to help you determine what your site can handle. These can be done in person OR virtually.

There are many things to consider when putting fruit trees and berry bushes in the ground. Unfortunately, it’s not as easy as merely deciding what you like to eat and planting it. If you live in Michigan, no matter how much you like avocados, they just won’t survive without a heated greenhouse. Likewise, if you live in Florida, the traditional Haas avocado that you buy in the grocery store hates the humidity. So, there are other varieties that will do better in that region. Learning what does best in your area is an important step and also a lifelong journey. Enjoy that learning process.

Here are some important things to keep in mind when selecting species and planting your new food forest

  1. Understand the cold hardiness zone for where you live. More important than the higher temps, it’s critical to know your minimum temps. Freezing is generally more likely to harm a sensitive plant than higher temperatures. If you want to learn more about your growing zone, click here.
  2. Know your sun exposure. If your yard is mostly shade, you are unlikely to do well planting tree species that prefer full sun. Though a mis-planted tree may “survive”, it may not do well or produce fruit. Keep in mind that there is full sun and full shade in every USDA growing zone, so regardless of where you live – there is something that will grow and thrive on your site. Choose well and work in harmony with your site.
  3. Plant during the right season. Depending on where you live, the ideal time for planting fruit trees may GREATLY vary. Don’t assume that just because a nursery tells you to plant it that it is the ideal time to do so. Remember, their job is to get you the plant – it’s your job to steward it well.
  4. Understand the differences in varieties. Within each type of tree (peach, pear, mango, etc.) there are hundreds and even thousands of different varieties to choose from. A peach is simply NOT a peach. For example, those peaching grown in Georgia are bred for that specific growing zone and will not produce fruit in Central Florida. However, varieties of peaches like Tropic Beauty (our staff favorite), Tropic Snow, and Florida prince are bred to require less “chill hours”, so they will bare fruit much better in zone 9 and 10. Likewise, avocados have a WIDE range in their varieties. Some (like “Fantastic” or “Joey”) are cold hardy down to 15 degrees. Some avocados are better for slicing and dicing (like Winter Mexican or Wurtz), while other avocados are more ideal for guacamole (like Brogdon, Oro Negro, or Mexicola). The benefit of having someone to consult with is that you are more likely to get a variety that meets your preferences in flavor, but also one that will THRIVE on your particular site.
  5. Think in layers. Don’t just plant one height of trees all over the property. Think about creating production at various heights and levels. What can you grow as a root crop? A smaller perennial? A bush layer? A dwarf tree? Top story tree? Vine? By choosing to plant multiple layers in your system, you not only maximize your space, but create a scenario where various plants can work in synergy with one another. One might provide the needed shade for another. Or, better yet, one might actually fix atmospheric nitrogen into the soil to fertilize another plant.
New Food Forest Installation

Now, it’s time to get planting

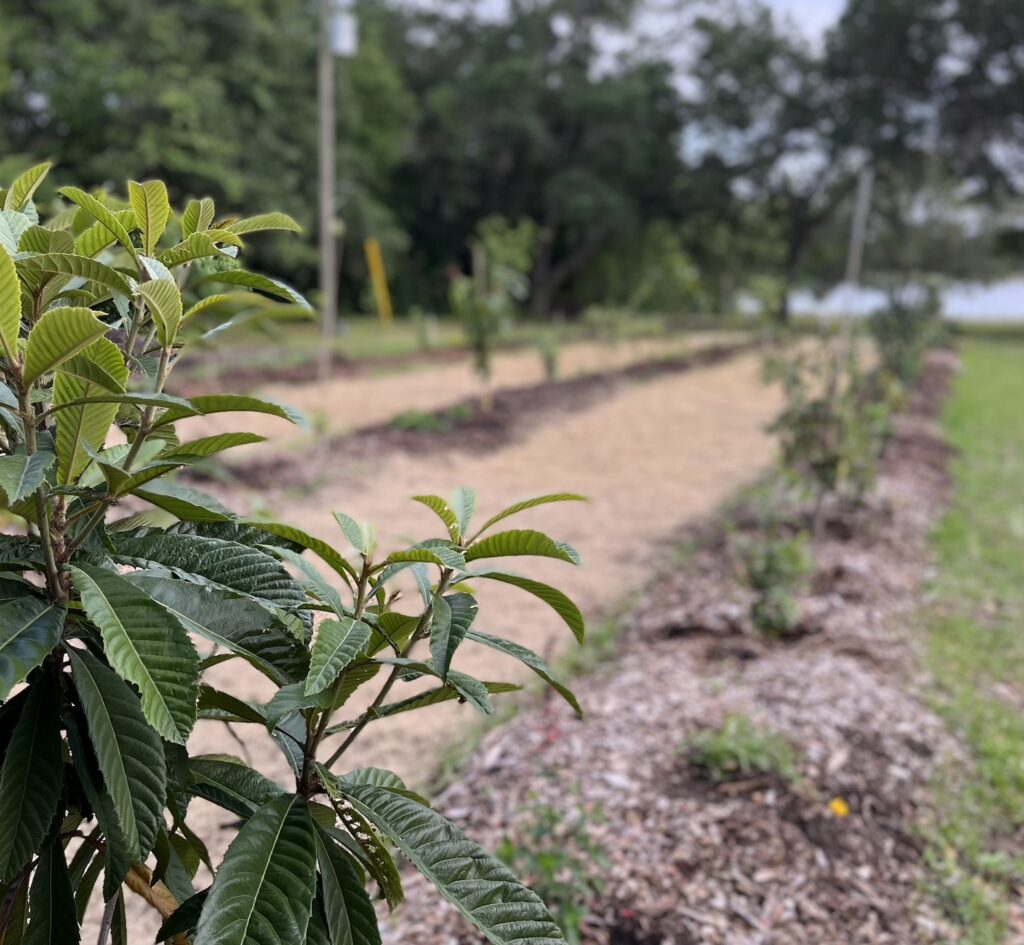
  1. Plant away! Use something to suppress weeds. Apply compost. Layer up 4-6″ of wood chip mulch. For more in-depth planting instructions, CLICK HERE.
  2. Finish a smaller area before moving on to the next. This is one of the most common mistakes that new food foresters make… they want to just put the tree in the ground and walk away. However, one of the worst things you can do for your new tree is leave it to fight with the grass around the base. Cover the soil properly, using the method above and completely finish one area before moving on. This will not only give your tree its best chance at thriving, but it will also give you a sense of completion.
  3. Know when to water. There is no possible way to simply say, “water your plants three times a week.” Differences in heat, sun exposure, wind, and humidity all vary so much that it’s impossible to set a specific watering schedule. So, to know when to water, put your finger in the soil down to your big knuckle. If you feel moisture, do NOT water. Plants actually need to dry out between watering. This not only causes their roots to expand and grow deeper into the soil, but also helps prevent root rot.
  4. Maintain your food forest and garden by checking back on the blog for our free monthly To-Do Lists. We will help remind you when to fertilize, when to plant the next crops, and when to prune.

FULL FOOD FOREST BLOG SERIES

Part 1:  Myths about Planting a Food Forest

Part 2:  How to Prepare the Soil for a Food Forest

Part 3:  Selecting the Right Plants for a Food Forest

Part 4:  How to Install a Food Forest

So, now that you’ve read the theories and have done some research – it’s time to get outside and plant. Remember, you can always find more help, information, and inspiration on our social media account.

See you in the Garden!

Five Things Every Organic Gardener Needs on Hand

Over the last 20 years, I have found that nearly every garden problem can be solved with a handful of solutions. Of course, there are countless nuances to the various problems, but often times, the solutions are the same. Whether in my own home garden, at other USDA certified organic nurseries, or on the dozens of permaculture sites I have designed, I have found that there are five solutions that every organic gardener needs to have on hand at all times. So, here are the five things that every organic farmer needs on hand:

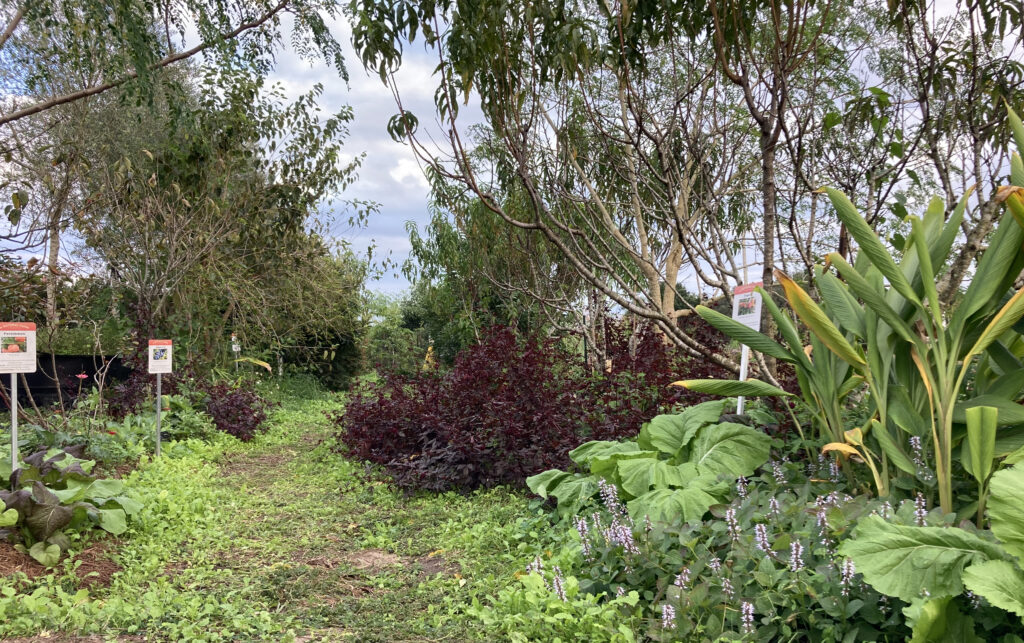
Food Forest Garden
1 – Organic compost

Instead of wasting money on expensive fertilizers and soil amendments, every gardener needs a good compost pile going at all times. Healthy plants will be more resistant to disease, fungal infections, and bacterial issues. Compost not only helps increase overall plant health, but also builds soil structure. If you are fortunate enough to have an organic compost source locally, then absolutely support them by purchasing their product as well. For many families, a compost pile can be too much work and not enough return. So for many homes, a worm composting unit (like those from Uncle Jim’s Worms) are the best solution to get compost and compost tea. In cold climates, a 1″ layer of organic fertilizer can be applied in April, June, and August. In subtropical and warmer climates, it can be applied in February, June, and September.

2 – Soil and Plant Probiotics

Ideally, we are all brewing batches of indigenous micro organisms, but since that isn’t possible for many home gardeners, there are amazing products to help soil microbes. Probio is (by far) my favorite soil probiotic. I use this monthly in my watering can, as a foliar spray (using a backpack sprayer), and even as a compost pile activator. On the organic farms I am connected with, this product is often the secret weapon for plant and soil health. It often works so well that it curtails future problems with fungal and bacterial issues before they even start. Having this product on hand is a must. CLICK HERE for order info.

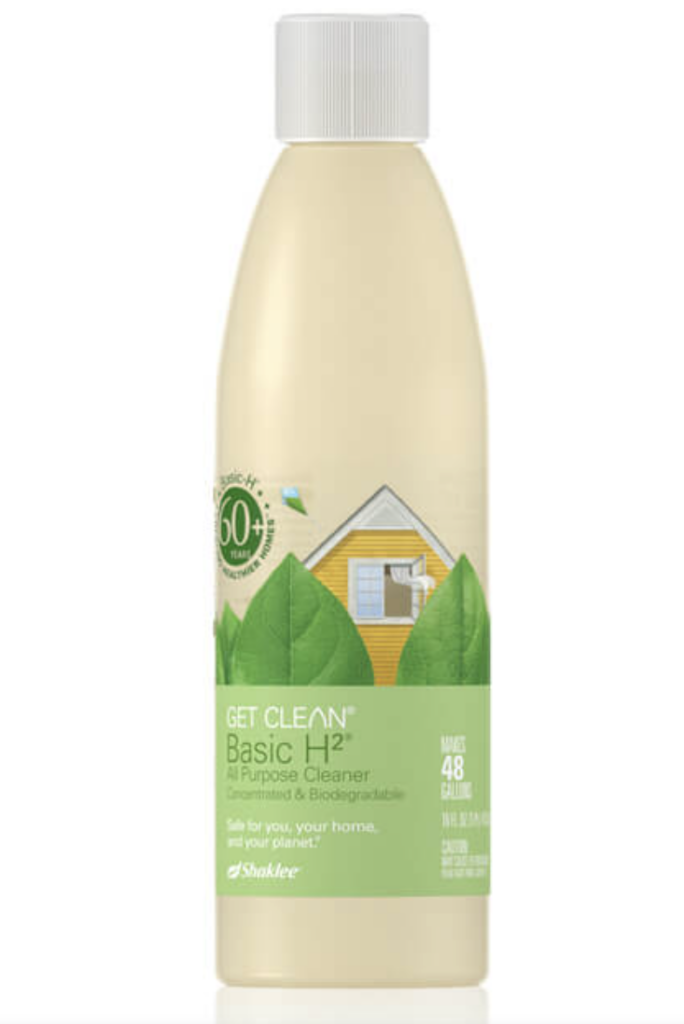
Basic H – Plant Based Surfactant

3 – Soap Alternatives (must be plant based)

An organic plant-based surfactant is a god-send in the garden and food forest. Personally, I use Basic H, and we also use this at several certified organic farms we are connected with. This is used to wash off pests, aphids, and bugs….but also to clean pots, trays, and farm equipment.

is also great for treating fungal and bacterial issues and used to emulsify neem and/or fish emulsions before application. Permaculture guru, Joel Salatin even uses this for deworming cattle and livestock (and I now do the same). Do NOT use non-organic options or even scented castile soaps, because they will remove the natural waxy coating on the plant leaves and can actually damage soil health.

4 – Neem Oil

Neem is an organic plant extract used to treat fungal issues like sooty mold, powdery mildew, etc. It is also a great insect repellant and used to kill things like aphids. Neem also has a short activity period, so it’s not going to affect bees and butterflies (unless you spray them directly). It’s a much safer insecticide than anything else I have ever seen or used. Not to mention, in humid climates, it helps control our many fungal and bacterial issues. When purchasing, be sure to get 100% pure neem and then dilute it yourself. The premixed stuff in a spray bottle is a rip off.

5 – Kelp and Fish Emulsion

These two are both light fertilizers that also contain living enzymes that build the soil. They are both non-burning, organic compounds that not only fertilize the plant, but also help the uptake of minerals. They can often be added to water as a root drench, but also used as a foliar spray multiple times during the growing season. Chemical and synthetic fertilizers bought in the store (even most organic options) use salt as a carrier mechanism for the nitrogen. Some organic fertilizers “hide” it with things like soy protein hydrosolate, which is up to 40% MSG. So stick with organic compounds like compost, fish emulsion, kelp, bone / blood meal to build your top soil and microbial health.