Lessons in Lifestyle Permaculture | by Kris Edler

vision board

Seasons of change and transition are often challenging to navigate, no matter how many seasons of life one has experienced.  As I am in the midst of one of those seasons myself, I am continually asking myself, “Why is this so challenging?”  The answer to that is so simple, it is often overlooked.  In short – People.  People and relationships are complex, ever-changing, and the most precious commodity in the universe.  Learning to navigate our journeys while being centrally focused on people are essential tools in a permaculturists belt.  These lessons in lifestyle permaculture are a reflection of one of the core components of the practice – People Care.  While many articles, blogs, and videos teach the earth care and money making principles of permaculture, the aspects of inter-personal relationships are often underplayed.  When ignored though, the system goes out of balance.  In most cases, earth care is the “what”, fair share is the “how”, and people care is the “why”.  Without the foundational WHY being cultivated, the practices we build on top do not matter that much.

Have you ever been in a season of life when you lost your WHY?

In 2007, I was a part of a group of educators who helped found a small private school in South Kansas City.  Over the last decade, The Daniel Academy went from 65 students to over 300.  We purchased 18.5 acres of land in the city and an old church campus to hold our classes.  Immediately, mentoring these young adults became my “why” and the fuel for my teaching job.  Everything I did from that point forward was for kids and to see them thrive in the context of healthy families.  Creating a school that was more of a community than an educational sphere became a foundational value that I functioned from.  In 2010, we started a gardening and permaculture class for the junior high and high school students, and every quarter had between 5-35  students, depending on the season. Over the years, I can still tell you which students planted which nut tree groves, which families paid for and planted the apple trees, which students planted the wildflowers, and who helped plant the understory in the food forest.  I can still picture some of my first students, Graham, Christopher, Becca, Bria, and Austin out in the courtyard planting Missouri native wildflowers.

This year, for multiple reasons, I came to the realization that my time at the school was nearing an end.  I had been sensing the transition and have a burning desire to take the impossible step into “the next assignment” (forgive my teacher talk).  I am not the first one to have been here, nor will I be the last.  We have all been there, in that painful place between the last season of life and the ambiguous next season.  We have all felt the intense series emotions that accompany transition and asked the question, “How in the world am I ever going to get there?”  The answer, like most in life, can be found in the garden.  Permaculture practice does not end at the garden gate, in fact, it often begins there.

It is important to embrace tough seasons, challenging relationships, and trying times.  After all, the very best gardens have a foundation of crap.

Lessons in Lifestyle Permaculture

Here are a few of the lessons in lifestyle permaculture that I have been learning.  Perhaps it will help others in learning to navigate their seasons from one garden to the next.

1 – Understand your WHY

For me personally, I have always thought I was project driven.  I thrive when there is a large task, project, or an event to plan.  My heart comes alive in doing acts of service for others and being able to see them loved well.  In December 2016, when I moved my desk, some of the chickens, and my other belongings out of the private school and into my home, I began to reimagine my ideal backyard set up.  It was my opportunity to give order to my own castle.  So, I arranged my desk to look at the back window, and had the chickens in the perfect line of sight.  I rearranged my shed and garage, and started drawing up the next phase in my urban permaculture yard.  It was / is a picturesque set-up that I can find few practical faults with.  The last two weeks, looking out from my desk, I had a profound realization…

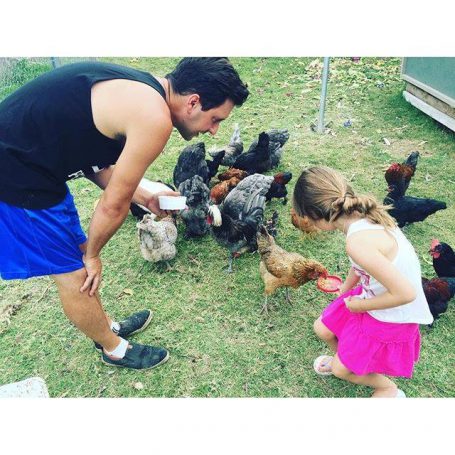
I do not like chickens that much.  Even heavier… I do not really enjoy permaculture (itself) as much as I thought.  Believe me, I was shocked.  For three days, I sat and pondered while I continued to clean and organize, until the realization hit me.  There are no sounds – no people.  At the school, I was surrounded by kids, teachers, families, and parents.  Every twenty minutes someone would come into my office to sit, talk, or just hang out.  At the time, those interruptions were annoying and seemingly inconvenient.  Now, being at home, I have realized that those students, kids, and families were the WHY behind the projects.  

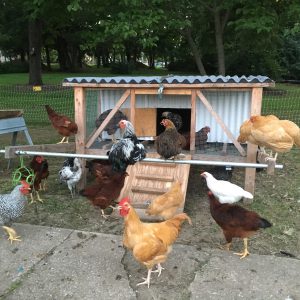
It’s true, I raised chickens primarily because it gave me a platform to interact with students.  I taught 11-12th grade English because I loved seeing the “ah-ha” moments on their faces.  I worked in my office with the door open so that parents and kids could come inside and visit.  In fact, I even studied permaculture to give me a connect point with families outside of the traditional classroom.  This entire time, I thought the projects, hugel-swales, raised beds, writing assignments, and books were my passion, but I was wrong.  I misunderstood my own passion, which was really caring for PEOPLE.

2 – Strengthen remaining connections and build new ones

When undergoing seasons of transition, take Bill Mollison’s advise, “For every element, establish 3-4 connections.”  Often when our life experiences change, we focus on what was lost.  We look too heavily on the “sink” or the waste.  This is easy to do, because we experience a sense of grief and mourning, which is healthy and normal – for a moment.  Instead of staying in the place of loss though, we must look to what remains.  Strengthen the connections that have weathered the storm, because often times those are the most healthiest points anyway.  In an ice storm, the branches that break off are often the ones that likely needed pruning anyway.  Focus on restructuring from the remaining framework and make additional connections to strengthen that which remains.

Often times, remaining connections will experience stress and pain, but instead of ignoring it, tend to it.  Let the wound have “sensation”, because it’s a sign of life still existing there.  Apply healing salve to broken limbs, set bones right again, and prune back the dead leaves.  Focus on the trunk and root system and be prepared to nurture it over a period of time.   Yes, recovery takes nurture, and most importantly, nurture from community.

Use these times of transition to build new connections. Add limited additional elements to your system.  Not only will this help you learn something new in the process, but it will also take your mind off your circumstances. Instead of focusing on the valleys, look up to the hills and find the longest-highest contour point (where the water comes from).  So, let’s be practical.  In times of life transition, embrace relationships where you can be vulnerable.  Let people call you higher.  Invite people into your home, even if they don’t invite you first.  Make the phone calls you have been dragging your feet on, and try a new project or two in order to keep the hands busy.  Don’t shrink back – take a step forward.

3 – Think long-term and begin with the end in mind

Seasons of loss are followed by rebirth.  Death is not the end, but rather a beginning.  In the garden, when sometimes dies, we do not throw it away and remove it from our property.  We compost it and re-add it back into our system in a changed (often healthier) form.  Even diseased plants can be composted, but need to be treated with a higher core temperature to kill the bacteria, but after a short time (18-days in the Berkley method) the compost can be generally re-added to the garden without fear.

lessons in lifestyle permaculture
Vision Board Night 2017

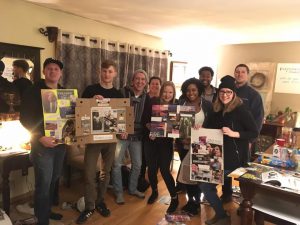
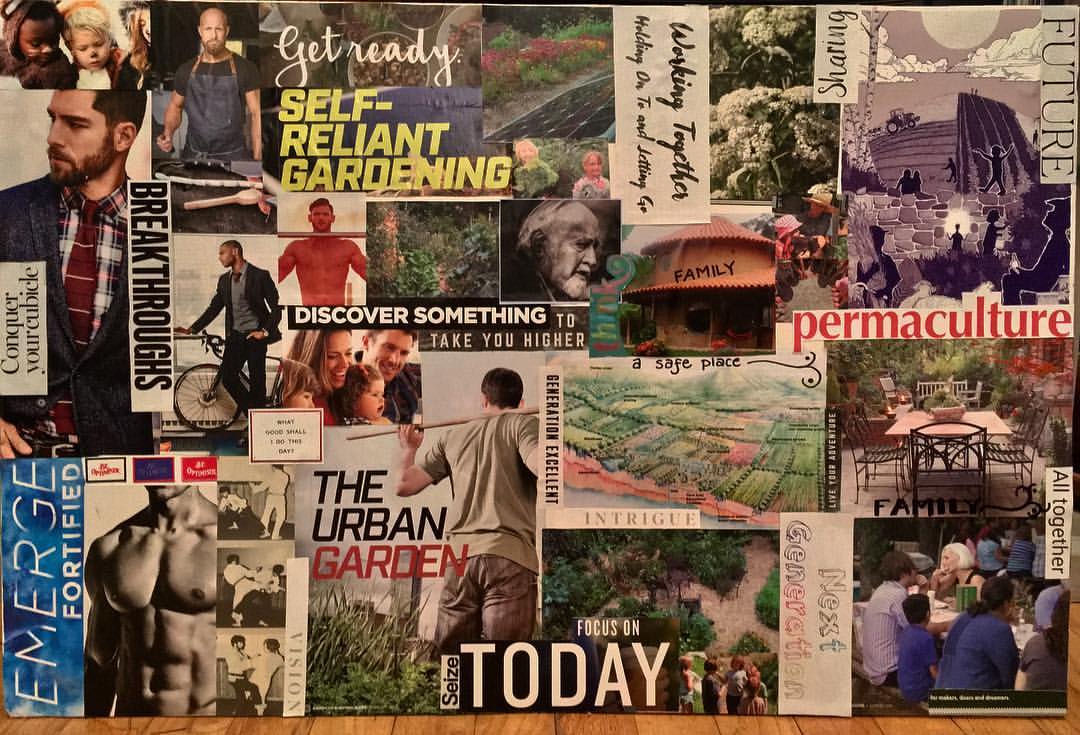
One of the practical strategies in lifestyle permaculture is to begin with the end in mind.  If you want a long-term food forest to feed your children, don’t limit yourself today by only planting lettuce and tomatoes.  In our every day life, one of the practical tools I use is creating a vision board.  As yesterday was National Vision Board Day, I had 15-20 folks over last night to just dream about their futures and get a little creative.  Participants cut images and words out of newspaper and magazines, and glued them on their own vision boards to hang up in their offices, closets, and bedrooms.  Keeping the longterm vision in front of us on a daily basis helps keep our eyes fixed on the bigger picture and allows us to visualize what the future might look like.  For me, seeing my vision board every day helps me make smaller decisions that are like “steps” toward the bigger goal.

4 – The problem is often the seed of the solution

Problems are real and cause stress.  Conflicts are painful.  Relationship bumps are challenging and stir the heart.  Emotions, both positive and negative, are real and should be experienced without shame.  Getting stuck in the place of pain is obviously never the goal, but glossing over it is not helpful either.  Often times, the pain points we experience in transitional times are the seeds that we need for the days ahead.  I remember Geoff Lawton saying, “You don’t have a slug problem, you have a duck deficiency.”  The slugs are natural parts of the ecosystem and should not be reason to burn an entire crop at the first sign of their presence.  Their presence is an indicator that the system is in need of attention and nurture to bring it back into balance.  The problem is often the solution.  Those slugs, with the introduction of ducks, can be turned into eggs, meat, and fertilizer.  Not to mention, those problematic slugs provide hours of entertainment for families when we get to watch the ducks on a feeding frenzy.  The problems do not indicate the end or death; instead they merely indicate a system which needs nurture (not neglect).

When using permaculture as a lifestyle model, ask yourself some key questions about the problems you are facing:

A – What is the pain point I am experiencing?  Why does it matter to me?

B – What is the opposite of this pain point?  How can I build toward this to create a better reality?

C – What type of nurture is needed in order to bring about this change?  What connections need strengthening?  What pests / diseases need to be “heated up” in order to bring back the balance.

5 – Polyculture not Monoculture

In the garden, planting a mono-crop is often easier in the short-term.  It requires no other connections with plants, little thinking, and can be accomplished in a short amount of time.  In the long-term though, the mono-crops experience nutrient deficiencies, devastating disease, require fertilization, etc.  When the mono-crop is finished producing it’s fruit, it is done.  Nothing next.  In contract, a polyculture with multiple, perennial species, a different approach is taken.  It takes more careful planning, time to evolve, and a little nurture, but it will create a balanced and self-sustaining system that has perennial abundance.  Polyculture systems experience less disease, continue fruit and supply, and a supply for both humans, insects, and animals.  Polyculture systems create the platform for abundance.

When crisis arises in our personal lives, we often bunker down and try to hide ourselves away.  After a rough day in the office, I would frequently go home and have a glass of wine and a PINT of Ben and Jerry’s Ice-cream.  Nursing my wounds with ice-cream is an unfortunate go-to, but is usually followed the next day with regret.  Likewise, instead of isolating ourselves in our momentary hang-ups, allowing ourselves to be vulnerable in the place of community is a much healthier approach.  When your brother falls down, stretch out a hand to help him up.  When a neighbor is cold, give them a blanket and food.  Do unto others as you would have them do unto you.  Sounds simple, but it is much easier said than done.  It requires us to establish and nurture connections, and be vulnerable.  That risk is always worth it.

It is all about the WHY

At the end of the day, what I have discovered in this season of transition is that understanding our foundational WHY is the key to thriving in times of change.  For me, these lessons in lifestyle permaculture have taught me to value family before function.  People are the foundation stones for any project, and at the very center of my being is an innate desire to be in family and a part of a community who is in it for the long-haul.  For me, that is permanent culture.  People care is the foundation of my journey in permaculture.

Why do I do permaculture? I believe that families today deserve the very best food, produced in the very best way, and that kids deserve to live in a community that is flourishing with abundance. I do permaculture because when I leave the earth, I want to leave it to the next generation BETTER than I found it, which means that merely “organic” is not enough anymore. We need regenerative systems to heal the damage we have already caused. Millennials, we are way past the point of needing “sustainability” and organic food – we need a culture that heals families, land, and hearts. We have to leave this planet better than we found it or we have failed. Because of our endless greed, narcissism, and egocentrism – we will have failed the ones who will come after us. This is why permaculture is more than tomatoes – it’s about a legacy.


vision board


Overcoming Permaculture Destination Addiction Part 2 | by Kris Edler

permaculture destination addiction

Because permaculturists are are often futuristic in thinking, it’s easy to get excited about the future and miss the opportunity where we are in the moment.  Many times, I find myself day dreaming so much about the mature food forest I will one day steward and I miss the fact that I need to be applying compost to the soil today.  In the first part of these series on Overcoming Permaculture Destination Addiction, we talk about how to BE right where your feet are and to enjoy the plot of land you are stewarding today.

Overcoming permaculture destination addictionIn order to stay in our power-allies, we have to set up careful parameters in order to keep ourselves focused and living intentionally.  When a permaculturist is focused the system thrives with intelligent design and abundance.  When we get distracted, we end up with 30 half-finished projects around the property.  Learn how to select the most important projects here, with “Five Keys to Healthy Building”.  For me, there are three dangers that often creep up that are easy derailments of my efforts.  These dangers have applications both in and outside of the garden.

Danger #1:  Planting Outside of Your Zone

We have all been at the greenhouse and saw “THE PLANT”.  You know the one… it’s the one you don’t have in your garden that is so perfect and exotic that you absolutely have to buy it.  Even if the plant is just outside of our growing zone, we usually still buy it with the thought in mind that we can nurture it, mulch, or maybe even take it in the greenhouse for the winter.  The fact remains, the plant often looks good at the plant store, because it was just shipped there from Florida and is full of fertilizers.  That is a short lived reality.  Once those two factors wear off, we all know how the story goes – the plant struggles in our midwest garden, will sometimes make it through one winter, but is usually a pitiful stem in the second season…and dead shortly thereafter.  A mistake I have made more than once myself.

Don’t get me wrong, it is fun to plant outside of our planting zone and sometimes (rare as it may be), we can make it work.  However, there is a reason those planting zones exist.  That zone is what is optimal for the plants growth and ability to thrive. Yes, the little plant might survive in your garden, but the chances of it thriving in a system it wasn’t intended for are slim.  As a gardener, I have to deny myself the momentary pleasure of buying that tropical plant in order to give it a better chance in the system it was created for.  Zones exist for a reason – they are the unspoken boundaries of the landscape that allow for abundance.  We cannot simply erase these invisible lines simply because we desire the tropical tree enough.  We cannot wish away the boundaries that nature has drawn.

Danger #2:  Letting Books Frame Your Reality

When I first started researching permaculture, one of the ideal trophies many people touted on about were their “herb spirals”.  These seemed to be the golden children of permaculture design that everyone wanted to have.  As I read my first few books, I started to think to myself, “If I don’t have one of the spirals like this – I’m going to be a bad permaculturist.”  So, during my first PDC, I was waiting for Geoff Lawton to introduce the concept, however, when he finally talked about it, he told us upfront that it was NOT a design for everyone.  Lawton actually tried to talk us out of creating one before he gave the mechanics of designing it.  He specifically said, “there are some growing scenarios that make it a really wise choice, but there are 10 other scenarios that make it a permaculture fantasy.”  They key to a healthy system is doing what IS right, not creating something because it FEELS right.  So what makes it right?  The system.  It is the difference between a system being able to sustain an element and the element actually being good for the system as a whole, where they both thrive because of its introduction.

Just because it’s do-able in someone else’s system, does not mean that it is the best course of action for your scenario.

Danger #3:  Jumping the Gun

apple orchard care in kansas city
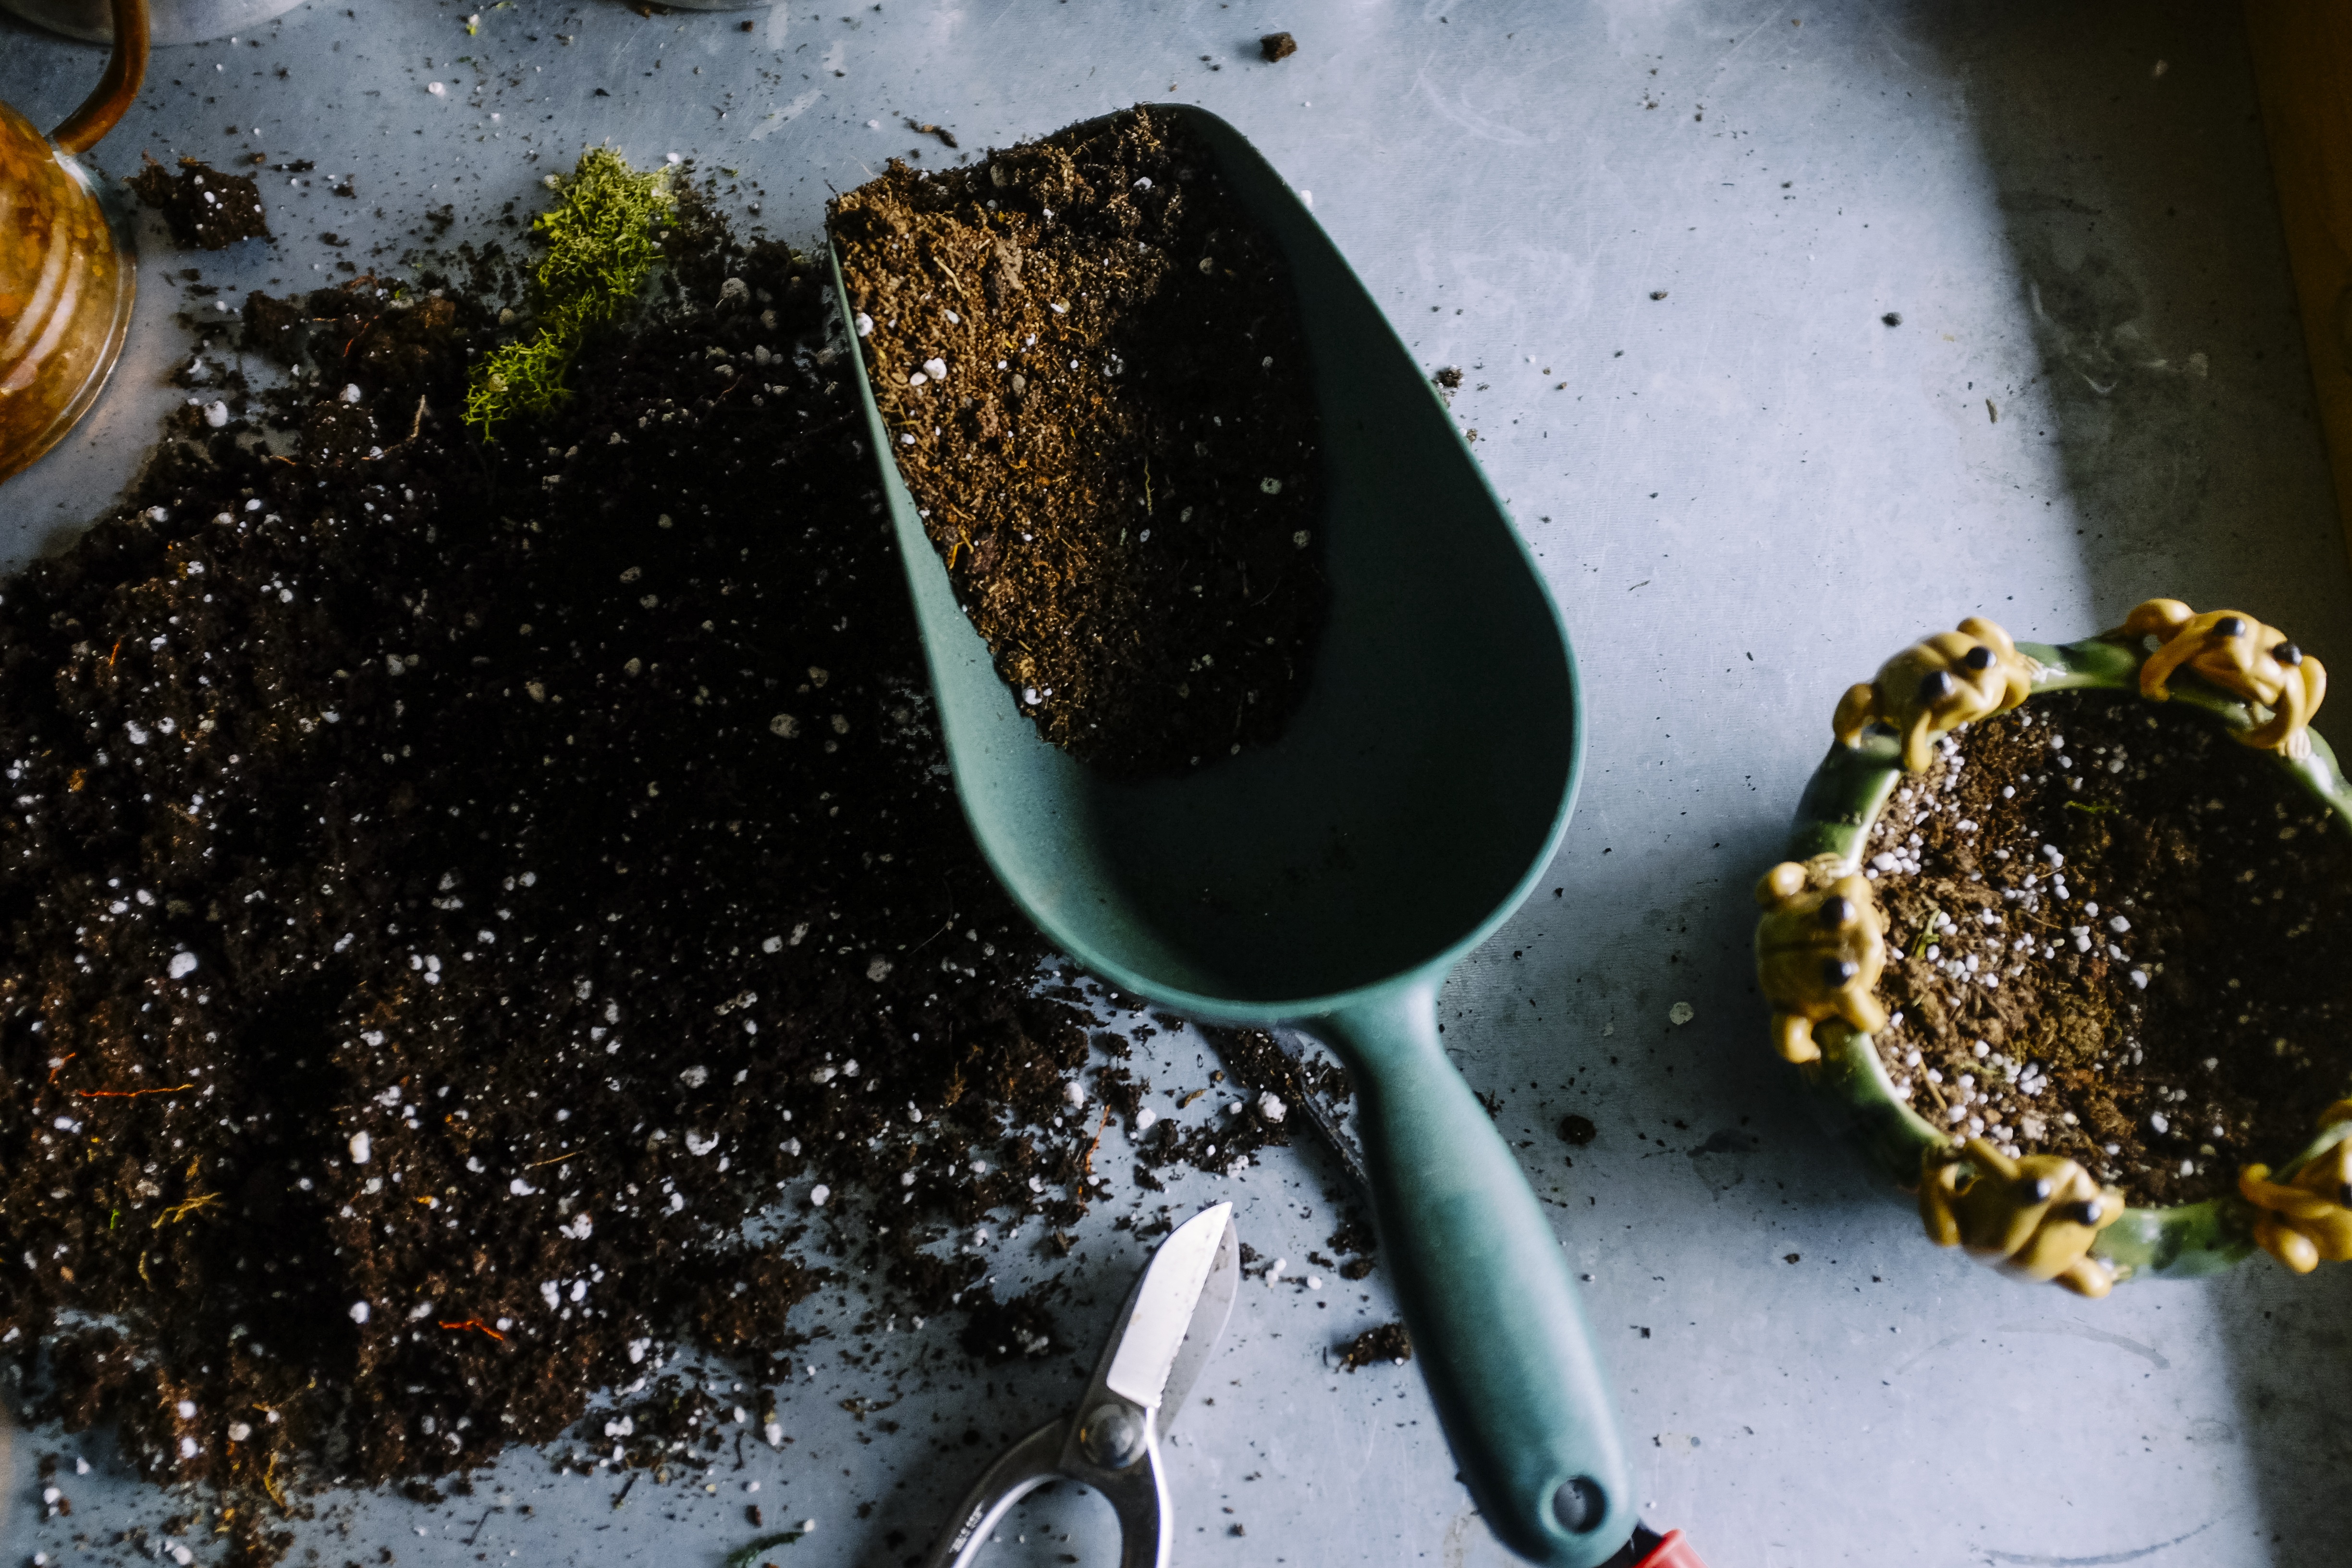
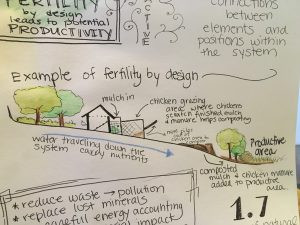
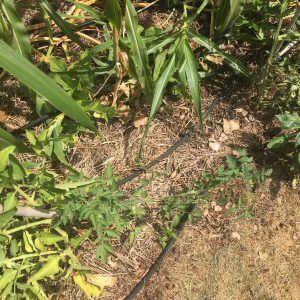
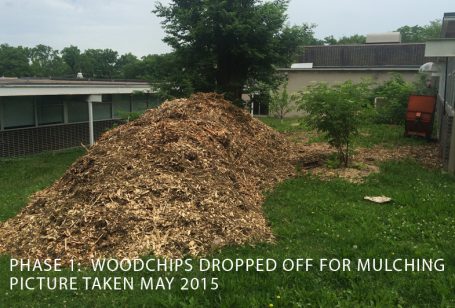
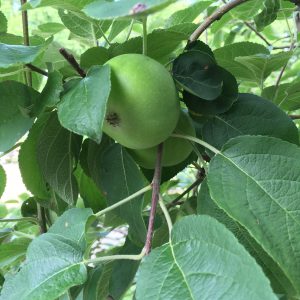
One of the hardest lessons I have learned in permaculture is that real growth takes real time.  Real abundance takes ground work above all else.  I have planted hundreds of trees and bushes the last few years, and some of them do really well while others thrive.  The difference is generally found in how much time I spend nurturing the soil vs. how much time I spend playing the with leaves.  On the trees which I have mulched, wood-chipped, composted, and sprayed with beneficial micro-organisms, I see immense growth and health.  However, there are some trees that I focused on foliar sprays which have really struggled.  The lesson learned regarding my apple trees is to allow 3-5 years of root growth on new fruiting trees BEFORE allowing them to have fruit set.  This creates a tree that will be healthy for 100 years, but requires me to forgo the momentary pleasures of a few apples.  The waiting process is painful, but it’s worth it in the end.

This month, I took some young 7th grade students out to the apple trees to look at the branches during the fall.  On the trees, you can see the buds setting for the next season.  I told them how we have been waiting for several years to have apples, because the focus has been on root growth, and how next year there will finally be apples!  Here is the Facebook post I wrote that day:

“…Because I am a garden nerd, I know that next year I will have more apple blossoms than ever before.  I can see the bud set starting this fall for the next year.  We are nearly past the tree infancy stages and entering our first production years.  We have labored hard to create the soil that they could thrive in, and have provided companion planting guilds to ensure a healthy eco-system.  All the while, we have strategically plucked the blossoms and early fruit to prevent apples from forming the first few years.  However, this fall, I see buds forming for next year that we will allow to produce fruit!  The promise of fruit – finally!  If I open up the buds to take a peek at the promises before their time, I cannot simply close them back up and hope for them to bear later.  Once opened, they cannot be closed.  The buds need the hardening off of the winter to prepare for the year ahead.  Otherwise, should I act in haste, the fruit sets will fall to the ground.  As a gardener, I watch and wait, and I do my part today to tend the soil and provide a covering.”

Overcoming Permaculture Destination Addiction

So, be patient.  Wait.  Tend the soil where you.  Be wise.  Observe the plot of land that you are responsible for stewarding and ask yourself what is best not only for the individual tree, but also the planting build; not only what is good for the guild, but also the system as a whole.  Be where are you are right now and care for the plot of land you are responsible for.

Don’t worry about what land you are going to steward in the next 10 years, just enjoy today and get outside in the garden.


Permaculture Destination Addiction Part 1 | by Kris Edler

The grass is always greener on the other side of the fence, unless you are a permaculture ninja, then the food forest is always more established on the other side of the hugelkultur swale.  Whether you own 300 acres in the country or 1/4 acre in the city, I am sure we have all had the occasional case of property envy.  This happened to me immediately as I started my permaculture design course (PDC) with Geoff Lawton.  I started researching properties all over the United States that would provide the environment for the ideal food forest.  As I went through the PDC, I started imagining swales, 7-layered systems, hugel-beds, herb spirals, and the multiple zones for growing and production.  Unfortunately, those moments of dreaming quickly made me realize that I wasn’t happy where I was.  I had a horrible case of destination addiction… permaculture destination addiction.

destination addiction

It is easy to get lost in the fantasy of “if I only had that property, then I would…”.  Though it is helpful to dream, it is also dangerous if we allow ourselves to stay there.  Not only do we have the opportunity to be happy and fulfilled where we are, but we also have the ability to experience abundance.  Bob Fraser, a Christian leadership author, says, “Your ministry is right where your feet are.”  In the case of the permaculture ninja, our opportunity for abundance is right where we stand.  It is true, I might own another property in 20 years that will be very different than the ones I manage now.  However, the reality is that I am stewarding land right now that needs my care, attention, and focus.  I need to build right where I am as though I were going to be there for the next 70 years.  I need to live in the present and not in the possibilities of the future.

What system are you stewarding today?

A permaculture friend of mine has a stunning little property in a suburban area that has a lot of old growth.  He has hickory, oak, large maple, etc.  Because of his desire to build a picture perfect permaculture property, he is longing to put in a food forest.  He wants all seven layers with each one expressed in a way that it looks like a picture of Sepp Holtzer’s property.  However, with the amount of old growth and shade he has on his property, having a 7-layer system is just not reality.  He would have to cut down sections of the old growth to allow more sunlight and would need to amend the soil because of the high tannins in the acorns.  In essence, he would need to kill off part of his 150+ year old system in order to add in a few bushes and understory shrubs.  IT’S NOT WORTH IT!!

J.R.R. Tolkien says, “He who breaks a thing to find out what it is, has left the path of wisdom.”

Be where you are – Avoid Permaculture Destination Addiction

Instead of fighting against the natural succession that has already taken place on the property, he has the opportunity to work with nature instead of against it.  Instead of the 7-layer system, he could be expanding the understory to include gooseberries, currants, ramps, fiddlehead ferns, etc.  Instead of a regular vegetative layer, he has a property that would be perfect for mushroom production.  He has a stunning overstay for raising chickens, ducks, turkey, or goats in the dappled shade of the forest.  The maple trees are mature enough to be tapped for syrup, and the acorns are attracting the neighborhood deer and wildlife for hunting.  This may not be a 7-layer food forest, but it really is a horse of a different color.  There is a rare and unique system being offered right where his feet are.

Overcoming the temptation to “be” somewhere else is much easier said than done.  Personally, I could spend all day dreaming about the future, white-boarding it out and making new designs.  however, when I do that, my current system goes into chaos because I am not tending the garden the way that I should.  Creating designs and white-boarding is an excellent practice, I outline a few tips on how to do it here, but we have to overcome the planning paralysis and become people of action and intelligent design.

Action, for a permaculturist, has to be not only balanced, but also optimized to express earth care, people care, and fair share.  Our actions in the garden should pass the following questions:

1 – Am I doing what is right for this plant by creating an environment for it to thrive?

2 – Am I doing what is right for the companion planting guild that surrounds this plant?

3 – Am I doing what is best for the system as a whole?

Notice these questions do not involve topics primarily focused on the gardener.  I am only one element in the system, and that system is quite simply bigger than I am.  The questions are not asking, “Are avocados my favorite fruit?”  This question has merit, sure, I want to grow something I enjoy.  However, the reality is that I live in Missouri, so growing an avocado is not what’s best for the tree or the system as a whole…no matter how much I enjoy guacamole.  In Missouri though, I can grow annual tomatoes, peppers, and other ingredients for salsa.  I can grow perennial stone fruits for apple pie, berries for preserves, and grains for bread.  Instead of focusing on avocados, it is best for me to appreciate the ground my feet are standing on right now.  It’s best for me to intelligently design the system I am in and ask the healthy questions of how to optmimize it for abundance.  Maybe in the future I will be in a system for avocados to thrive, but it is not today.

Because permaculturists are are often futuristic in thinking, it is easy to get excited in the moment and miss the opportunity where we are.  There are three dangers that a young permaculturist or gardener should be careful of in order to create a healthy system.  These are carefully outlined in part two of the Destination Addiction series, which you can read here.

Now, stop reading and get outside and into the garden!

Overcoming Planning Paralysis | by Kris Edler

overcoming planning paralysis 2

As a type-A, leadership driven, slightly OCD personality, I know what it is like to get stuck in the planning phase of the building process.  This brain freeze in the midst of a project is often referred to as planning paralysis.  Overcoming planning paralysis is something that every good permaculturist struggles with at some point in time. From the very beginning of my permaculture journey, PDC leader, Geoff Lawton taught me that, “for every hour of work on a new project, you should have 10 hours of planning and observation.”  At first, I thought, “NO WAY!”  After all, I am a doer, a mover, and a shaker… not a philosopher.  However, after realizing just how easy it is to walk around a property and get lost in your thoughts, or how fast time flies when you go out to the chicken coop “for a minute”…I quickly found the wisdom in his words.

Chicken tractor system on contour
Chicken system on contour

One of my favorite ways of thinking through a new process or idea is by using a white board.  I have one in my office, another two 8′ wide ones in the meeting room, and a portable one in my shed.  Wait… I also have one portable one in my car and another one at home in the front closet incase an idea hits me in the evening.  Sure, I use a whiteboard app on my iPhone, but honestly I prefer the size and functionality of using the markers.

How Do We Overcome Planning Paralysis?

In the past, when finishing an idea, I would let the board sit and sometimes erase it without following through on any of the components.  The nagging fear in the back of my head has always been, “What if I forget something and mess it up?  Maybe it’s better to wait until I have the perfect plan before starting anything.” Regardless of how much planning I do though – I will forget something and will find things I want to improve upon.  Period.  No plan is ever going to be perfect and no prototype is going to be the end-all-be-all.  So, how do we then get out of the project planning phase and start overcoming planning paralysis?

Using white boards to overcome project paralysis

Step 1 – Think with Strategy

Embrace the inner planning addict and let yourself have whiteboard time.  Think, dream, and go big!  Look for problematic areas and potential hang-ups.  Examine the possible fruitfulness of the project and who you might include on your project dream team.  Draw pictures, diagrams, make lists, and color code with 11 different colors of markers.  GO FOR IT!  Tweak one part of your process though, and add a column in your brainstorming for “Steps to Get Started”.  The addition of this simple column in your planning will help you formulate the initial strategies for moving forward. Sure, the idea might fail, but at least you will know how to get moving.

Step 2 – Bring Someone Along with You

Even if you never want to pursue the idea, take someone else along with you for the ride – a student, intern, family member, friend, or co-worker.  It is always good to have an extra eye on a project, but it is even more beneficial to have someone who can see things differently than you.  Don’t bring someone with you who will agree with everything you say.  Remember, you want to examine a full-spectrum.  At the end of the brainstorming session, maybe you decide the project is not for you, but it’s possible that the person thinking along with you will want to take it on (or know someone who could).  Fruitful conversations deserve their seeds to be planted.

Step 3 – Take a Picture of Your Brainstorming

Do not erase the board and walk away!  Take a picture of your work to capture it “as is”.  This visual can often be helpful to look back on, especially if there are images or diagrams.  Plus, it is fun to look back on concept drawings from previous projects after a few years.  Trust me, you can learn a lot from your own drawings and note-taking.

Step 4 – Type it Out

The last two steps are the most important in overcoming planning paralysis.  After you have taken the picture of your brainstorming time, type it out.  This simple step makes it searchable on your computer, easy to send to others, and helps make the process more streamlined.  Often times when white boarding, we think conceptually.  Something happens when we start typing and our brain begins to make things more linear.  A natural process begins to develop and clear steps begin to form.  The fact is, the pictures and images of the white boards often get lost in our photo albums of 400,000 other pictures of kids, trees, and mushrooms.  However, making a digital file folder to organize your dreaming can give you the ability to go back and search them later.

overcoming planning paralysis 2Step 5 – Take Actionable Step Toward the Goal

The last step is the most important in the process of overcoming planning paralysis.  Take a practical and actionable step.  It doesn’t have to be huge or involve a bunch of money.  Your step might simply be to share the idea with another person.  Projects that involve people get traction.  Remember, every good idea is like a seed that deserves a chance to be planted.  Who knows what fruit might come of your actions, but if you never try – you will never find out.

Let’s start planning and see what happens!  For more information on Healthy Building, click here. 

What to do with Wood Ashes from the Campfire | Kris Edler

wood ashes in the garden

What to do with Wood Ashes from the Campfire

I recently spent the weekend burning brush from a tree that fell on our permaculture test site at The Daniel Academy.  At the end of the weekend, I realized I had a small problem involving the amount of wood ashes remaining after the fire had long cooled.  In permaculture, one of the keys I learned from my PDC leader, Geoff Lawton, is that “the problem is often the solution.”  So, I asked myself what to do with the wood ashes from the campfire that remained?  How could I give those nutrients back to my environment in a useful way?

img_7678
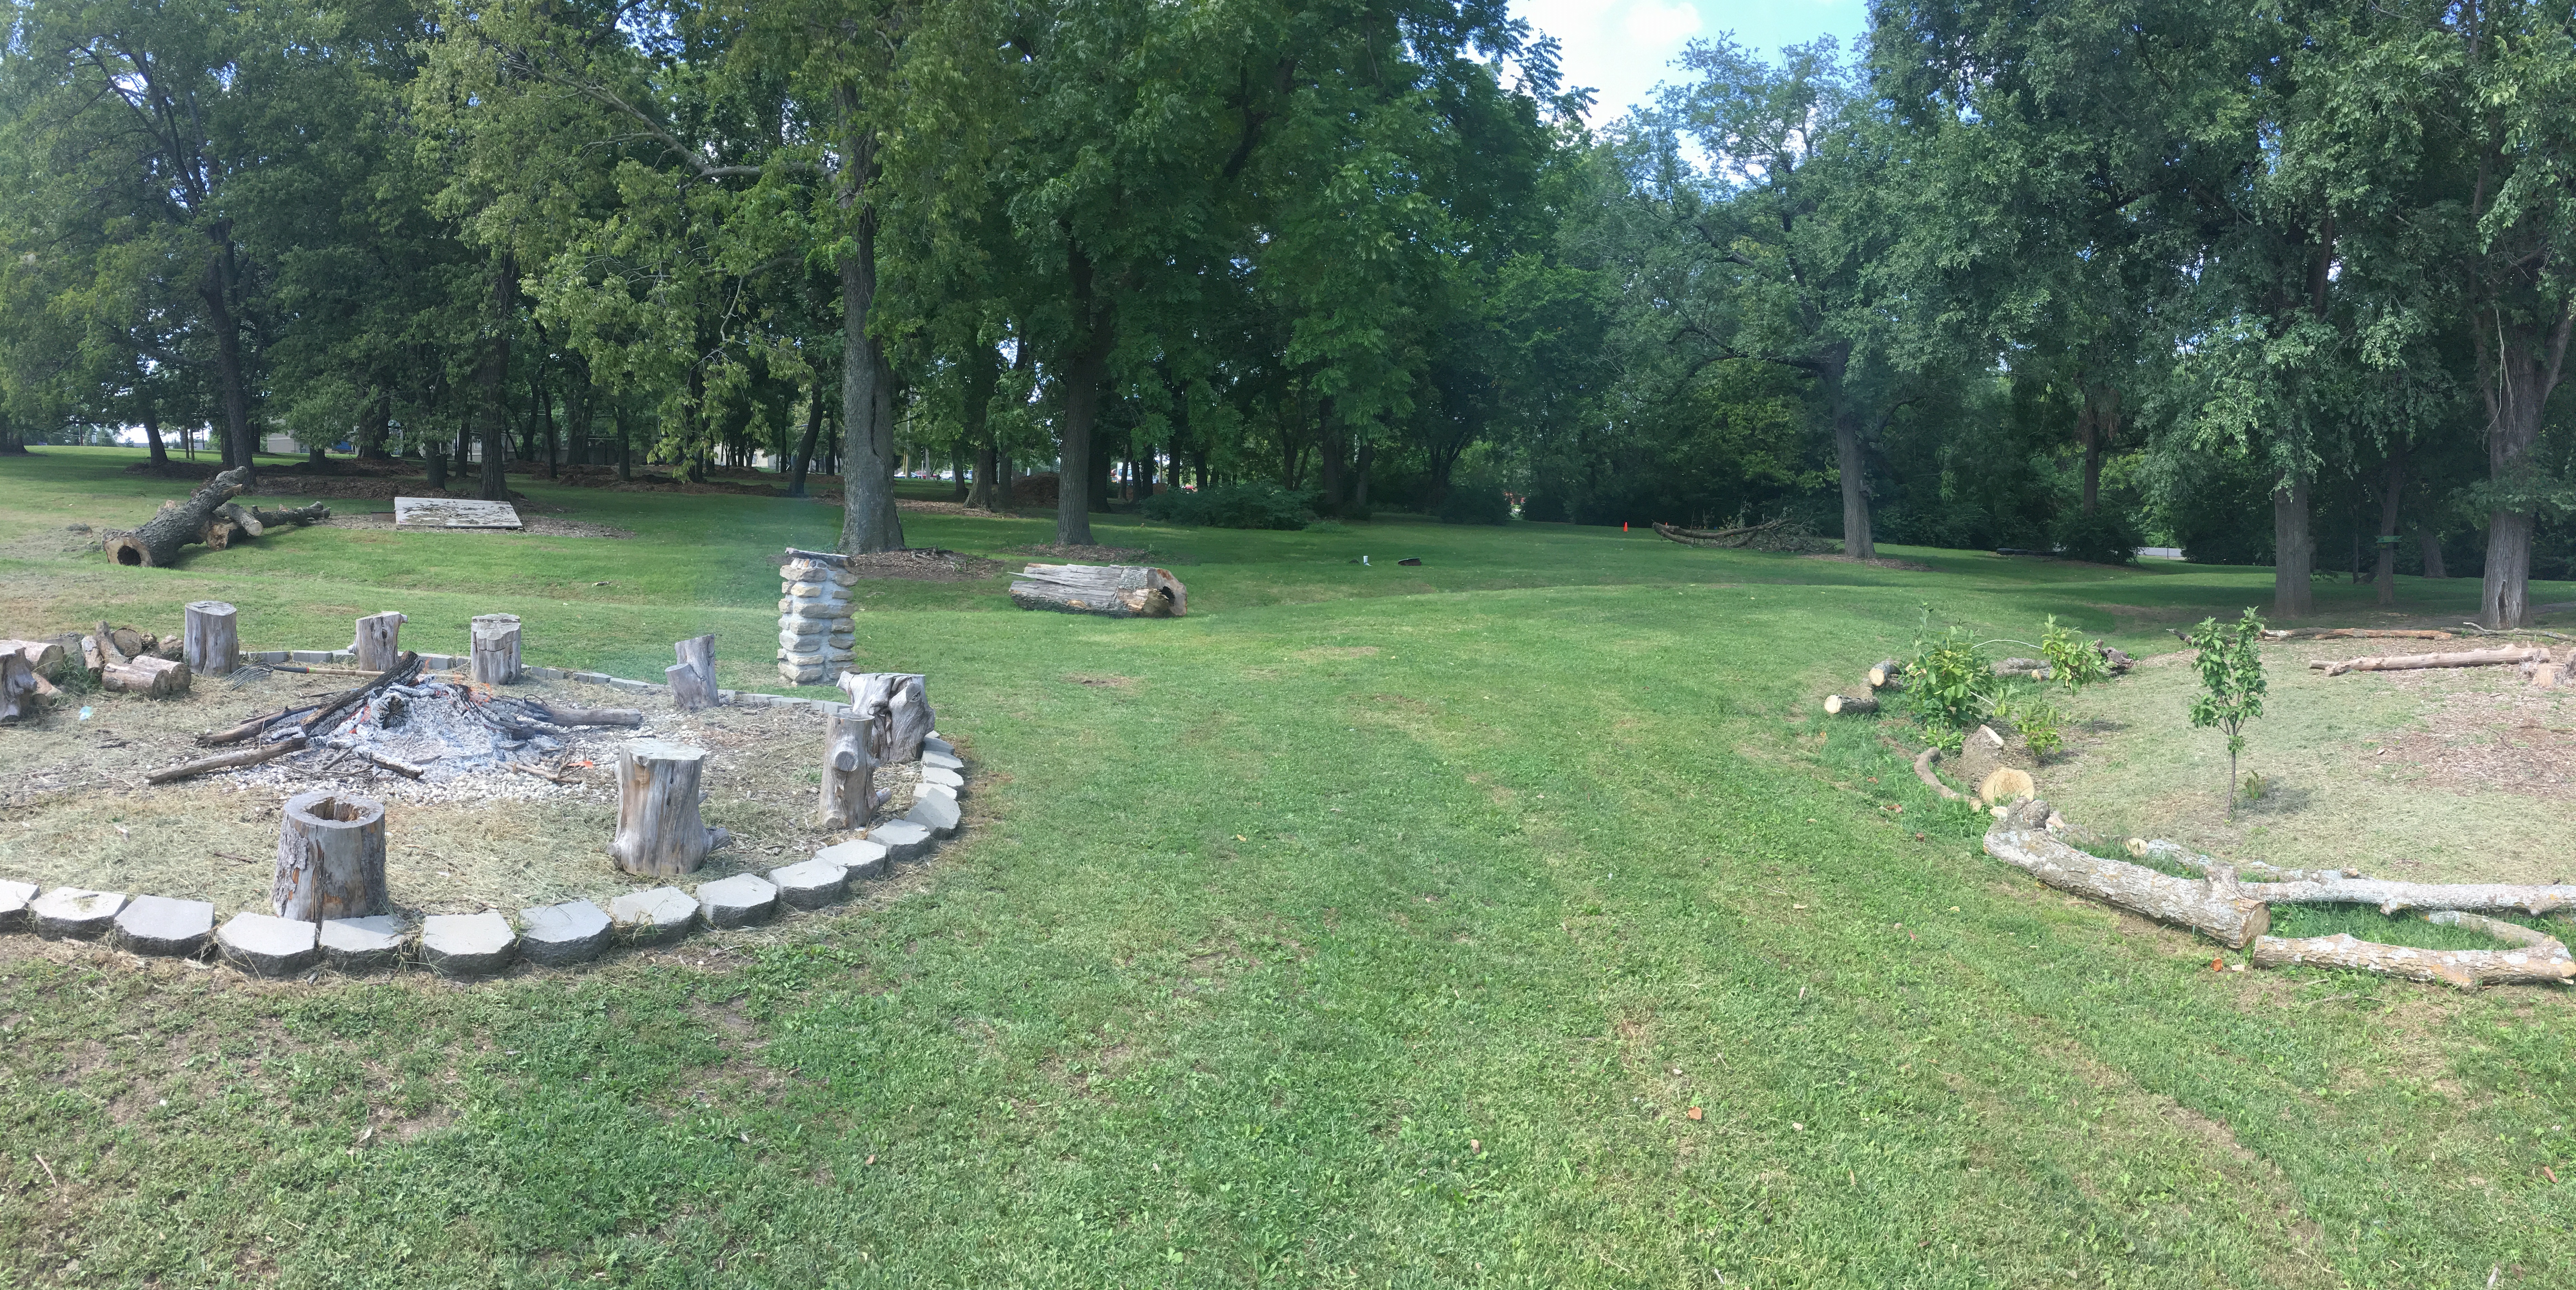
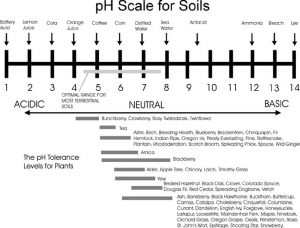
When looking around a permaculture property, there are many uses for wood ash which can be a great source of nutrients for your soil.   However, it’s important to know that with wood ash, your kindergarten teacher was right in saying, “A little dab will do ya.”  Use only a small amount and increase after a few weeks to make sure your soil pH says in the safe zone.  The reason for this is that ashes are extremely alkaline on the pH scale.

Wood Ash is Highly Alkaline

pH for vegetables
best pH for vegetable garden

Because wood ash is a high pH (often 9-13), we have to carefully consider what to do with ashes in our garden.  Optimal soils for most vegetable gardens have a pH of 6.0-7.2, so adding something like wood ashes can have a drastic effect on pH and do so very quickly.  However, using it appropriately can really help nature walk out it’s course of keeping your soil in balance.

Wood ashes are naturally occurring in nature and are a great way for nature to “reset” an environment.  In the Great Plains, the Kiowa Nations would often do controlled burns in order to reset and manage the land.  Next comes California, as devastating as wild fires can be to homes, it’s actually natures way of resetting the damaged landscape and ridding it of invasive annuals that we have brought to the area.  In upstate Washington, the fires clear out understory and add nutrients back to the soil to feed the remaining old growth forests.  This being said, though fire can be a source of destruction, it’s also a source of life in certain circumstances.

Nutrients in Wood Ash

Potassium and potash are two of the prime nutrients are available from wood ash.  The burning process makes them readily available for absorption by your plants.  In fact, potash is so soluble that if it gets wet between the burning process and the time you spread it on your plants, much of the nutrient value will have leeched into the nearby soil.

You can learn more about how to improve your garden soil here:  Ways to Improve Garden Soil

How to Use Ashes in the Garden

There are countless ways to use wood ashes in your garden and around your property, but understanding the soil make-up of your area is the first step before application.  You can easily find out the average pH by purchasing a test kit from a  local garden center.  You can buy kits to test it instantly (lower accuracy) or purchase a kit online that will test it overnight to get a better reading.  Either way, once you know your starting point, you can adjust your pH using organic compounds, like wood ash, to get into the optimal range.  Remember, start by adding only a small amount and give the soil a few weeks to adjust before adding more.  It’s also important to note that various parts of the property could have very different pH readings.

So, now let’s get to it:  How to use wood ashes from the campfire…

1.  Use it in the compost pile

This is especially useful if you are composting a lot of fruit waste, because fruit (being acidic) can really lower the pH of your pile, making it a wet / slimy mess.  You can bring it back into balance by sprinkling a shovel full of ashes over the top.  Always make sure your ashes are completely cool before using.

pH for trees and bushes

2.  Sprinkle them around berry bushes and fruit trees which prefer alkaline soil or extra potassium.

I generally use them first around apple trees, currants, gooseberries, strawberries, raspberries, blackberries, etc.  They will enjoy the extra sprinkle a few times a year, especially in the early spring or late fall.

3.  Sprinkle on plants to deter pests

This application will only require a small amount of ashes to create a fine dusting.  If you do not have ducks to control snails and slugs, then wood ashes can be a great deterrent.  Carrots and turnips can also be susceptible to the flies and larvae, which can be deterred by the ashes as well.

4.  Light use in the vegetable garden

Often root crops like carrots, turnips, and beets will appreciate a sprinkle of ashes in the springtime worked into the soil.  Just a light dusting is more than enough.  I often use my wood ashes a few weeks before planting and then let it rain a few times before planting seeds.  Other plants that love the extra potash are beans, peas, and legumes.  Just remember, when using ashes in the garden, always test your soil first, so you stay in the optimal zone (6.0-7.2 pH) for growing veggies.

5.  Use them your lawn instead of lime

Wood ashes are a great substitute for adding lime to your lawn.  The easiest way to spread the ashes is to do so just before a good rain, so it soaks into the ground quickly.  This helps with the solubility and also prevents the dust from being tracked indoors or getting on your shoes.  I often use my grass seed spreader and put it on the lowest setting and broadcast the ashes that way.  Doing it by hand or with a shovel can often create piles in the grass which will over alkalize an area.

Now that you have a good use for those ashes, go outside, make a campfire and have a s’more (or three) and let us know how you have used the ashes when you are finished.  Again, make sure they are cool before spreading.  Remember, the problem is often the solution.  Happy gardening.


5 Ways to Create a Kid-Friendly Garden | Kris Edler

5 Ways to Create a Kid-Friendly Garden

In a culture of video games, Pokemon Go, and fast foods – we desperately need to get kids and teenagers back outside.  Getting your children in the garden is easy, as long as you recognize they are not going to “enjoy” merely pulling the weeds or dead-heading flowers.  However, there are some really creative ways to create kid-friendly garden that will encourage activity, creativity, and connections with nature.

As a teacher at The Daniel Academy, a Pre-K through 12th grade private school in south Kansas City, I work with students and families on a daily basis.  Getting these kids outside to explore and imagine is truly one of my passions.

Before I share any of the tools and tips, it’s important to stress here that the overarching idea is that YOU GO OUTSIDE WITH THEM.  No toy, decoration, or tool is a replacement for spending actual time with you kids.  There is not a replacement for laughing with them, getting dirt under your nails together, and talking with them.  Regardless of age, quality time is the goal and the garden is just a place to make that happen.

That being said…Here are a few tips that are easy to integrate in your urban or suburban backyard.

1 – Literature directional signs from their favorite books

It isn’t hard to get kids to enjoy reading, as long as you make it fun.  Making these directional signs are a great way to keep the family busy on rainy days or weekends.  We painted these with our students this summer using acrylic paint and then added a clear polyurethane varnish to seal them.  You can hang them on posts, trees, or on the side of your shed.  Now, of course, you can always do signs from movies or TV shows, but I think we can agree that encouraging reading is a better practice.  Check out mine here (IMG_7679IMG_7680…)

hobbit garden
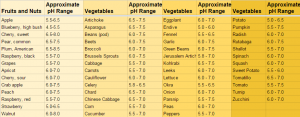
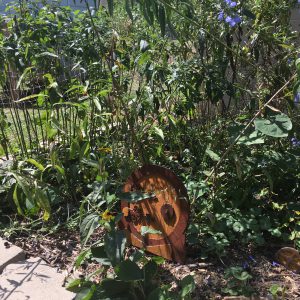
2 – Hobbit / fairy furniture to spark imagination
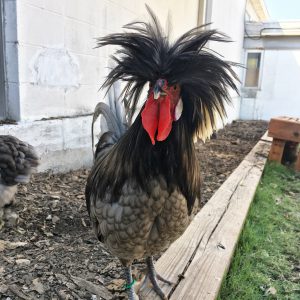
The boys generally aren’t going to be real impressed with a fairy garden, but give them a place to rock their action figures and they are all set.  Use sticks to create fences or have the kids help you make your own furniture from popsicle sticks or wire.  I have a few of these around the school and one in my backyard, which the neighborhood kids helped me design.


backyard chickens kansas city3 – Involve animals

Whether you create a place for your dogs or get a few backyard chickens, there is always room for animals.  Kids love working with animals, especially when it’s outside.  In our gardening class at the school, my students will argue about which group gets to feed and play with the chickens.  They would rather be in the group with the birds than eating and picking berries or tomatoes;  when kids turn down food – you know it’s a big deal.  We have purposely selected a lot of heritage chicken breeds that have “cool hair” or have personalities that are more social.  The rock star rooster in the picture is Cogswell, he’s a favorite of our students and loves all the attention he can get.  The kindergarten classes even wave to him on their way past multiple times a day!

bird watching in Kansas city
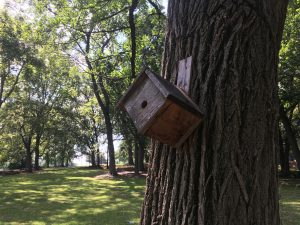
4 – Birdhouses, feeders, and watering stations

Attracting wildlife to your property or backyard engages the kiddos whether they are inside or out.  In the middle of winter, it gives that extra bit of interest looking out the window.  I still remember being a kid at my parents house in Millington, Michigan and watching the birds out the window.  My mom always did well at keeping the bird feeders full, so there was never a dull moment out the front living room window.  It was a collection of simple acts (mostly from my parents), like filling the bird feeders, that helped cultivate a love of nature that has lasted into my adult years.

outdoor fitness kansas city
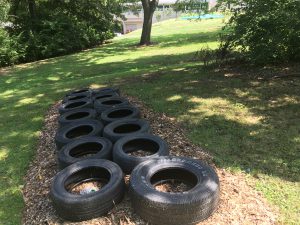
5 – Interactive fitness areas

Now it gets fun!  Start thinking beyond a basketball hoop or volleyball net, though those are a great start.  This summer at our school, we added pull-up bars for the gymnasts and a cool tire-run section using old tires from the side of the road.  You can hit two birds with one stone and not only help get kids moving, but also give them a lesson in repurposing and recycling as well.  With Pinterest out there, we have no excuse for up-cycling with our kids and finding creative ways to get them moving.

If you have enjoyed one of these tips, please share this with some friends on your favorite social media network.  Enjoy your afternoon – and GO OUTSIDE and take a few kids with you.

Three Ways to Improve Garden Soil | Matthew Capps

Wood chips for Garden Beds

Three Ways to Improve Garden Soil

One of the main ideals of Permaculture is to catch and store energy in whichever form it takes. Most people spend heaps of cash importing what they need and disposing of their waste, when if they only examined their system a little, they would discover that what they pay the trash collector to take away is actually a valuable resource if harnessed and stored correctly. This is problem of biological waste is often an opportunity to improve garden soil.  The ideal system is one in which no “waste” is produced; every byproduct of every element is captured and channeled to some other purpose.  In essence, we capture the waste (aka. sink) of one system in order to feed another.  Of course, this is physically impossible per Newton’s laws of thermodynamics, but for the practical purposes of everyday life, we can actually come quite close. So, let’s just get real – how do you find cheep and easy ways to improve your garden soil?


1 – Kitchen Compost

This is probably the best understood method for recycling resources, but surprisingly few people actually do it. If we are honest, the few that do compost, never actually get to use what they create because it’s in a forgotten corner of the yard.  Whether from fear of the smells and sights of rotting vegetables or merely the inconvenience of gathering scraps and toting them to the compost pile, most people miss out on this simple and productive system. It does take a bit more work, but for a serious gardener it is more than worth it as piles of fertile earth become available.

You can compost vegetable and fruit scraps, eggshells and coffee grounds (in moderation), however meats, dairy and fats should be avoided as they will stink and attract pests.  Unless, of course, you are using the Berkley Method of Composting, but that’s another article.

Where heat and moisture are concerned, the microorganisms that make compost have a goldilocks zone: warm and moist. Accordingly, if you live in a cold climate it is best to have the compost in the sun where the microorganisms can benefit from the heat, but if you live in a hot climate, you may want to put your compost in partial shade as too much heat will hamper the process or cause it to go anaerobic.  If you live in a dry climate, you will also need to watch the moisture; a dry compost will not only kill microorganisms, but if overheated may actually catch on fire.

Compost should be turned regularly to provide oxygen for the microorganisms. This provides the perfect chance to check for moisture and heat. Also, compost should maintain about a 1:2 ratio of brown (leaves, twigs, dried stalks) to green (veggies, fruit, chicken manure), the term ‘brown’ referring to those materials higher in carbon and ‘green’ those higher in nitrogen. A healthy compost needs both. If properly maintained, this ratio should be enough to neutralize any odors coming of your compost. For a chart of compost items on the carbon/nitrogen continuum you can go to homecompostingmadeeasy.com.

A “cheater” alternative, if you just can’t bring yourself to hassle with composting, is to take your kitchen scraps to a corner of the garden and just bury them a foot deep with your shovel. Boom.

Wood chips for Garden Beds

2 – Fallen Wood

One source of biomass and organic matter that is almost completely forgotten is fallen wood. After a windstorm when the trees shed their weak and dying limbs, people regularly bundle them up and set them on the street corner to be carried away. A treasure trove of sticks and logs can be easily harvested by a pickup truck or even a regular vehicle if you don’t mind vacuuming afterwards. When compiled, this wood can be used for hugelkultur swales, mushroom growing, or wood chips if you’re willing to rent a chipper.  It can also be burned for wood ash, which is really useful for the home orchards.  Apply wood ash around your apple trees and blueberry bushes.  You can also use the finer wood ash in your chicken dust baths, instead of diatomaceous earth.  DT is a highly controversial substance with livestock, because research is showing that the powder can get into the lungs of the animals (birds) causing respiratory problems.  If none of these options are viable, you can store the wood to burn in the winter, heating your house and providing nutrient rich ash for your compost.  You can even use the wood ashes, once they are cooled down to help alkalize the soil and add potassium (potash) to the soil.


3 – Weeds, Leaves and Grass Clippings

Last of all are weeds, leaves and grass clippings. These are the waste products that homeowners spend hours pulling, raking, bagging, and shipping off to a dump where they will do no good. Weeds and grass can be used as feed for chickens or goats; once dried they also make good scratch’n thatch to neutralize the odor of chicken manure and keep disease at bay.  However, in the chicken coop, dandelion greens, plantains, and clover don’t last long at all!  My girls devour it!

Leaves too can be used as mulch or mown over and put in the compost. Fortunately for the permaculturist, leaves are like fallen wood in that no one seems to want them. Bags and bags can be found by every driveway during the fall. By collecting them you can capture the biomass that it would have taken your trees 10 years to generate. My permaculture teacher, Kris Edler, shared in our PDC about how he will collect dozens of bags from his neighbors trees to add to his gardens and compost piles in the winter.  By spring time, most of it has decomposed and is forming a rich layer of organic matter on the top of the garden beds.  It is important to run it over with a lawn mower if applying to flower beds, to help the decomposition process.

Grass Clippings on Garden Beds

A note on grass clippings:  It is dangerous, however, to take bagged grass clippings from people you do not know, as these are often covered in chemicals from their former owner.  They could have pesticides, herbicides, or other toxins that you may not welcome in your organic garden.

To use toxin-free grass clippings, you can add them around the open soil of flower pots to add instant nitrogen and help prevent water evaporation.  These clippings go great at the base of tomato plants or the garden veggies, though I would not put them around the base of squash, because their stem does better when slightly dry.  You can also dump a load into your chicken coop and allow the birds to forage through for weeds, bugs, and seed heads.  There are so many things to do with great clippings around the yard, so don’t bag them up and send them away – save them for yourself to improve garden soil.

Catching and reusing energy is essential to a sustainable future, but with so much going to waste in our own neighborhoods, it only takes one good neighbor to make a difference for many. Building your permaculture property and organic garden can make a huge difference in the community, when it’s done well and with careful planning.  Geoff Lawton says, “We should have 10 hours planning before the first hour of labor.”

We can talk and study about permaculture all day, but until we take these small, practical steps, nothing really matters.  By taking a few steps we improve our neighborhoods, one yard at a time.  Each of these three simple methods are great ways to use biomass to improve garden soil.

If you enjoyed this article, comment below with your own tips and tag a friend on social media.  Thanks for the SHARE!

5 Food Sources for the Resourceful Backyard Chicken Keeper | Matthew Capps

Mealworms for chickens

5 Food Sources for the Resourceful Backyard Chicken Keeper

Going to the mill and buying chicken feed is easy, but it has its drawbacks. With a limited spectrum of nutrients, mill feed can cost more than it’s worth, especially if there are healthier and more readily available alternatives. Eliminating bagged feed entirely may not be possible, or even desirable, but if we activate the resources at hand, we can greatly enhance the lives and quality of our birds. Here is a list of five food sources for the resourceful backyard chicken keeper to lower costs and bring balance to the diet of your flock.

1 – The Compost Pile

An active compost pile provides not only diverse food scraps, but also the insects that come to feed on them. On top of that, compost is still produced, simply taking a short detour through the chickens’ guts before being deposited back into the pile and surrounding land.


2 – Fermented and Soaking Your Chicken Feed

The bacteria in fermented feed are good for the chickens, and will make nutrients more bioavailable, increasing nourishment and lowering food intake. Whole seed chicken feeds can be easily fermented by soaking in water, adding a glug of apple cider vinegar, and leaving it until the concoction is slightly bubbly and smells fermented– the amount of time will vary by season and climate. Generally in Kansas City, if left in a potting shed overnight, it’s already bubbling the next morning. If the feed is left too long it will go bad, or create it’s own ACV scoby. If the food doesn’t smell fresh to you, it’s probably not fresh for the birds. If you see ANY sign of mold, discard it immediately. Remember though, fermentation will only work with whole seed feeds. You can get the recipe for our specialized whole seed feed blend by reading the linked article.


Mealworms for chickens
Mealworms for Chickens

3 – Mealworms

Mealworms are an excellent source of protein for chickens and can be grown easily in a basement, closet, or garage. Their living conditions are very dry, as are their feces (called frass). All they need is an occasional fruit or vegetable scrap and a plastic tub to breed in.


4 – The Nightly Free Range

If chickens are released from their run about 30 minutes before dusk, they will almost always instinctively return to the coop before dark. Obviously, these are animals and there is no guarantee, so I’d watch them the first few times. In the meantime they will be able to find and eat whatever their current forage is lacking.

That said, before you try this idea, know your area and know your birds. Free ranging is a great resource, but if you have squeamish neighbours, live by a busy road, or frequently see predators, it could easily mean the demise of your girls. Watch carefully!


backyard chickens in Kansas City
Alternative Chicken Feed Options in Kansas City

5 – Rotational Foraging Systems

A rotational foraging system will keep chickens healthy and active with fresh ground and change of scenery. By the time they expend forageable plants and insects in one zone, they are moved to the next. As each zone rests, insects and vegetation return, capitalizing on the open ground and nutrient rich manure the chickens leave behind. If the zones are rested long enough (about a month depending on the climate and season) they will be teaming with life next time the chickens come around.

Taking care of chickens requires effort and care, and the value of our flocks will match the value of management we put into them. If we are willing to invest and think creatively, we will be rewarded by high quality, high production, and happy birds.


5 Keys to Healthy Building | Kris Edler

food forest wood chip pile

One of the biggest pitfalls for educators, permaculturists, and business folks alike is the subject of overcommitting themselves.  Like Bilbo Baggins, we often tend to spread ourselves too thin, like butter over too much bread.  When we are building (both projects, land, and people), this tendency of overcommitting often results in half-finished projects, burned out brains, and enough stress to go around.  Not even a dirt ninja can overcommit on projects for an extended period of time.  It always results in burnout.  Always.  In addition, the lack of finished and excellent projects often result in a system that is not sustainable, producing at maximum capacity, or supplying for the people maintaining it.  This is where the 5 keys to healthy building take us from burn out to abundant living.

Before we begin, let’s be honest.  These five keys to healthy building are ones that I have learned, am learning, and will continue to learn.  Every good leader is a going to face the temptation to become unbalanced in these areas, but by revisiting them with frequency, we really can keep our commitments in check.  I am the king of overcommitting, so I am essentially an expert on this subject due to repeated and frequent trial and error.

Half Started Projects

food forest wood chip pile
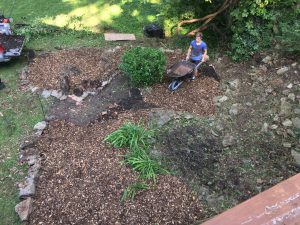
For the urban gardener or dirt ninja, we tend to start new vegetable gardens, fruit tree guilds, and hugelkultur swales, but all too many times, get sidetracked from focusing on one project only to start another one.  On most permaculture worksites, you can walk around a see 10-15 (or more) projects that are started, but yet to be successfully completed.  On these worksites, one dynamic which often follows is the systems are not maintained, managed, or allowed to yield at their fullest potential.  Not to mention the unpleasant side-effect, which includes ugly properties with piles of “stuff”.  When managed well, a permaculture system should both create successful yield, and provide beauty for the eye.

Whether you are examining the habit of overcommitting from a business management, leadership, or permaculture perspective, the keys to overcoming this trap are the same.  The five keys to healthy building allow the leaders to both grow themselves, their business, and the people around them.  This system of personal and professional development involves healthy levels of input (e.g. learning) resulting in vigorous levels of output (e.g. the project, growth, or fruit produced).

One Thing – Just One

The key number to remember is ONE.  One commitment for every one area.  No more, no less.  This simple rule helps keep leaders healthy in their minds, bodies, and spirits.  By remaining focused on one area at at time, using these five outlets, we keep the diversity needed to prevent boredom, while retaining the focus needed for success.  Keep the first things first and remember – one.  Just one.

5 Keys to Healthy Building

In each of the following five areas, the leader should choose a single project or focus at a time, in order to maintain a peaceful and productive balance.  Obviously not all leaders are created equal.  Some focus better with multiple plates spinning at once, while others can only focus on one thing at a time.  The beauty of using these five keys is that they allow for multiple expressions, while still helping balance various types of commitment.   The following are the 5 keys to healthy building:gallery_15.jpg

  1. Learning:  This input helps maintain personal growth and development.  The learning input includes reading, listening to podcasts, taking classes, or other tasks that aid in personal growth.  As productive and flourishing human beings, we should continually give ourselves to personal growth.  Walt Disney said, “We keep moving forward, opening new doors, and doing new things because we are curious, and curiosity keeps leading us down new paths.”  At the same time, too much of this key commitment (learning) can result in become knowledge fat with little productivity.  Some of the greatest thinkers will never be known, because they spent too much time thinking and not enough creating.
  2. Giving:  This is the output / outcome that helps keep a balanced leadership lifestyle.  This key of building focuses on sowing back into others through volunteerism, tithe, serving the poor, etc.  Within every human being is the innate need to give back and make an impact on the community around them.  In permaculture, the foundational value is on “people care”, which gives back to the community at large.  Overextending our ability to give, however, can result in an unbalanced income or profit, which goes against the third principle of permaculture – fair share.
  3. Brainstorming:  This type of key commitment is the vision-forming stage of the building process.  By committing to one brainstorming project at a time, we keep our eyes forward on the future.  Looking ahead gives a builder hope that new things are on the horizon and inspiration in the creative process.  In regards to permaculture, Geoff  Lawton says, “Spend 10 hours of observing and thinking for every one hour of action.” However, at the same time, too much dreaming and brainstorming often results in little action.  Great ideas with lack of follow-through are not productive elements in a system and result in brain clutter.
  4. Building:  The building commitments are often the ones that need most of your time and attention, because these are ones that leaders are actively creating.   They are new systems that have just come out of the planning phase.  Even with the best planning, leaders who over commit to building get burned out, emotionally drained, and physically exhausted.  The danger is building more than one project at once is that most of the time, we do not realize we are overcommitted until it’s too late.  There is, however, productive abundance when we build from a peaceful and focused place.  This is the opportune phase to be hands on, active, and committed.  Stay focused here and do not try to build more than one area at a time, otherwise your permaculture property will have handfuls of half-started projects that never reach their potential.  Just because you are should do the project one day does not mean you should do it today.  Just because it is a good idea, does not mean it’s a great idea.  Just because someone should do it, doesn’t mean it should be use.  Instead of taking it all on yourself, use this time to train others for the final key of healthy building.
  5. Maintaining:  In this final key commitment type, we make the decision of what others are capable of in order to create the best system for maintenance.  We now examine whether the end justifies the means; we decide if the system is producing enough to keep active.  If a system is not sustainable, it will eventually become unbalanced and fall into chaos.  Fred Elliott, a business man and church leader from Clermont, FL, once said, “You need to determine first if the project is a priority that needs to be done right now or if you should wait.  Secondly, determine if it’s something you should train others to manage, or thirdly, decide if it’s something you need to maintain yourself.”  Once you figure out maintenance, you are freed up to build the next project and begin the building process anew.

permaculture kansas cityWhen we actively engage in a permaculture creative process, these 5 keys to healthy building help us live from a peaceful, balanced, and productive place.  In order to experience the power of a focused life, it’s important to revisit these five keys and ask ourselves a few questions.  First, “What am I committed to in each of these areas right now?”  The second question is “How do I limited myself to ONE commitment per area?” Finally, “Am I overcommitted and lying to myself about what I can responsibly accomplish?”

By following these healthy habits, we are able to be managers of productive and abundant systems, businesses, and families.

Action Item

permaculture projects in kansas city Make a list of these five areas and what you are currently doing in each.  Narrow it down to five projects total (one for each area) and practice it for 2-weeks with intentional focus.  Do not waver and do not take on any other commitments.  Revisit after two weeks and examine the fruit of your labor and how you feel as a person.

Leave your thoughts in the comment area below and tell us what you think.


Permaculture Test Site and Case Study | The Daniel Academy

permaculture test site

The Daniel Academy (TDA), a pre-kindergarten through 12th grade private school in South Kansas City, is an active permaculture test site and case study.  This site began using permaculture design methods to transition their existing commercial landscape around 2010, and has been on a fast-track course to pioneering the use of permaculture in midwest education.

Permaculture at The Daniel Academy

ji garden 2As a permaculture test site, TDA has been hosting yearly gardening courses for 7-12th grade students, and in 2016 hosted its first Permaculture Design Certification Course (PDC).  As a test site, there are several models of permaculture related designs taking place on one property.  Each of these has a direct connection to the students, classrooms, and families that the school serves.

The downloadable document below gives an example of a permaculture design project focused on the educational sphere.  This design was developed by Kris Edler in 2014 and presented to the school for adaptation and implementation.  It gives a historical summary of the 18.5 acre property, a current site analysis, and a few project ideas to launch them into 3, 5, and 20 year planning.  The project proposal includes everything from the use of late spring foliar spray methods to long-term building proposals and capital investments.

Download the FREE PDC Proposal Below

This permaculture test site and case study is a great way to find out what works in Kansas City with our extreme weather fluctuations, as well as provide inspiration for other local projects.  For those interested in implementing permaculture into education, it serves as an excellent case study to use for adaptation in your own systems.  Finally, the document below is one possible approach to how to do a permaculture design project for your own PDC.  If you know of other test sites for permaculture in Kansas City, or would like your own site to be featured our website, please email permaculturekc@gmail.com


CLICK HERE TO DOWNLOAD The Daniel Academy Permaculture Design Proposal