In the midst of challenging times, we have a choice of whether to give in to fear or focus on abundance and hope. CLICK HERE FOR INTRO VIDEO. Personally, I will always choose the side of hope. In that choice, I have made the conscious and intentional goal to be more self sufficient and sustained. Planting your own veggie or herb garden is an easy step, and one that you can take regardless of your living conditions.
The following document download contains the notes from a session on “Medicinal Plants and How to Use Them”, which was given at A Natural Farm, in Howey-in-the-Hills, Florida in December 2020.
Feel free to share this link with a friend, who might benefit from this information.
Learn how to make the best compost tea recipe for your organic garden, orchard, and house plants. Using organic permaculture methods, you will help create an abundant environment for your plants and animals to thrive! With this simple recipe, you can make gallons of this living probiotic fertilizer for your plants and will see fast acting results within a matter of days. It’s always recommended to test a small amount of this first, to make sure it doesn’t burn your specific plants. If in doubt, dilute this recipe with water.
What you’ll need to make the best compost tea!
Large drum container (a 10 or 50 gallon works great, but you can also do this in smaller batches in a 5 gallon bucket.
Aerator pump (you can either purchase one online or use a fish tank bubbler with a large soapstone).
Fish Emulsion (preferably organic. I use one from GS Plant Foods or Neptune’s Harvest)
Neam oil (or leaves)
Cured animal poop (Rabbit is best for manure, but worm castings are my fav overall)
Comfrey leaves (4-5 large leaves)
Molasses or cane sugar (1/4 cup for a 5 gallon 2 cups for a 50 gallon drum)
Pond sludge, lake or stream water for local beneficial microorganisms (1 gallon)
A few banana peels (for potassium)
Dried kelp meal (optional, but sometimes sea weed is included in the fish emulsion)
How to make the best compost tea
Put all liquid ingredients into the bottom of the water container using the recommended dosage for your specific product. The reason there are not any quantities above is because it may vary from company to company (product to product), so the rule of thumb is to use LESS of their recommended dilution. For example, I often only use 50-60% potency of any given product.
Put solid ingredients in an old t-shirt (with ends tied shut) to create a make-shift “tea bag”.
Lower the bubbler / aerator into the bottom of the container. This helps create an oxygen rich environment for the microorganisms to multiply in. Do not skip this step, or you will risk an anaerobic liquid, which may harm your plants and soil.
Fill the container with water and let bubble for 24-36 hours.
Apply as a foliar spray or to the soil around your plants. This mixture needs to be applied / used within 4-6 hours, so the microorganisms stay alive and healthy.
You may use to water OR dilute for a foliar spray in a backpack style sprayer.
TIP: Apply this recipe in the evening or before a rain, so the water flushes it deeper into your soil. Avoid any foliar spraying in the heat of the day or during full sun hours.
Learning to make your own fermented chicken feed can help you save money and have healthier birds. By soaking your chicken feed in water, the seeds will expand, releasing locked up nutrients, and will also deliver important probiotics to your flock. In turn, your birds will be healthier, happier, and your wallet just a little fuller.
Basic Chicken Feed Recipe
Ingredients are measured by “parts”
Mix the feed using a unit of measurement that suits your particular situation by changing the size of the unit of measurement. For example, one part (in the recipe below) could mean “a coffee can full”, “a scoop full”, “one cup full”, “one bucket full”, etc. In essence, this recipe will make 12 parts total. So, if your unit for measuring is one cup, you’ll be adding 2 cups of cracked corn, 1 cup of oats, 1/2 cup of kelp, etc…. which will then give you 12 cups of dry feed when the recipe is complete. If you use a 1 gallon scoop for your unit, you will get 12 gallons of mixed dry feed.
Here is the basic chicken feed recipe:
2 cracked corn
1 oats
1/2 kelp meal
1 barley
2 milo
2 wheat
1 alfalfa (pellets)
1.5 split peas
1/2 flax (ground or whole)
NOTE: It’s important to use organic / non-GMO ingredients when possible.
NOTE 2: Use 1/4 part aragonite for layers as a calcium supplement
How to Ferment Chicken Feed
How to Ferment Chicken Feed
How to ferment your feed
Use the chicken feed recipe above OR your own whole grain feed mix. Fermenting feed does not work well with pelletized food, because when soaked it makes a mush that some chickens may avoid. In addition, non-organic foods may also contain added antibiotics or chemicals that may change the fermentation process.
Fill a five gallon bucket 1/2 full of feed.
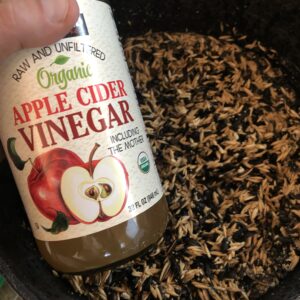
Add 1/3 cup of apple cider vinegar OR 2 tablespoons of BioLivestock (by SCD probiotics) to start the fermentation process.
Add enough water so that the bucket is 2/3 full. Your feed will expand, so be sure to allow room for this. You may need to modify this quantity based on your feed type.
Keep 2” of water on top of the feed at all times. This will help prevent mold from growing on your feed. Whenever you see mold, the ferment will need to be discarded.
Let it sit for 3-4 days to get the ferment going. You’ll smell the ferment (slightly sour) as it becomes ready. You should never see mold growing or smell a rotten smell in the bucket. You may choose to lightly set a lid or board on top of the bucket (do not press sealed) in order to keep critters out.
Feed your chickens the fermented feed (within 5 days) using a pan or tray and make sure to add more water to the ferment so the seeds are covered at all times.
Use a scoop from a previously fermented bucket to start a new bucket of feed, similar to a kombucha scoby. Once the ferment is started, you will not need to add more of the apple cider vinegar or BioLivestock, unless it’s a completely new fermented bucket.
The general rule is that if you feed a scoop of fermented feed, add a new scoop to the bucket, so you don’t have to start from scratch each time. Think of it like a sour dough starter for chickens.
Soaking and fermenting your own feed is a much healthier choice for your flock. It delivers powerful probiotics in a way that is bioavailable to birds, and also expands the food using water so that you use less feed. This nutrient dense way of feeding your flock will not only increase their overall health and well-being, but also give you healthier eggs for you and your family. Enjoy!
Mushroom hunting is something that many foragers and homesteaders want to try, but for some reason are put off by the fear of being poisoned. However, I would suggest that although mushroom identification can be challenging at first, there are a few species that are easy to identify, hard to miss, and have very few (if any) look a-likes. These species are great starting points for those who want to get starting in the mushroom world. Lion’s Mane, Chaga, Chicken of the Woods, Morel, and Oyster mushrooms are among some of these species that are both easy to identify and use. In this article, we’ll give you a step-by-step process of how to find and harvest chaga mushrooms. A later article (after ours have dried) will be created with tea and tincture recipes for chaga and a few bonus tips on how to use chaga in your coffee.
Health Benefits of Chaga – The King of Mushrooms
Nutrient-dense superfood. …
Slowing the aging process. …
Lowering cholesterol. …
Preventing and fighting cancer. …
Lowering blood pressure. …
Supporting the immune system. …
Fighting inflammation. …
Lowering blood sugar.
How to Find Chaga
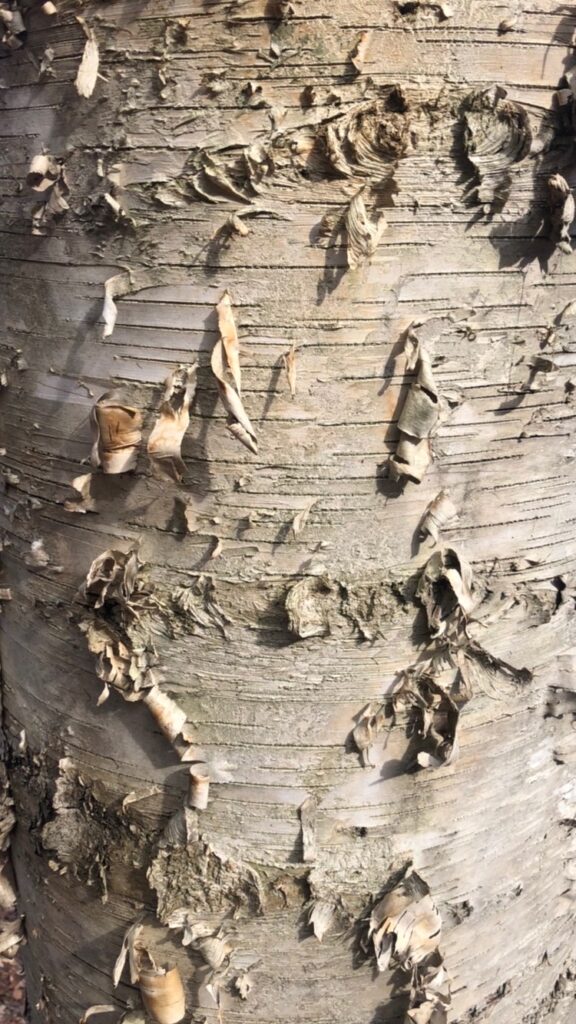
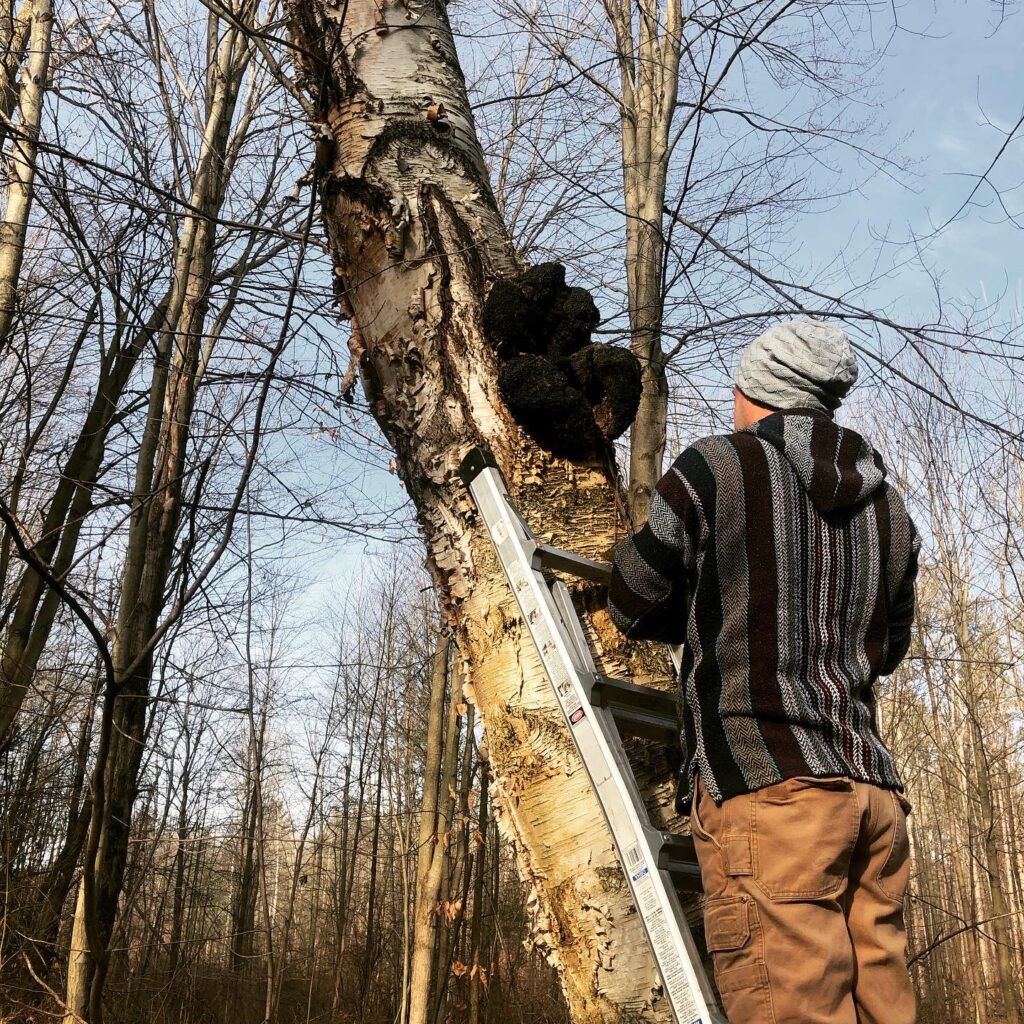
Step One: Find White Birch
Though chaga will grow on a varieties of trees, the most common is the white (or paper) birch tree (Betula papyrifera). In fact, when growing on this type of tree, the chaga mushroom is the only species that has this growth habit, so you don’t have to worry about mistaking it for another species. Often times, these species of trees grow in sandy soil near pine and oak trees. Because of the bright white bark pealing from the tree, they can be easily seen in the distance. The white bark also makes chaga easy to spot on the side of the trunk.
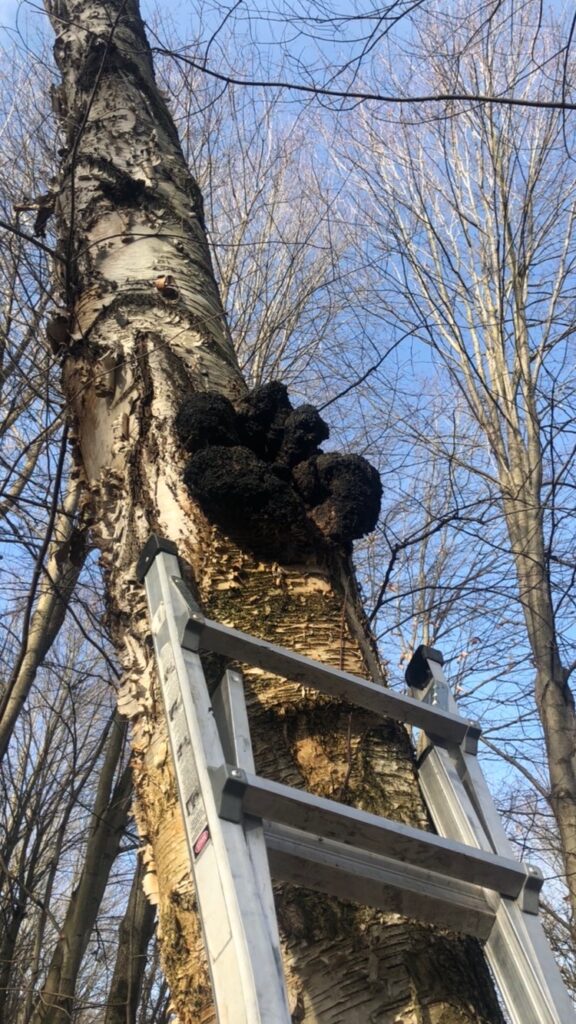
Step 2: Look Up
More often than not, chaga will grow 8-10′ or higher in the tree. When hunting, bring a ladder and leave it in the truck while you are looking. Then either mark the tree with bright ribbon OR by dropping a pin on your GPS. You have found a specimen, you can go back and get the ladder. Generally speaking, the larger and healthier species will be higher up in the tree, so be sure to bring a friend with you to help hold the ladder while harvesting. It’s also helpful to have someone to hand the chunks to as you cut them, so you don’t have to drop them on the ground.
How to Identify Chaga
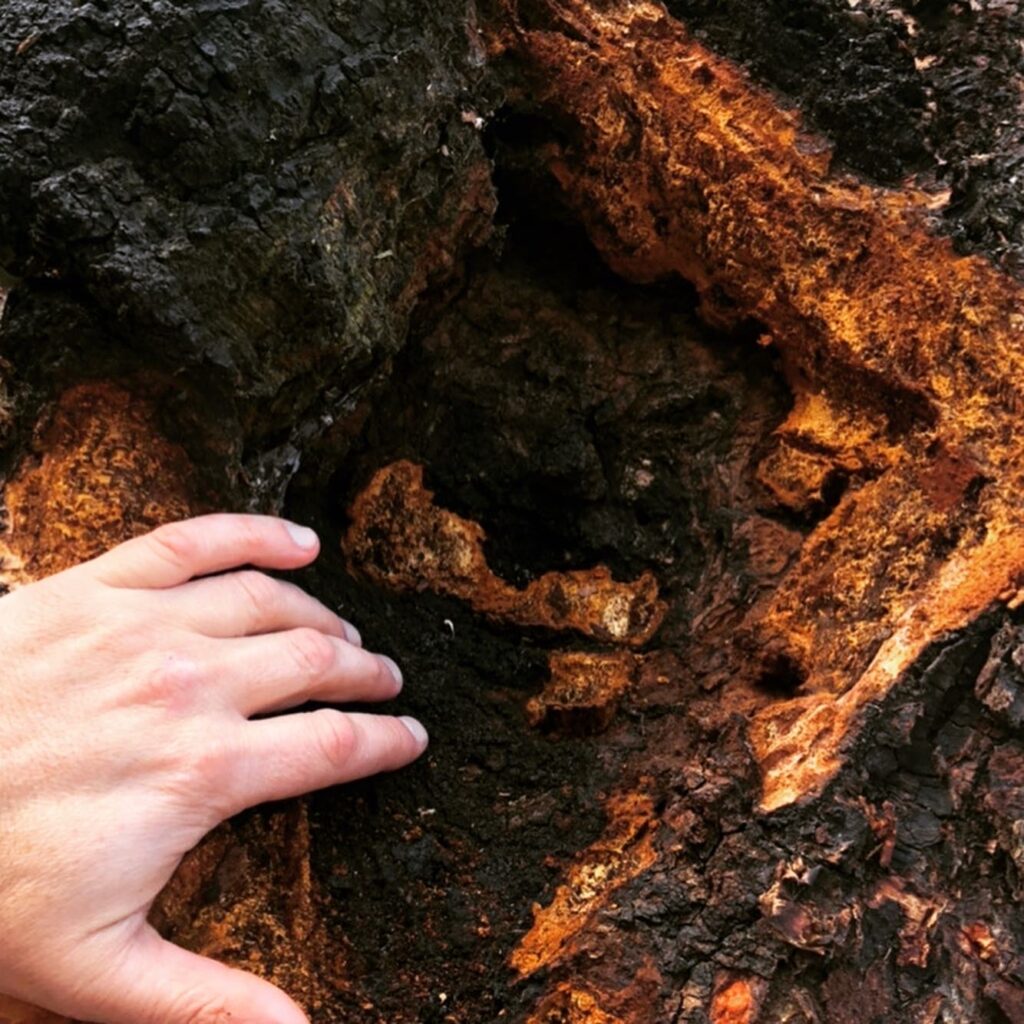
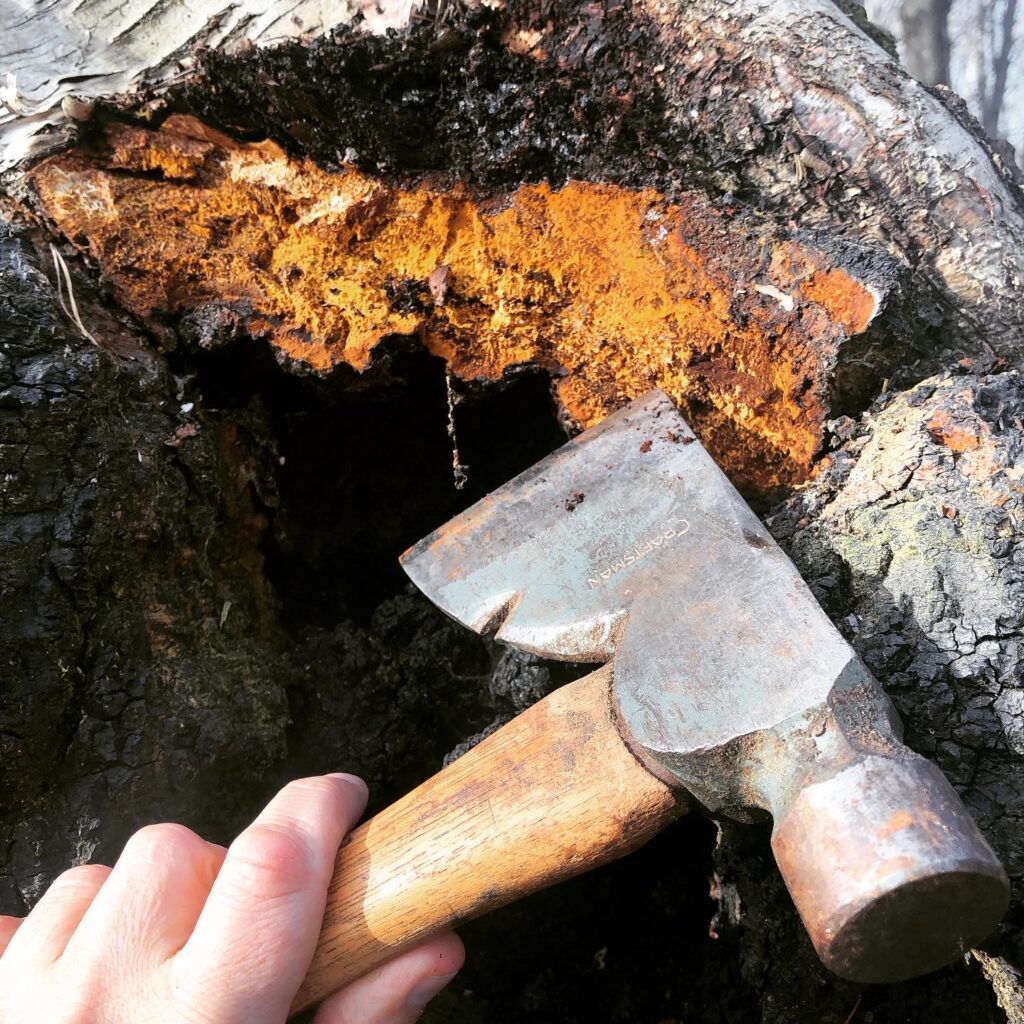
Step 3: Look for back and red
When you cut open the chaga, a healthy specimen will have a rough black exterior that resembles burned wood. The interior will have a red / burned orange umber. If the interior looks like wood and has rings, you have found a birch canker which is not edible. However, the black and umber coloring are your primary indicators for a healthy chaga specimen.
How to Harvest Chaga
Step 4: Think about safety
It’s highly recommended to have two people harvesting chaga. One person to hold the ladder (preferably with a helmet and glasses) and a second person who is climbing and chopping. A safety helmet is wise, in case the axe is dropped during harvesting, and the eye protection is best for the person below because chaga tends to come off in hard chunks (with lots of dust).
Step 5: Use a hand axe to remove
Chaga is nearly impossible to remove with just a knife. The black exterior is extremely hard and the high moisture content makes it like removing part of the tree itself. Use the axe to cut it off in manageable chunks. At this time, you’ll see the healthy and living red interior of the mushroom. Only remove <80% of the mushroom, as it may continue to grow in the years ahead. Often times, the same tree will produce more mushrooms.
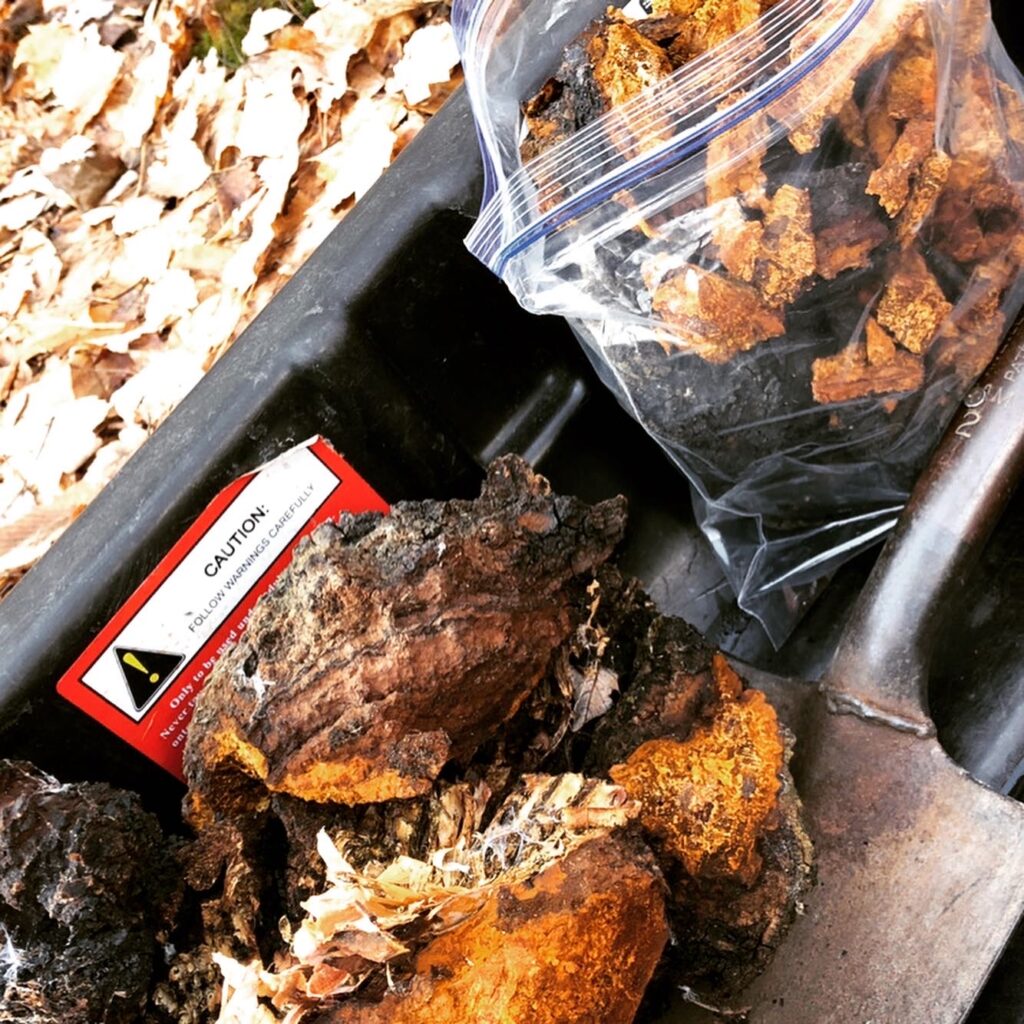
Step 6: Bag it up
As you harvest, because of the way chaga breaks free, you’ll have a variety of sized chunks. I try to bring a few gallon zip-lock bags for the smaller pieces, because I don’t want to waste any. In some cases, you can even bring a tarp for the base of the tree to help collect the smaller chunks as they fall. Don’t worry, if you miss any pieces, the wild turkeys will eat them and be thankful.
How to Prepare Chaga for Use and Storage
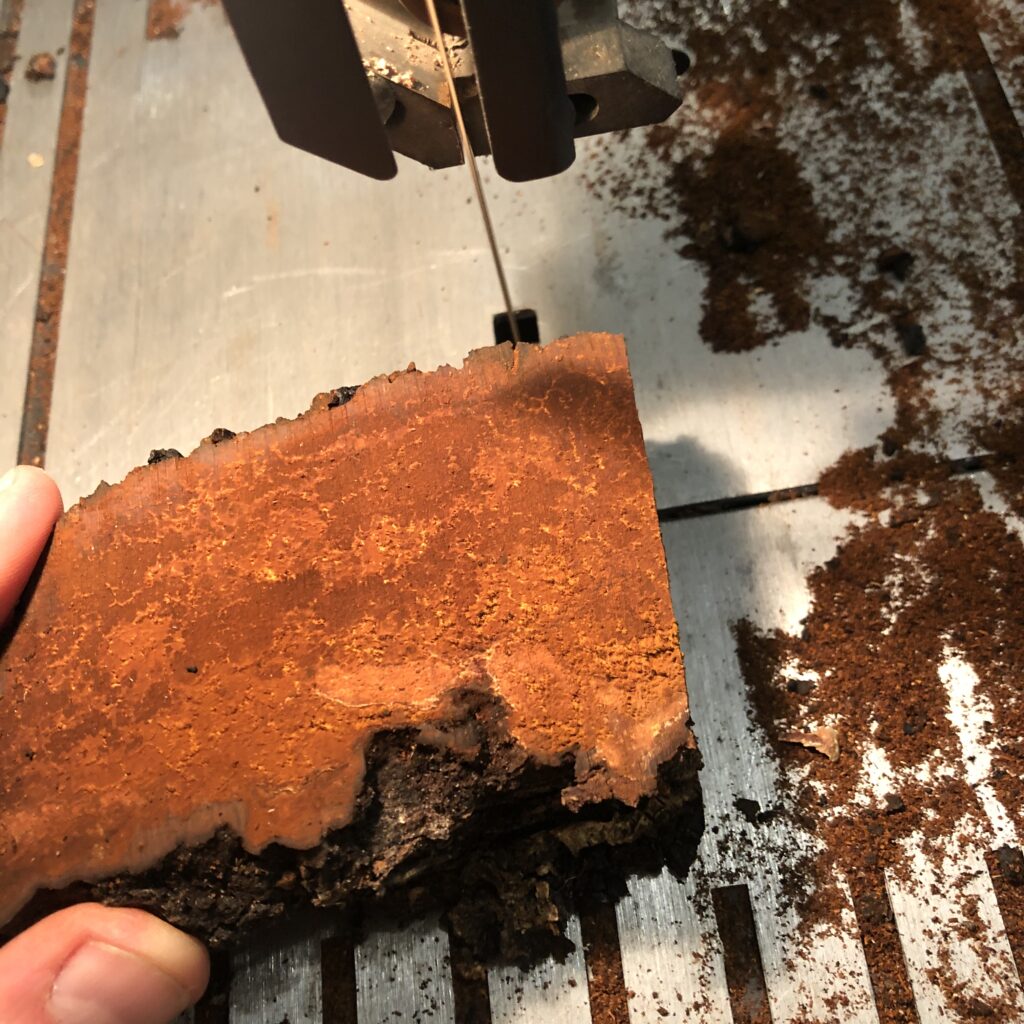
Step 7: Cut it up
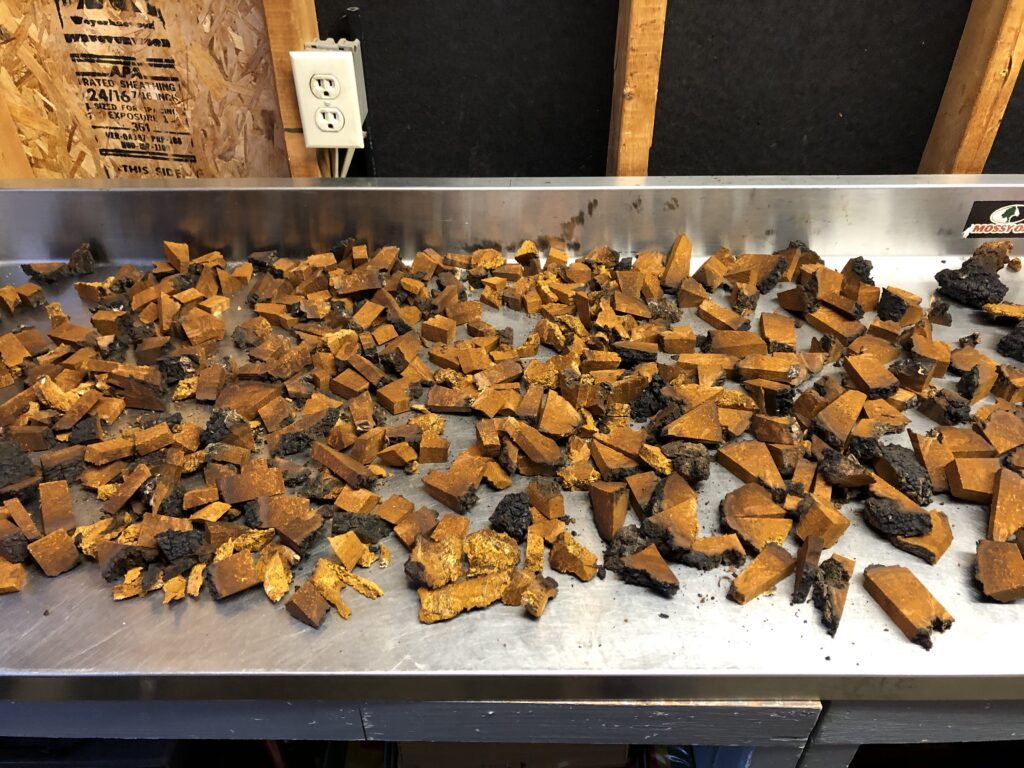
Chaga has a very high moisture content, so it needs to dry well before consuming and storage. Using a band saw, cut the chaga into chunks about 1″ each. This is possible using a knife, but will likely dull the blade, because the black exterior of the mushroom is extremely hard.
Step 8: Lay it out to dry
Chaga needs to dry for 6-8 weeks before storage and use. Spread your 1″ chunks out on a sterile surface and turn them weekly to help them dry on all sides. This step should be done in a warm, dry location (i.e. on top of a refrigerator). Once dried, chaga can be used and stored for years.
Your chaga mushroom is now ready for storage and use. There are many ways to incorporate chaga into your diet. In a later article, we’ll give you more tips on how to process, store, and use the chaga.
This is just one of the many topics that will be covered in our winter permaculture design certification course. For more information on this course or upcoming events, click here.
In the midst of the winter hibernation, I find myself craving all things GREEN! I want to get outside and play in the dirt again, long for the warm sunshine, and can’t wait to smell the spring flowers. If you are like me, you have frequently googled, “What can you plant between snows?” …only to find very few answers. However, here are a couple of my favorites to help keep your heart hopeful in these long winter months.
Try sowing the following plants in your winter garden, so your yard is ready for springtime.
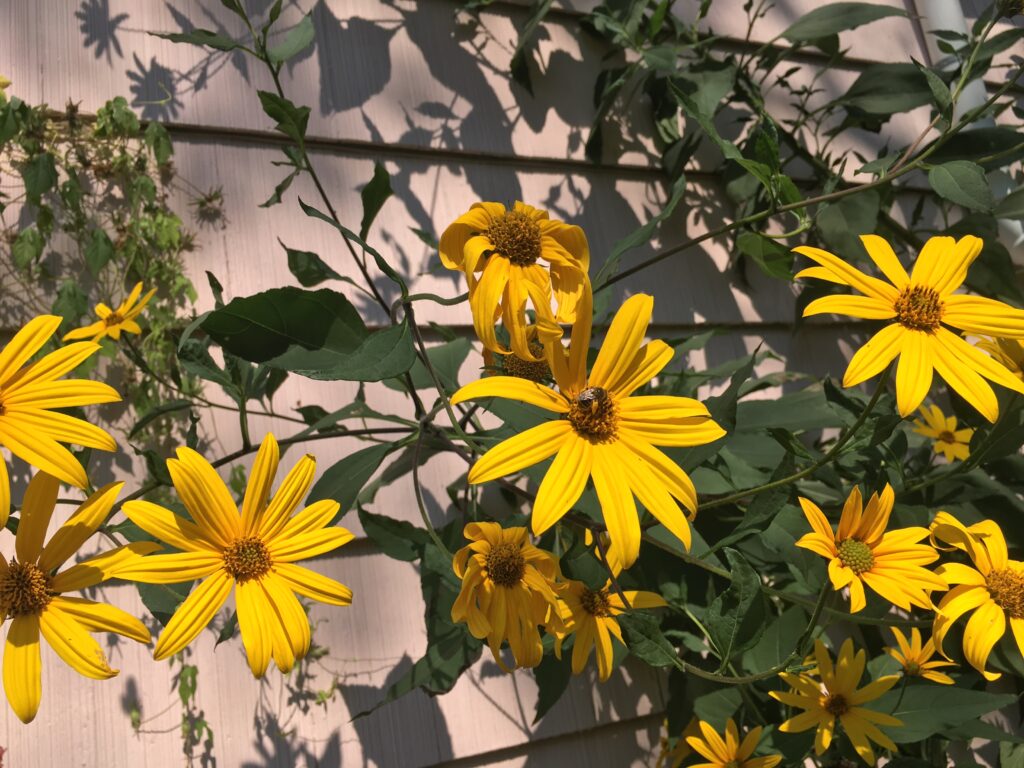
1 – Sunchokes (Jerusalem Artichokes)
Jerusalem artichokes are among the unsung heroes of the food forest garden. The tubers can be eaten like a potato and the fall plant will become 12′ tall with gorgeous yellow flowers. They need a lot of space and spread quickly, so do not plant them in the flower bed. Use them on the edge of the yard or as a full sun-border.
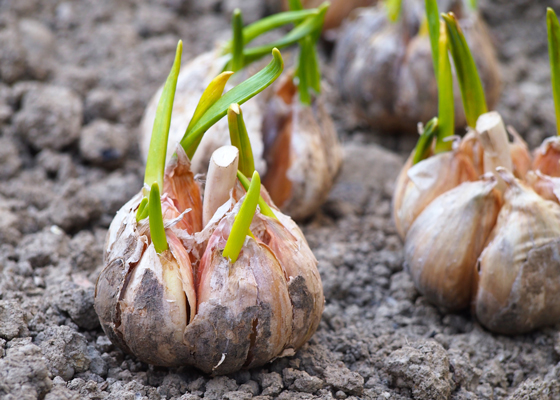
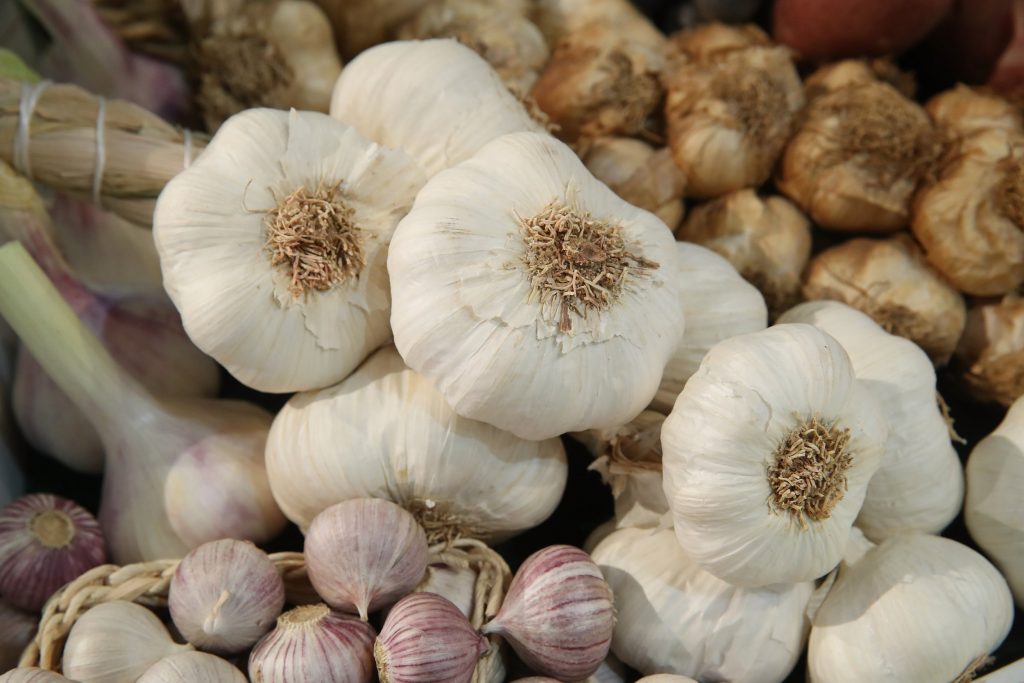
2 – Garlic
Garlic can be planted in the winter any time the soil can be worked. Plant twice the depth of the size of the clove, with the pointy end facing up. Cover with compost or straw when finished. They are best planted among the strawberries, because they form a beneficial relationship and help keep strawberry bugs away. Plant in full sun.
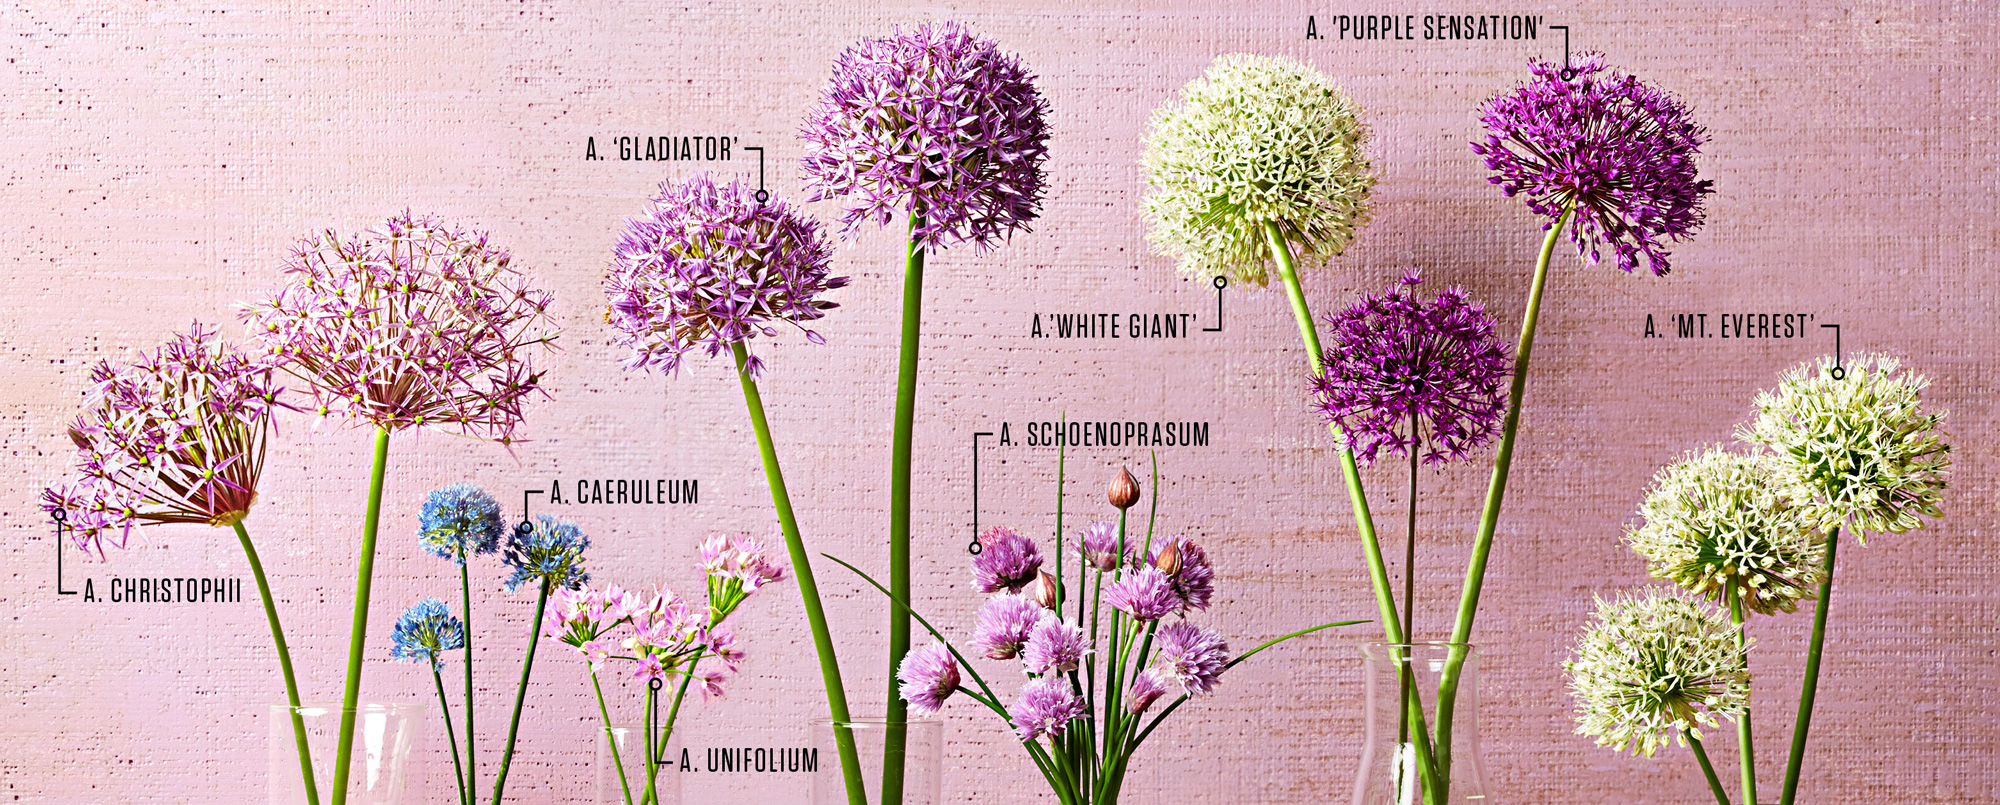
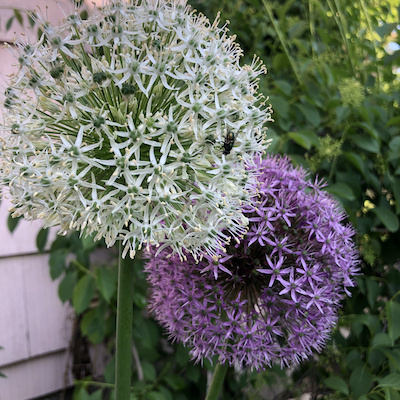
3 – Alliums
Alliums are among my absolute favorite spring flowers. Globemaster and Gigantium are possibly the most stunning garden perennials in my book and an excellent pollinator. Check out the banner on the top of the article for some other varieties. You can often find these bulbs on sale in early winter at local hardware stores. If you think you have bought enough, get two more (you’ll thank me later).
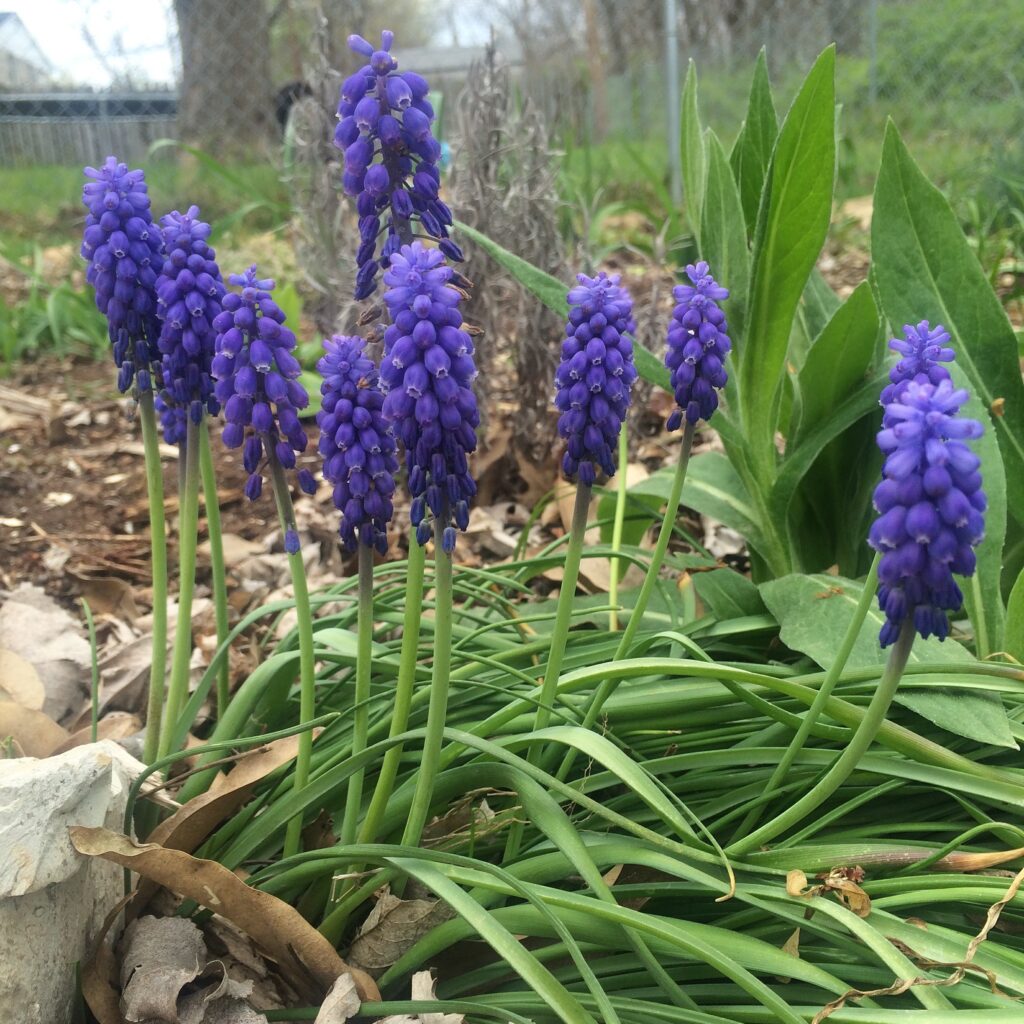
4 – Crocus & other spring bulbs
Most spring flowering bulbs can be planted until the end of January. Although they will not be as prolific as they may have been (had they been planted in November), they will still flower in the spring and flourish the following year. Crocus, narcissus, and muscari all do well in our area. These are all excellent sources of early color in the garden and great pollinators for bees emerging from their dormancy period.
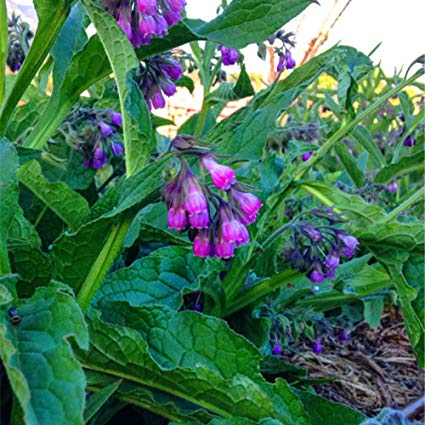
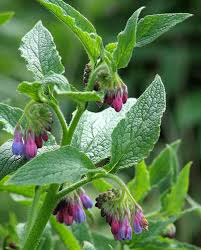
5 – Comfrey
If you are a chicken, goat, or farm animal keeper – comfrey needs to be on your planting list. It is high in minerals and micronutrients, great for biomass creation, and used as a compost additive. Root cuttings are the most economic, and can be planted in the ground during the winter or indoors and transplanted in the early spring. Use the Bocking 14 variety to prevent seed spreading.
If you are looking for some more tips to satisfy your gardening itch in the winter, be sure to read through the December Gardening To-Do List. You can also sign up for our mailing list below for more FREE resources and information on upcoming events.
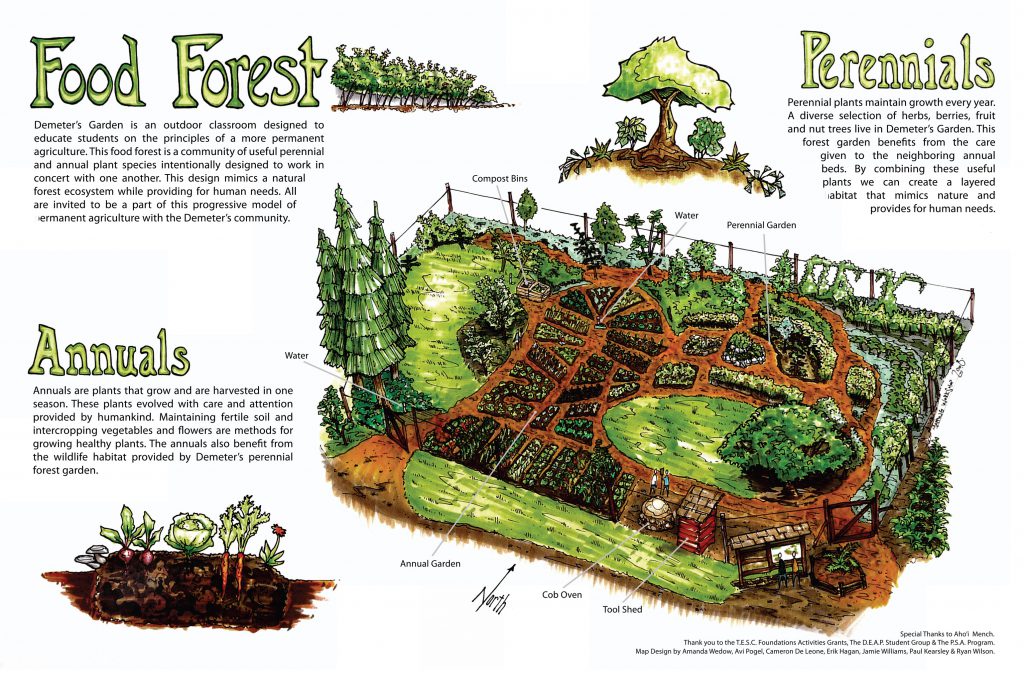
In this article, we explore the possibilities of a cancer fighting food and medicinal forest, which has been specifically designed for the Midwest USA.
Food forests are a low-maintenance agroforestry system that mimic the natural production of a woodland forest edge. Plants in a food forest are arranged in a way that work in synergy with the natural succession of species in an ecosystem and maximizes their food producing potential. The practice of permaculture (permanent agriculture) seeks to work in harmony with the natural growth processes in order to create a system that speeds up the natural growth pattern of an area. What might take over 100 years in a natural, untouched system, permaculture systems can accomplish in a matter of 3-5 years. After just a few years, there could be a food and medicine producing forest that would provide for those fighting cancer. The food forest creates an ecosystem of productive abundance and is both low-maintenance and long-lasting. This type of system can last hundreds of years, once established, and can provide abundant healing foods for generations to come.
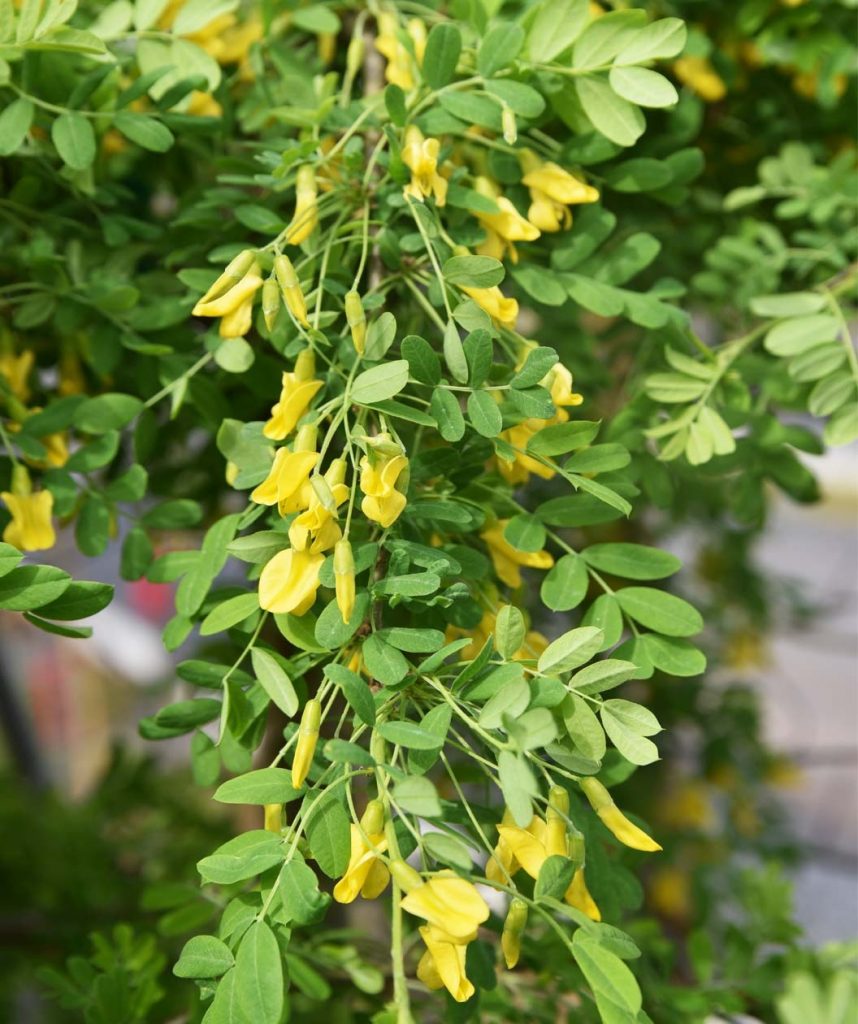
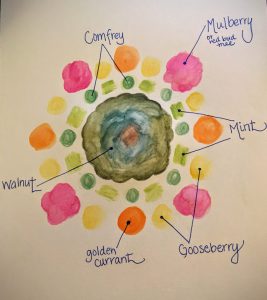
In our cancer fighting planting guild, we have strategically selected plant varieties that have specific anti-carcinogenic properties and immune boosting benefits. We have designed a system where each plant can serve the one planted next to it. For example, nitrogen fixing cassia plants help fertilize walnut and plum trees. Locust trees provide compost and living mulch, creating biomass for elderberries and goji berries. Cancer fighting herbs are also used to attract beneficial insects to help pollinate the berry bushes.
Each and every element in this system have been selected for growing US Growing Zone 6, but the pattern could be mimicked in other regions as well by swapping out certain species. This Cancer Fighting Medicinal & Memorial Garden is designed specifically for climate in Kansas City, MO.
As someone who has battled cancer, I have designed this system using elements that were beneficial me in my fight against cancer. Though natural health remedies have not been approved by the US Food and Drub Administration, there is on-going research taking place across the globe and growing anecdotal evidence regarding the benefits of natural health and food as medicine.
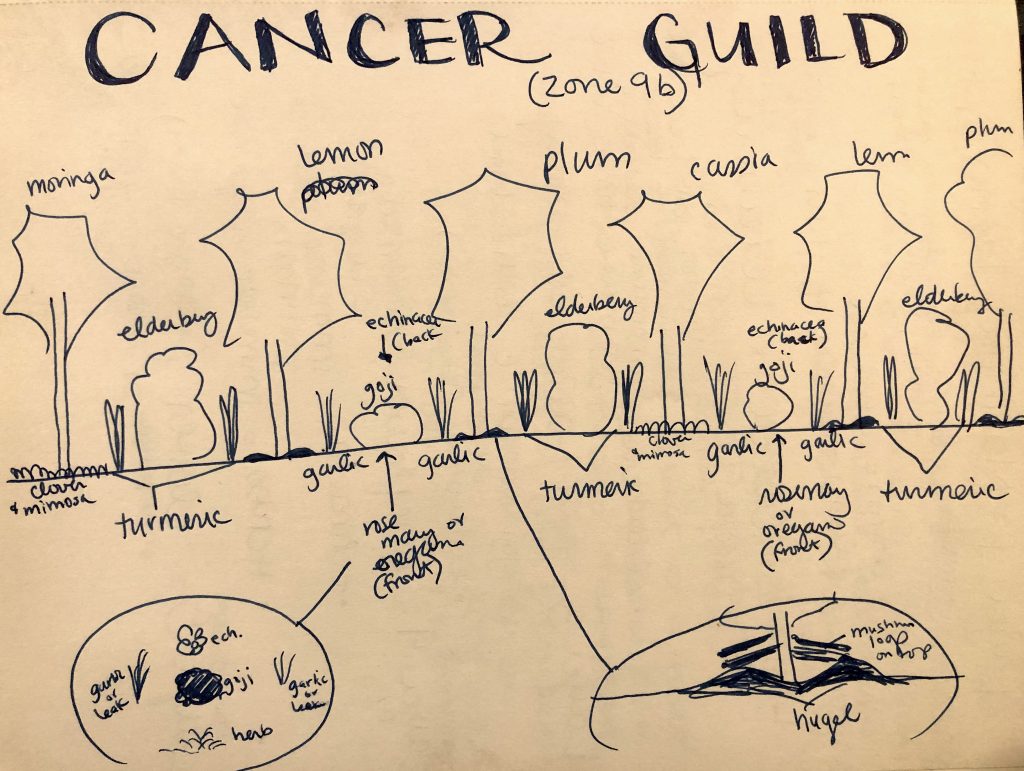
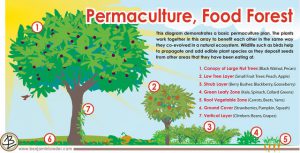
Cancer Fighting Food and Medicinal Forest (Diagram above is for zone 9a)
Goals of the project
To create a productive food system to benefit those who are currently in their own battle against cancer.
To create a learning garden for students, kids, and families.
To create a Memorial Garden for those of us who have lost loved ones to this horrible disease, and who believe that the cure for cancer may lie beyond the pharmaceutical industry.
In essence, this Cancer Fighting Medical Garden is being planted to inspire hope, remember loved ones, and to provide productive abundance for those battling this sickness.
Elements of the Cancer Fighting Food Forest
Layer 1: Top Story Trees
BLACK WALNUT TREE Walnuts have multiple cancer fighting benefits, and are the only nut that contain a significant source of alpha-linolenic acid (ALA) (2.5 grams per ounce). Walnuts also contain a variety of antioxidants (3.7 mmol/ounce) and numerous vitamins and minerals. Walnuts have fatty acids are also shown to have cancer fighting benefits.
SIBERIAN PEA This nitrogen fixing tree help fertilize the soil using nitrogen fixing nodules on the roots. It can also be “chopped and dropped” to provide biomass and much for other elements in the food forest system. The tree provides edible seeds which have 36% protein, which is comparable to soybeans
PLUM TREE Shown to have cancer fighting benefits including high fiber and polyphenols. They have high levels of anti-oxidants and vitamin C. There is ongoing research specifically for colon and breast cancers. In the food forest, plums are a delicious over-story tree, which also provide pollination for insects.
Layer 2: Small Trees and Shrubs
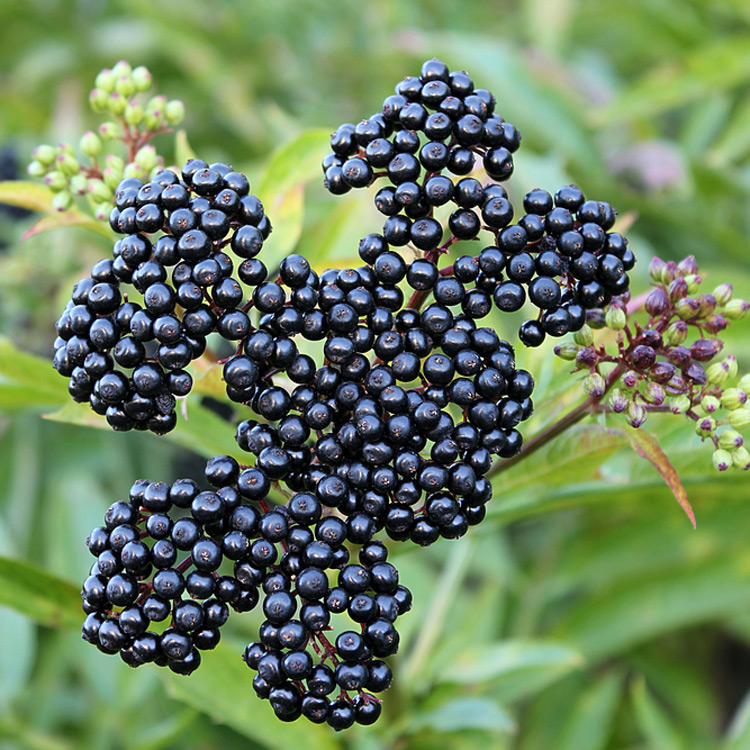
ELDERBERRY Flowers and berries have been traditionally used as an immune tonic to help strengthen the natural defense against disease. The berries are also high in vitamin C, which is a known cancer fighter and immune system booster. In the food forest, it’s an excellent pollinator as well as shade producer.
Layer 3: Small Shrubs and Bushes
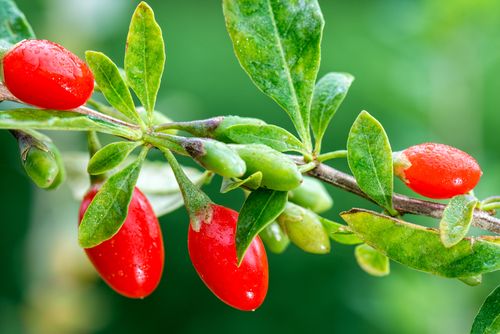
GOJI BERRIES High levels of vitamin C, strong antioxidant, and all around superfood. This plant in the food forest has stunning flowers and provides not only food, but also pollination .
CURRANTS Help create healthy bacteria in the gut as well as having high amounts of anthocyanin, which have an ‘anti-tumour’ effect on some cancers. Antioxidant and anti-inflammatory.
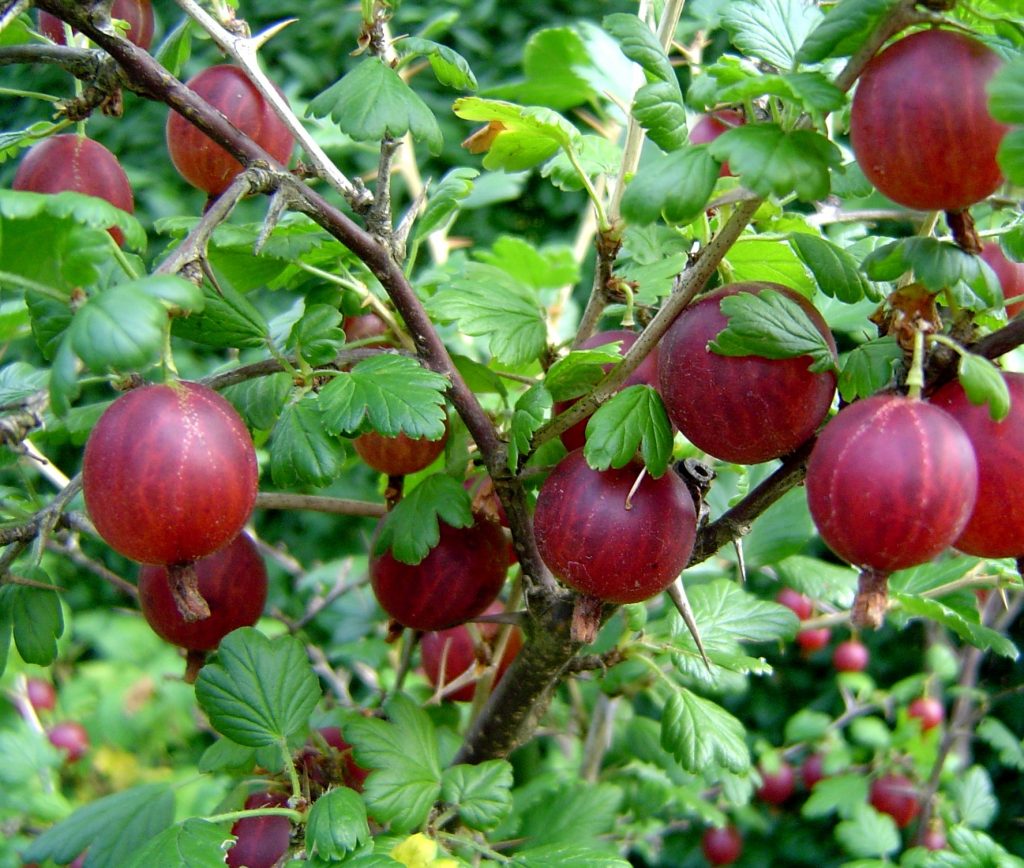
GOOSEBERRY Contain alma, which is being studied by the European Cancer Institute as a ‘wonder berry’ to combat tumor growth in several types of cancers. High in antioxidants, and as a plant is cold-hardy and disease resistant.
Layer 4: Herbaceous
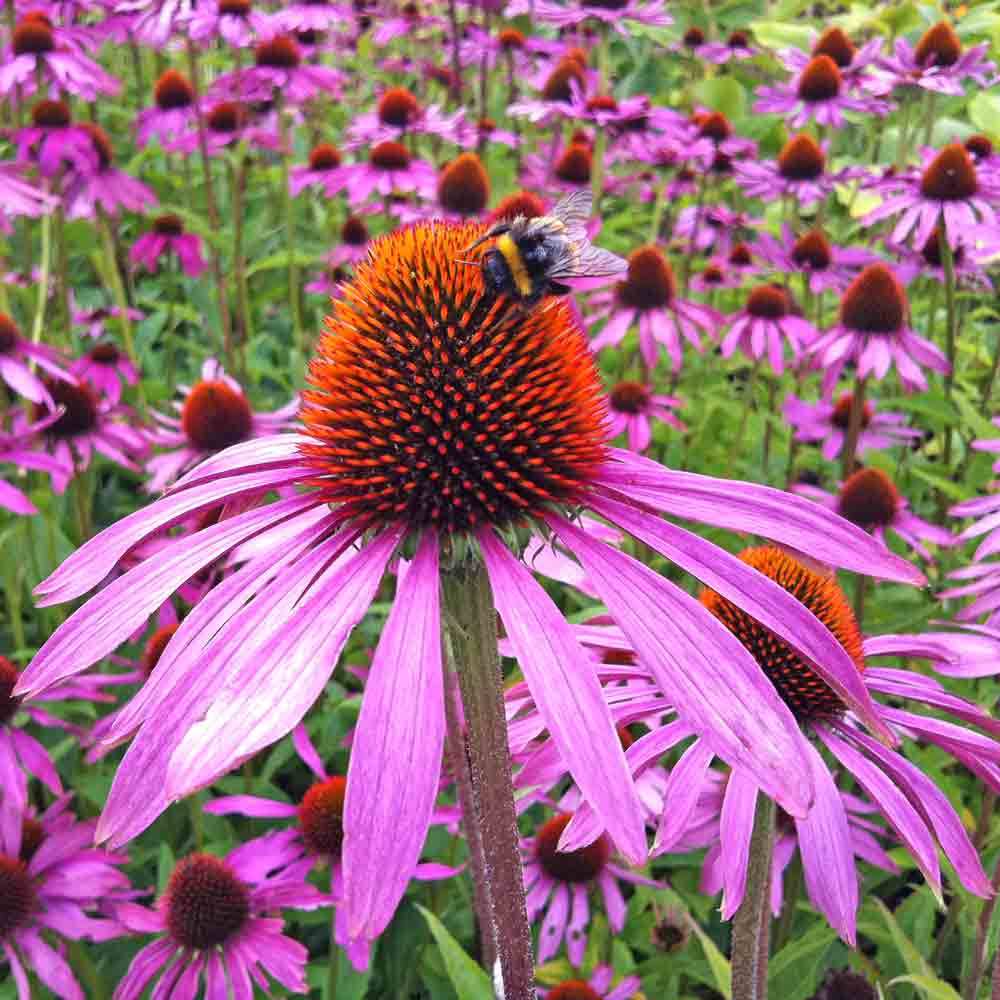
ECHINACEA PURPUREA All parts of this plant can be used to make an herbal tea to boost the immune system. It’s an excellent pollinator for beneficial insects and bees, and provides natural beauty and color in the food forest. There are several native bees and caterpillars that use this plant as their host plant, all of which are beneficial in the garden.
OREGANO Anti-viral, anti-fungal, cancer fighting properties. Helps boost the overall immune response. Provides pollination and ground cover benefits to keep the soil protected. Keeps away garden pests and repels deer and other animals who would eat the tree branches.
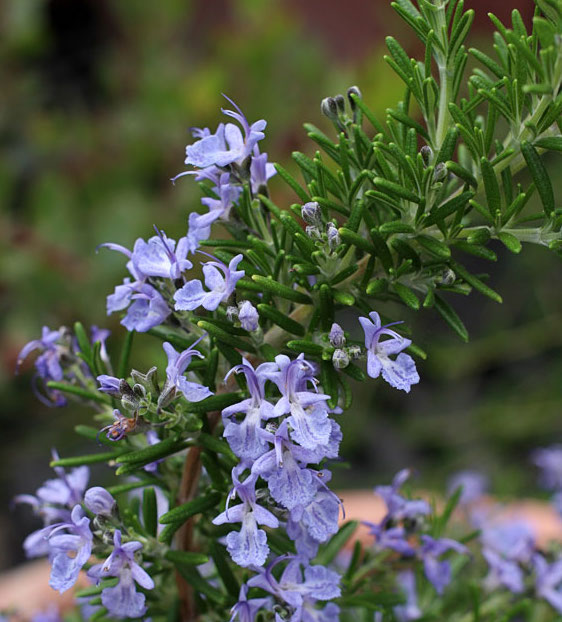
ROSEMARY Rich in carnosol, rosemary has been found to detoxify substances that can initiate the breast cancer process, and it’s a rich source of vitamin E (alpha tocopherol), another powerful antioxidant. Serves as a pollinator and insectary plant.
Layer 5: Ground Covers
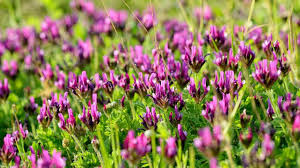
ASTRAGALUS It has immune-stimulating effects and may help to reduce side effects from chemotherapy, and boosts the immune-response of the body. In the food forest, it’s an excellent pollinator, ground cover, and insectary plant.
RED CLOVER Extracts act as an estrogen agonist and stimulates proliferation of ER-positive breast cancer cells in vitro. It’s also used for skin cancer treatment and as a tea to detoxify the body and boost circulation of the blood. In the medicinal garden it is not only a nitrogen fixing plant, but also a colorful pollinator.
Layer 6: Roots and Mushrooms
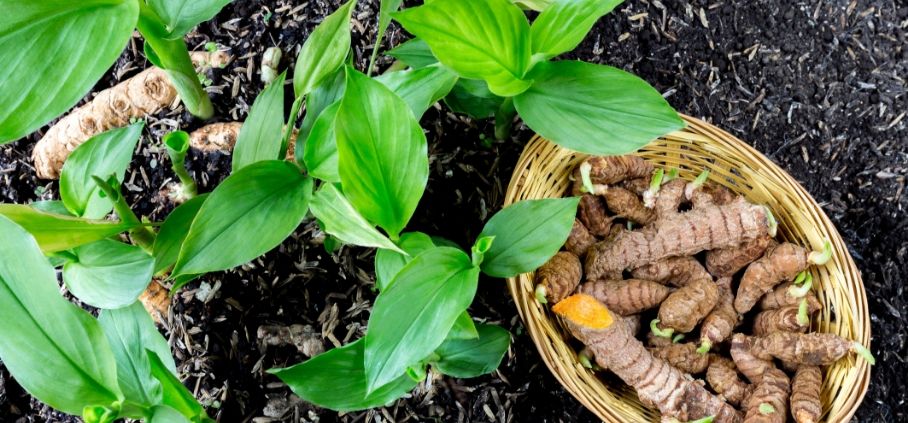
TURMERIC Curcumin, the constituent in turmeric has been shown to inhibit bone cancer cells while promoting growth of healthy bone cells. It also has strong anti-inflammatory properties.
GARLIC Several compounds are involved in garlics possible anticancer effects. Garlic contains allyl sulfur and other compounds that slow or prevent the growth of tumor cells.
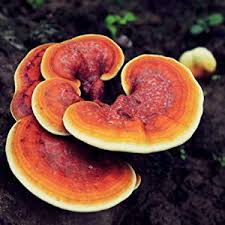
REISHI MUSHROOM Research in cancer patients has shown that some of the molecules found in the mushroom can increase the activity of a type of white blood cell called natural killer cells. Reishi mushroom can enhance immune function through its effects on white blood cells, which can help fight infection and cancer.
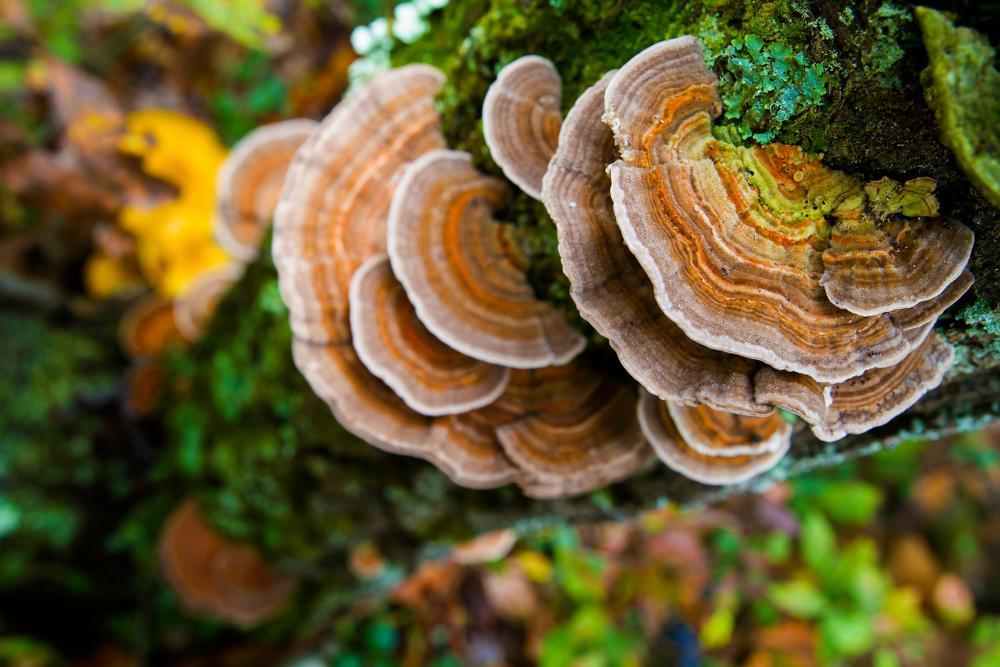
TURKEY TAIL MUSHROOM The polysaccharopeptide found in turkey tail mushrooms, inhibited the growth and spread of human colon cancer cells. A certain type of polysaccharide found in turkey tail mushrooms called Coriolus versicolor glucan (CVG) may suppress certain tumors, specifically breast cancer cells.
Layer 7: Vines
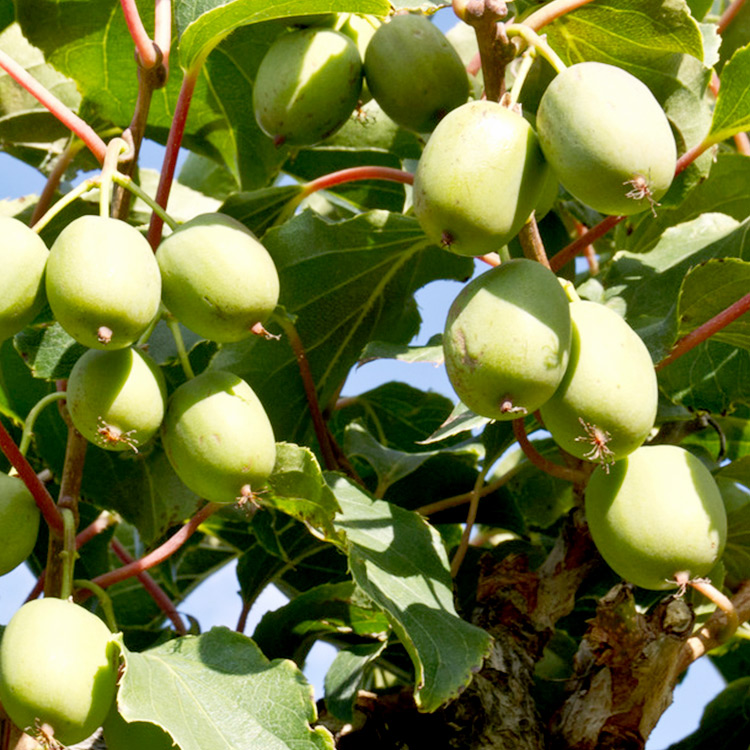
HARDY KIWI Kiwi is a little hand grenade of cancer-fighting antioxidants, including vitamin C, vitamin E, lutein, and copper. This cold-hardy vine is a high producer, great pollinator, and does well in a food forests part shade.
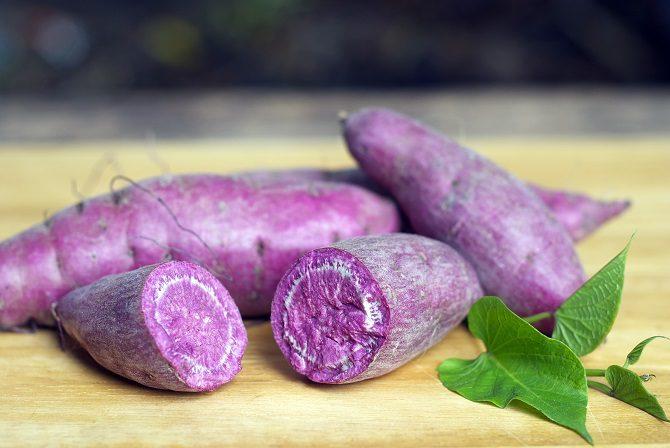
PURPLE YAM Climbing vine and support species that has also been shown to benefit breast and colon cancer patients. Promising research suggests that two anthocyanins in purple yams — cyanidin and peonidin — may reduce the growth of certain types of cancers.
Sample of a Full System
NOTE: The diagram below is actually for a similar guild for Zone 9a/b, but the concept of placement and repetition is similar for a Midwest planting
Using Ground Covers to Repair Nitrogen, Pollinate, and Create Beauty
Things to Consider
Succession of plants and species – When you first plant your food forest, you’ll likely have much more sun available because the trees are thinner and there is less canopy creating shade. This gives you the opportunity to plant more sun loving, nitrogen fixing plants, which will help get your food forest off to a great start. For more articles about starting a Midwest Food Forest, click here.
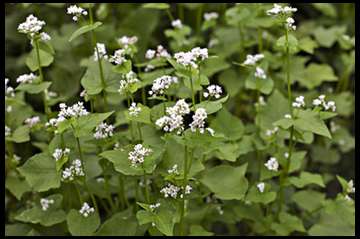
Annual vs perennial benefits – Obviously having a plant come back year-after-year is less work on our end, but at the same time, we shouldn’t overlook the benefit of annual crops to help meet specific functions. Sometimes those functions need to serve a short-term purpose, which is where annuals play a really important roll. For example, does the soil need tilling or aeration? Consider annual root crops like turnips, dandelion, or daikon radishes. Does the soil need biomass? Consider buckwheat or something in the vetch family. Does the area need fast pollination? Consider creeping thyme or a crimson clover.
How the area will fill out over time – Some species may work really well for a few years, but as the over story canopy grows, production increases, or as new plants are introduced small adjustments are often needed to the original species. As the canopy of top story trees thickens, the succession of species around it will need to evolve with it.
Where ground covers are located within the forest – Some ground covers can get tall and lush, but also serve as a chop and drop mulch. Comfrey (the bocking 14 variety) is great for this, because it creates substantial biomass, but will still still stay localized. It works great at the base of young fruit trees and provides needed pollination. There is some debate as to what it provides for the soil, but at the very least it is proven to increases minerals in the top soil region and provide shade for the tree roots that it’s planted by. At the same time, other ground covers need more sun, so will do better away from the base of the trees. For example, planting clover varieties in the alleys between orchard rows will help keep grass at bay, prevent the need for frequent mowing, and provide pollination sources. For more on selecting a location in your food forest or permaculture orchard, click here.
Depending on your region, there are a plethora of options to choose from when it comes to ground covers for a food forest or permaculture orchard. Before spreading seeds, it’s important to research and study your site thoroughly, because some ground covers can be harder to get rid of once established. It’s also important to pay attention to the sun and moisture requirements these species need to really help your ground cover be a show stopper. Lastly, be sure to research the ground cover you have selected so you prepare the soil correctly before seeing. Doing research beforehand will save time and money in the long run.
However, to get you started, here are a few suggestions for those of you who live in the Midwestern USA.
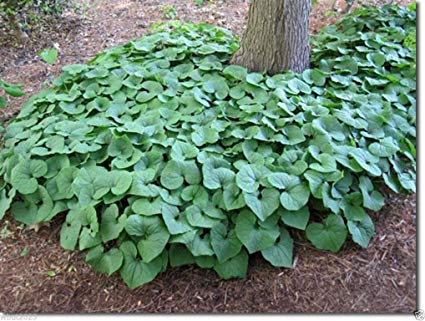
Wild Ginger
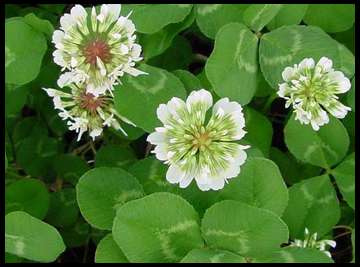
White Dutch Clover
Tokinashi Turnip
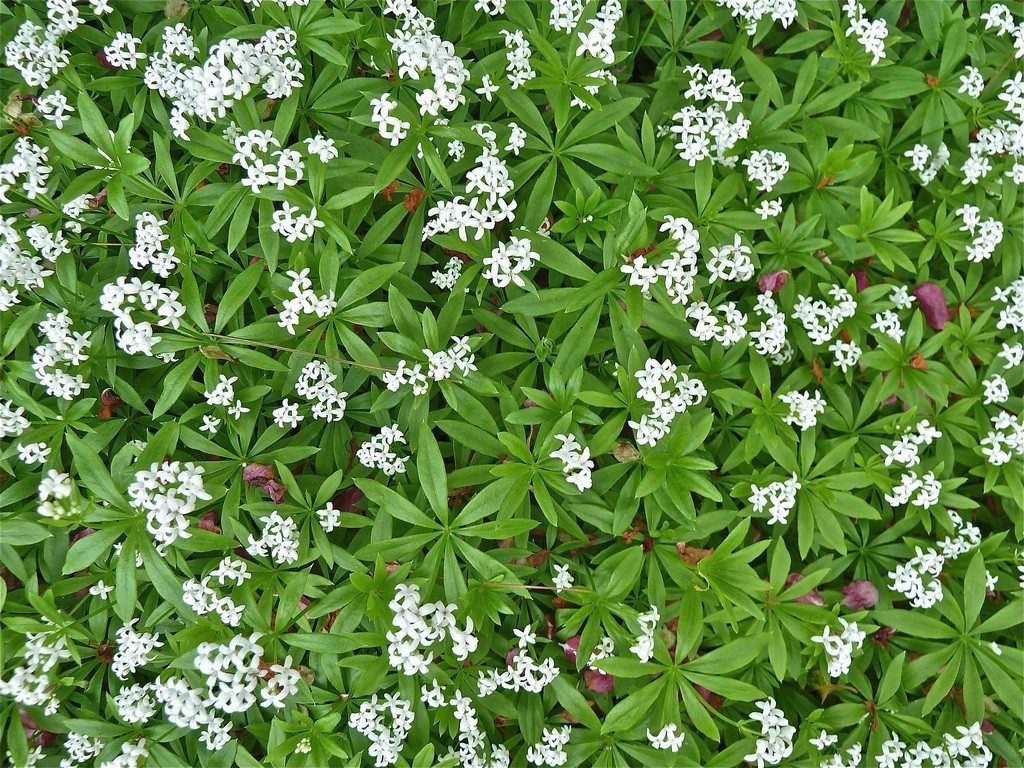
Sweet Woodruff
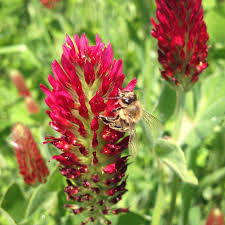
Crimson Clover
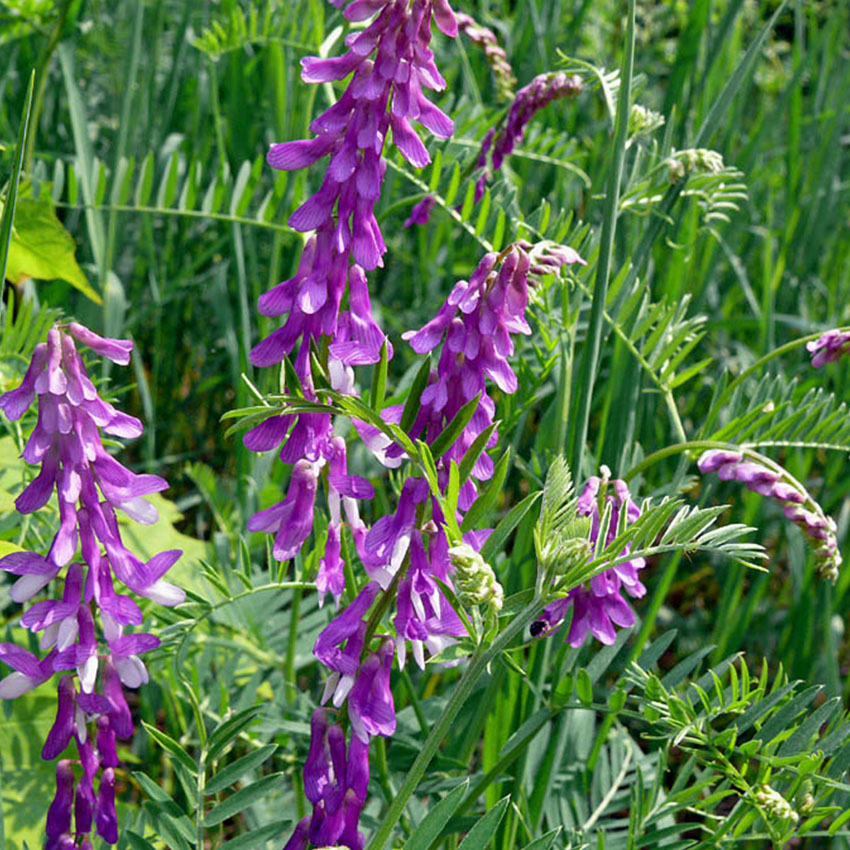
Hairy Vetch
Ladino Clover
Red Clover
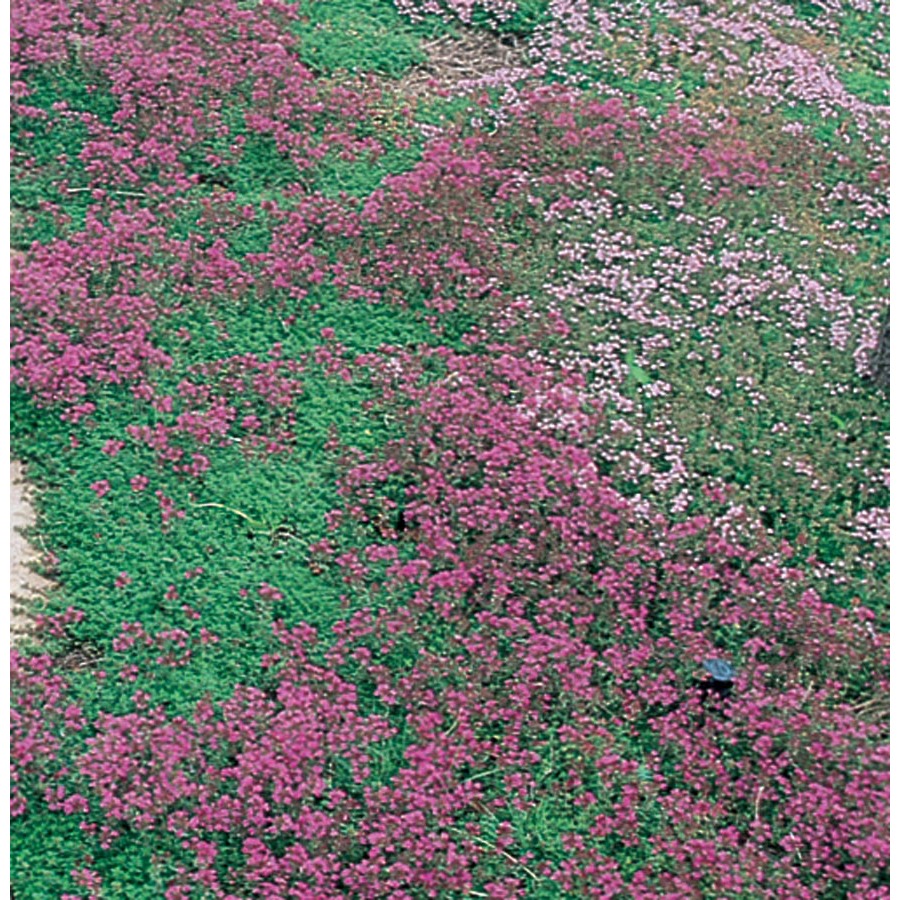
Creeping Thyme
Cowpea
Buckwheat
Comfrey – Bocking 14
Ground Cover Comparisons
Species
Annual vs Perennial
Height & Description
Benefits
Drawbacks
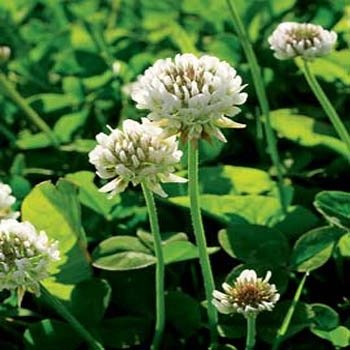
Dutch White Clover
Hardy perennial
3-6”, but can be easily mowed.
Nitrogen fixer, soil builder, dense foliage to cover soil. Great for sunny areas in food forest and for alleys between rows. Can also be used as a forage for animals and poultry.
Can spread easily to other areas if allowed to flower and go to seed. Should not be planted next to other plants it’s name height, because it can choke them out.
Ladino Clover
Perennial (4-5 year max)
4-8”
Nitrogen fixer, soil builder, dense foliage to cover soil. Great for sunny areas in food forest and for alleys between rows. Can be used as a forage for animals and poultry. Does better rebounding after animal pasturing and often more economic.
Spreads easily. Attracts deer more than other clover varieties.
Red Clover
1-2 year perennial
6-8”
Highest nitrogen fixing among the clovers, great for bees and honey flavor, excellent for adapting to a wide variety of soil types. Easily tilled under.
Short lived, does not do well in shady areas.
Crimson Clover
Annual
5-8”
Stunning flower display, similar nitrogen fixing to other clovers. Excellent source of nectar for bees and butterflies. Great for areas that need a temporary ground cover.
Short lived, attracts a full spectrum of insects (some good and some bad), including moths in southern regions.
Hairy Vetch
Tender perennial
Up to 3’
Very high nitrogen fixing ability and an excellent pollinator. Great for larger areas that do not have bushes or understory, fields, etc.
Best used in larger fields, livestock areas, and places that are not farmed multiple times per year. Great for soil stabilizing along water areas.
Hard to get rid of, because the vines can grow to 12’ long and get wrapped around smaller farm equipment. It’s best to till them under in April, before they are too invasive, and will likely need additional turning to terminate them (in a commercial or large scale setting).
Cow pea
Annual
2’ tall areas, but vines can be 12’ long.
Excellent at fixing nitrogen, but also gives an edible crop for dried beans. Easy to harvest, dry, and remove at the end of season. They are a great no-till cover crop that can be “mowed over” at the end of the season.
Not a great pollinator. Can climb up nearby trees and bushes if allowed. However, this is easy managed and pruned back.
Buckwheet
Annual (self sowing)
30-50”
Pollinator, usable seed for ancient grain, excellent bio mass producer. Great at choking out unwanted species. Some animals will use it for forage.
Thick, harder to harvest the seed without equipment. Will resow itself if you let it go to seed before chopping and dropping.
Tokinashi Turnip
Annual
12”
Greens are edible when cooked and roots are a pleasant food source (raw or cooked). Greens are excellent for animal and poultry forage. Excellent understory crop that can tolerate dappled shade.
Needs sunlight and space to grow if you are harvesting the roots. If you are harvesting greens, they are very easy to grow, even in lightly shaded areas.
Comfrey (Bocking 14)
Perennial (4-5 year max)
12-18”
Very resilliant, pollinator, medicinal usage for humans (bone and muscle healing), roots for tea and tonic. Biomass and mineral accumulation, chop and drop mulch, excellent forage for animals.
Hard to get rid of once established. Do not use anything other than bocking 14 or it will spread at a near uncontrolable rate.
Creeping Thyme
Perennial (4-5 year max)
3”
Herbal use, excellent pollinator, hardy once established, and great for areas that need lower growth. Needs sun to flourish. Can be walked on and moderate tolerate foot traffic.
Needs sunlight to do well and get established. It can be harder to get established in mass plantings, but once it has take root, it never needs to be mowed and covers the ground well.
Sweet Woodruff
Perennial
3-5”
Flowers can be used as a tea or added to white wine, pollinator, shade loving.
Spreads once established.
Wild Ginger
Perennial
4-5”
Shade loving, wild edible, small flowers under leaves.
Does well for smaller areas, but not ideal for large scale.
Knowing how to select the location for a food forest or perennial garden is possibly just as important as knowing what to plant. Before you start digging, take time to examine your site. Study. Watch. Learn from the environment around you. Take notes on some of the topics below to help you decide which location will be most suitable for your new food forest or perennial garden.
Sun and soil requirements: What pH will be needed for those plants? How much organic matter exists on site already? Does the site meet the sun requirements for the species selected?
Identify precursor species: Knowing what plants are already thriving will tell you about the site, soil, and environment. For example, if there are a lot of dandelions or tap root plants, the soil is trying to rebuild minerals and nutrients. If there are signs of plants with shallow, hair-hair-like roots, the soil may be trying to stabilize itself from erosion or drying out. Do you see acid or alkaline loving plants growing native?
Space to grow and fill out: Do the plants have room to thrive and have airflow at their mature size? Do you have room to move among the plants or rows? Do you need extra or protected space to make allowance for animals or livestock?
Ease of watering: Is there water access? The first 30 days are often the most important as the plants establish, so you will want to have easy water access points.
Ease of maintenance: Is the area something that you frequently visit or drive by? Is this area one that can be easily maintained or get tools and equipment to as needed? Will you need truck or tractor access?
What is the long-term use for this area? Consider mapping out 3-5-10+ years. Is your current use of the space preparing the site adequately for those goals?
Ease of Harvesting: Will you or others be able to quickly and successfully harvest? Are there rows or adequate spacing between key areas? Are 90% of the crops within arms reach? Will you see and be able to easily use the crops you have planted when the harvest time arrives?
In a culture that encourages us to have more money, bigger toys, larger savings, new cloths, and an endless supply of technological gadgets, we should be stepping back and asking, “why?” Do we really need one more gadget? Do we need another nick-knack? Do we need the latest cell phone or computer? Do we actually need the new shirt or pair of shoes or could we just simply wear the ones we already have? We have been trained by a consumer-based culture that more is better.
The reality is that most of these items we are collecting have a short shelf-life. Even our savings accounts, retirement funds, and inheritances we will fade in a relatively short time. Maybe they will last a few years, a few decades, or if we are are extremely wealthy they might last a generation or two. In the context of a century… our stuff will be gone in a heartbeat. But, what if we could pass on a legacy that would last 50-100 years or more? What if our legacy could provide food, shelter, and play areas for your children or grandchildren? What if our legacy provide pollination for wildlife, shelter for birds and animals, and purified the air? What if we could leave a legacy that actually provided a source of LIFE?
In my humble opinion, one of the most practical ways to accomplish a legacy of this caliber is to plant a midwest food forest. In permaculture, we use this phrase to describe a forest of edible and restorative plants working in harmony with one another.
Food Forest Design
What is a Food Forest?
Generally speaking, every forest is jam packed with edible fruit trees, nuts, berries, and fungi. Over hundreds of years, natural succession helps establish these systems and create a healthy and balanced growing environment. Using permaculture, we are essentially designing a system that works in tandem with nature to speed up the process. Instead of productive abundance taking 100 years to be established, we can design it to take only a handful of years. A food forest uses intelligent design to restore and remediate land that would otherwise take centuries to return to a normal state. Instead of working against nature to maintain a mono crop, perfectly green lawn, or a patterned landscape of tropical annuals, we use perennial species that will last foe year. This is especially useful in areas that have suburban forests, because in most cities our forested areas are only 50-70 years old (at best). Historically speaking, many wooded areas were harvested between 1940-1975 for lumber and then either naturally regrew or were replanted. Even the city land behind my house in Kansas City, MO is a fairly young forest and only has a handful of old growth oak trees that are older than 100 years.
Food forest summary
A note on removal of invasive species:
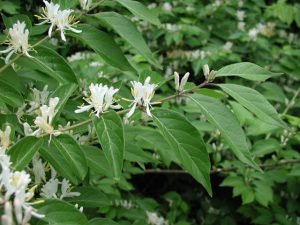
Most of the forests in the Midwestern city areas are in similar shape and are nearly all facing the invasive honeysuckle bush invasion. Amur honeysuckle, or Lonicera maackii, was introduced to gardens in New York in the late 1800’s and by 1924 was already labeled as “weedy species”. Since then, it has spread throughout the east coast and midwest and it’s shrub-like structure shades out low growing species in younger forests. It’s red berries are generally ingested by bird species and the seed spread in their stool to other areas. Removing this species is often the first step for Midwesterners starting a food forest.
Once the invasive species has been removed, the land is ready for replanting and reforestation.
Invasive Amur Honeysuckle
How to Plant the Food Forest – Part 1
1 – Land Preparation: In our recent project, we had a great deal of invasive honeysuckle to remove, which was obviously very time consuming. Digging it up is the most effective way, but you can also use a chain saw and cut it off at the ground. When you cut it, you will have to use chemicals to kill the root or it will simply grow back. Obviously, I prefer NOT using herbicides, but there are some natural alternatives that contain orange oil, agricultural grade vinegar (15-30%), and epsom salts.
It’s imperative to properly rid the area of the invasive species, because skipping this step will allow the old species to return and choke out all of your design work. When removing undergrowth species, I prefer to do it in early spring so it’s warm enough to work and you don’t have to worry about ticks or fighting through the leaf growth. If you are fortunate enough to have goats, they will take care of the leaves and branches, but you’ll still need to dig out the root or it will grow back quickly.
The second step in preparing the land is to examine your soil and structure. This is your time to consider amendments. You can bring in compost from a local company, collect fallen leaves from your fall clean-up, add bone or blood meal, or sulphur for acid loving areas. Before adding anything to the soil itself, make sure you are testing and observing your site. Get to know the land you are working with and begin with the end in mind. Know the type of soil your plants will prefer, so you can create the right environment for them.
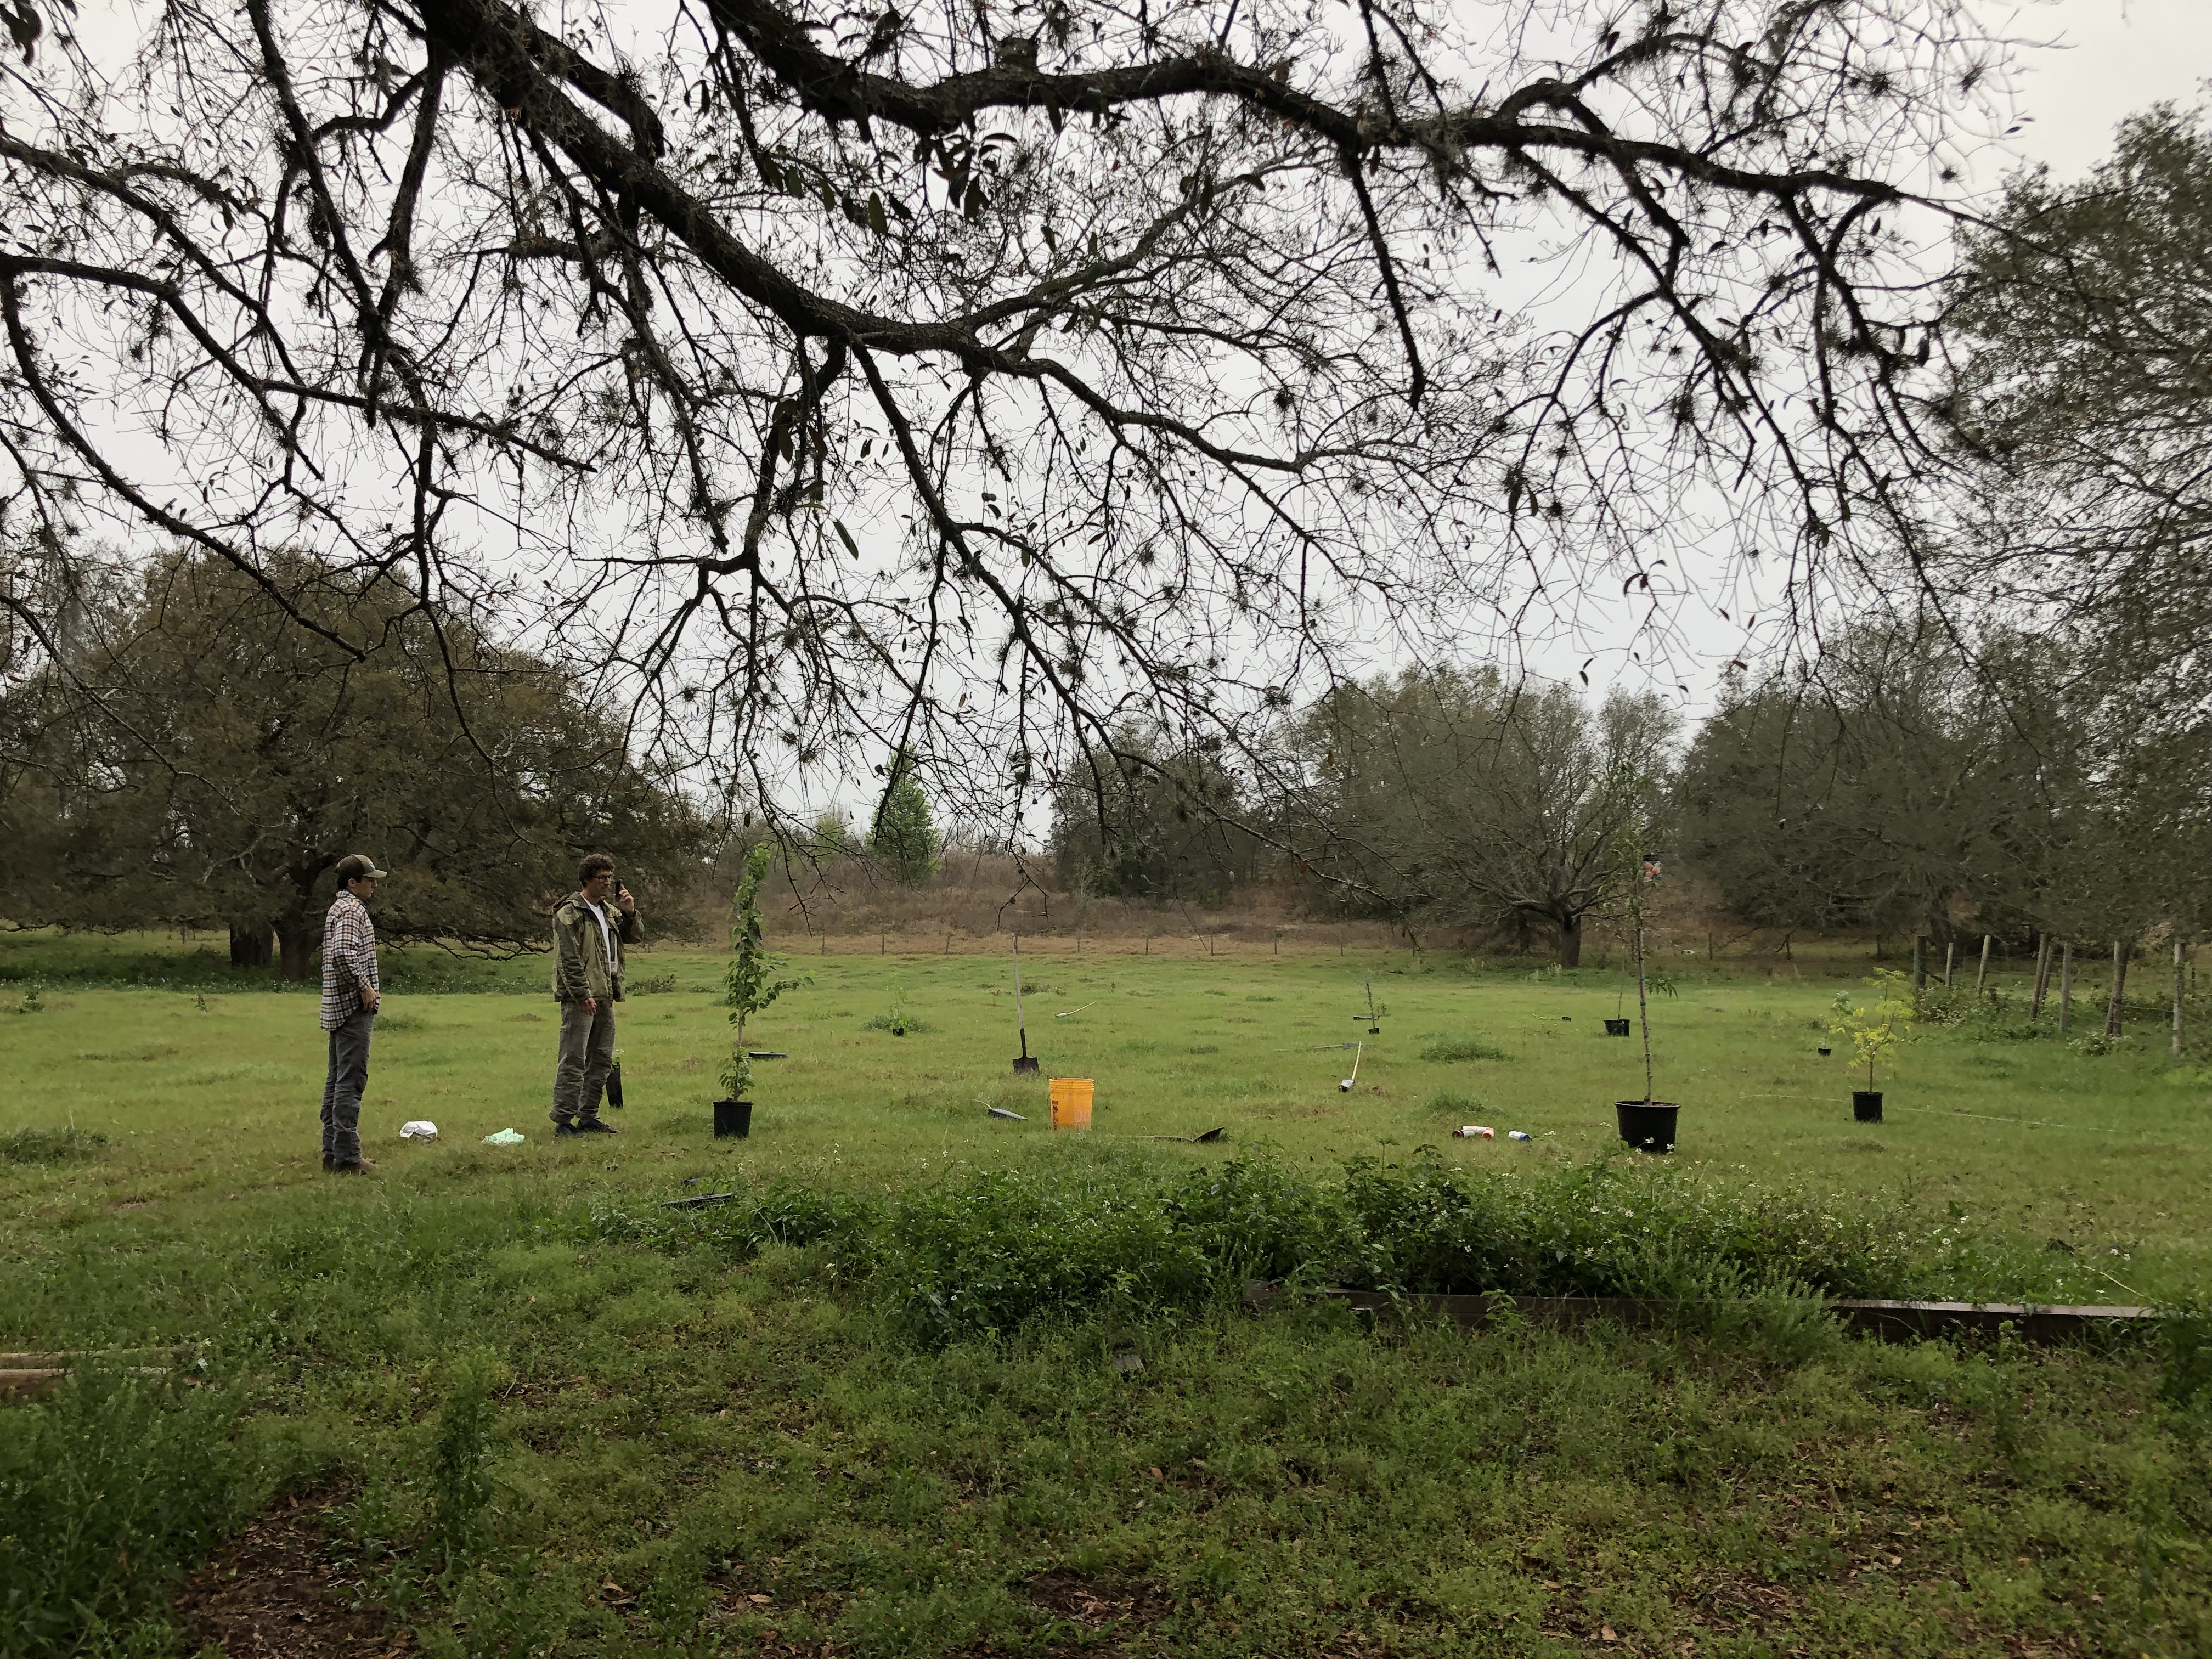
Cleared plot for a newly planted food forest in Kansas City, MO
2 – Plan out your design: For every project, I generally need about 10-15 hours of preparation and research before I even begin planting. Winter months are a great time to do this, because we often are not outside as much. Research species according to your soil type (acidity, organic matter, etc.) and carefully consider how much water will be retained in that area. Factor in sun exposure both in it’s current state, but also imagine the area once the plants have reached their mature sizes. How might this change your design?
Once I have the basic questions answered, I can then start looking at individual species and seeing what looks good together on paper. I will go through 3-5 different designs and purposely make myself change out some of the species in order to think outside of the box. Here are a few factors to consider:
What is my top story tree? Will it produce nut or fruit? Will that impact my soil acidity over time? How tall will my center piece trees get? Will that impact my shade?
Do my understory trees or shrubs have compatible soil requirements?
How it my spacing? What will this look like in 3 years? In 10 years?
Do I have at least 4 layers in my food forest?
Have I including at least one nitrogen fixing plant in my system (legume, locust tree, clover, etc.)?
Is there multi-seasonal interest for the eye? For nature?
Have I considered season-long pollination?
Do the plants that I have selected require a male and female plant for fruiting?
Do my colors and leaf textures work well together?
Finalizing Your Midwest Food Forest Design
Once you have created a few different drawings of your layout, I would recommend sitting on it for a few days and then coming back to it later. Run the ideas by a friend and get their feedback. When I was initially planning my layout, I incorporated too many alkaline loving plants next to my blue berries, which do best with slightly acidic soils. I was so focused on the fruit and berries that I liked, and the way they would look together, that I missed a pretty big piece of the puzzle. The result would have been an environment where likely neither would have thrived, so I was relieved to have the insight from another permaculture eye.
Before planting, plant on spending at least 10 hours of researching and planning out your design. As you plan, research various species, their growing zones, and read the reviews of others online. Often plants will say they will work in certain zones, but after a few years of consumer reviews, they change the rating on the species. For this reason, I tend to stay away from varieties that have not been tested in my region or ones that I am unable to find adequate reviews.
Personally, I like to order plants from places with one zone colder climate, so I know they can take the various types of weather we experience in the Midwest (KCMO).
The second part of this article will be available next week, including a few options in planting species for a wood-edge (sun/shade) area with clay soil structure. In the upcoming article you’ll learn how to amend the soil, perform bio-remediation for areas that may have had pollutants, and how to space the plants appropriately. The next article will include pictures of a newly planted food forest and close up pictures of the various species used in it’s design.
Of the three tenets of permaculture, as depicted by Bill Mollison, the notion of “people care” is, perhaps, the most essential. One of the most valuable lessons I have learned in my journey in permaculture (permanent culture / agriculture) is in focusing my efforts on the next generation. Let’s be clear, this is not an article about global warming, the melting ice caps, or a lesson in how to recycle more. There are plenty of well-researched articles written by scholars who have given their lives to such topics. This is about the importance of permaculture for kids. This article comes from my own experience working in youth ministry, 15 years in education, and as a neighbor with seemingly revolving doors on his house so the kids can come and get snacks before seeing the chickens.
Regardless of your beliefs regarding global warming and the many political agendas surrounding it, the reason you clicked this article is because you care about kids. So, based on that fact alone, we have something in common. This common ground allows us to have a healthy dialogue about WHY we do what we do. At the foundation of my journey in permaculture is the value of interacting with kids in order to help them be a part of a community that seeks to better the world they will one day inherit. These kids are not just future leader of tomorrow. They are tomorrow’s leaders – TODAY. They are impacting the world around them with vigor and passion.
Classrooms, worms, and the conversations with kids
Junior High student from our school permaculture class on a wildflower hunt
As an educator for the last 15 years, I have taught in public / private school classrooms. I have been a keynote speaker at hundreds of conferences and seminars. I have written school curriculum and served as student council advisor for 10 years. In spite of platforms, I have learned that the most meaningful conversations often do not take place in the classroom or surrounding an assignment on Ralph Waldo Emerson (though I love his work). The most heartfelt times did not take place in a prom planning meeting or even at our end of the year parties. Those events were memorable and exciting, but I tell you, the most profound conversations took place outside, in nature, and usually in the garden. Something profoundly different took place during the times I worked with students in the garden and their hands hit the soil.
When these young adults came outside and their hands hit the flowerbeds, their guards went down, their defenses lowered, and their hearts opened up. Conversations would range from home and family, sports to God, and from dreams to fears. Whether we were out feeding chickens or chopping down wood in the forest beside the school, those moments were the most meaningful in my career as an educator. So, what did I learn? I learned that the sowing into the next generation is more than just giving them an assignment – it is sowing seeds with them.
Kids don’t need another manager – they need mentors
So, how then do we learn to be centered on the next generation? Simply put, we take time to care. Kids spell “love”, T-I-M-E. That is it. Take time to talk, weed slower, and get less done. To be honest, when I worked with 27 junior high students in my gardening class, I quickly learned that I could get more work done in 2 hours on my own than after a week of having them do it with me. However, speed is not the goal. Quality of weeding is not always the litmus test for impact.
If we want to change a life, we have to be willing to value families before we value function. We have to value people before a project.
People Care in Permaculture
This core value of permaculture addresses the fuel for our projects. The reason we care for the earth is so that we can leave it as good or better for the kids who will live long after us. We want them to experience a better world in which they can experience a greater level of abundance than we have. Just think, when you were a child, kids rode bikes in the streets, would play out in the woods until the sunset, and would roam the neighborhoods as though it was their kingdom. We did not have to worry about a fraction of what kids today are faced with. And today, parents are terrified to let their kids go outside alone in many suburban areas. We need to impact our communities far beyond new recycling bins or switching to reusable shopping bags. If we think that stopping there is going to make a difference, we are kidding ourselves and petting our wounds by drinking overpriced coffee. Instead of settling for merely recycling to do our part, we need to be regenerative in our approach in order to reverse the damage we have already done. No longer is it enough for us to be “organic”, but we now need to restore the broken systems that even the USDA accepts as “certified organic”. Regenerative agriculture can no longer be a novelty form of gardening, it needs to become the norm if we are going to fix the damage we have done to our neighborhoods.
People care in permaculture is not only the “why” in caring for the earth, but it’s also the “why” behind the fair share aspect of permaculture. We want families to receive based on what they have sown. In permaculture, we seek to see families supplied for, fed well, educated to the highest degree, and kids receiving the support system they deserve. Each of the values in the permaculture system are hinged on the value we have for people – primarily kids.
Permaculture for Kids :: How to Step Out This Year
Instead of merely gardening in your backyard this year, invite your kids (or grand kids) to join you. You might not weed as quickly, and you might need to buy a few boxes of bulk popsicles at Costco, but it will be worth it. Here are a few ideas to get you started with the kid friendly garden. The seeds you sow by opening up your garden to others will produce a much greater fruit that you could put on your table. Don’t get me wrong, it does have its challenges, but even those are not insurmountable. I am a single 35 year old guy, and can tell you that even the single community can invite neighbors from the houses next door to take part. If you don’t have neighbors, find a foster care home to serve or invite over, or call your local Big Brothers, Big Sisters organization. If people care is important to you, make time for it.
Don’t settle for a flower for one. Grow a garden for all.


 Once you have created a few different drawings of your layout, I would recommend sitting on it for a few days and then coming back to it later. Run the ideas by a friend and get their feedback. When I was initially planning my layout, I incorporated too many alkaline loving plants next to my blue berries, which do best with slightly acidic soils. I was so focused on the fruit and berries that I liked, and the way they would look together, that I missed a pretty big piece of the puzzle. The result would have been an environment where likely neither would have thrived, so I was relieved to have the insight from another permaculture eye.


 This core value of permaculture addresses the fuel for our projects. The reason we care for the earth is so that we can leave it as good or better for the kids who will live long after us. We want them to experience a better world in which they can experience a greater level of abundance than we have. Just think, when you were a child, kids rode bikes in the streets, would play out in the woods until the sunset, and would roam the neighborhoods as though it was their kingdom. We did not have to worry about a fraction of what kids today are faced with. And today, parents are terrified to let their kids go outside alone in many suburban areas. We need to impact our communities far beyond new recycling bins or switching to reusable shopping bags. If we think that stopping there is going to make a difference, we are kidding ourselves and petting our wounds by drinking overpriced coffee. Instead of settling for merely recycling to do our part, we need to be regenerative in our approach in order to reverse the damage we have already done. No longer is it enough for us to be “organic”, but we now need to restore the broken systems that even the USDA accepts as “certified organic”.
 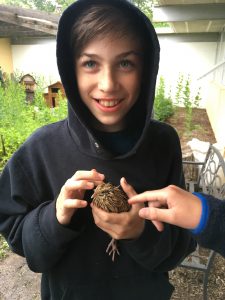 Instead of merely gardening in your backyard this year, invite your kids (or grand kids) to join you. You might not weed as quickly, and you might need to buy a few boxes of bulk popsicles at Costco, but it will be worth it.